Strapi works as a Headless CMS and provides a lot of functionality out of the box, allowing it to be used for any use case without any modifications to the code. This doesn't stop Strapi from providing customization options and extendable code that allows developers to fine-tune Strapi’s internal working to suit a special use case. Let’s dive into the internals of Strapi and how we can customize the backend.
Goal
We’re going to be working with the Strapi backend and cover a few aspects of customizations to the Strapi backend. We’re touching on controllers, services, policies, webhooks and routes, and others.
This article is based on the Strapi internals, customizing the backend workshop video by Richard from StrapiConf 2022
Strapi runs an HTTP server based on Koa, a back-end JavaScript framework.
What is Koa?
Koa aims to be a smaller, more expressive, and more robust foundation for web applications and APIs. If you are not familiar with the Koa backend framework, you should read the Koa's documentation introduction.
Leveraging Koa, Strapi provides a customizable backend and according to the backend customization docs, each part of Strapi's backend can be customized:
- The requests received by the Strapi server,
- The routes that handle the requests and trigger the execution of their controller handlers,
- The policies that can block access to a route,
- The middlewares that can control the request flow and the request before moving forward,
- The controllers that execute code once a route has been reached,
- The services that are used to build custom logic reusable by controllers,
- the models that are a representation of the content data structure,
- The responses sent to the application that sent the request, and
- The webhooks that are used to notify other applications of events that occur.
We’ll be covering these parts of Strapi backend while building the custom functionality for our order confirmation API
Use Case
The use case for this is very basic. We’re creating the backend for a shop where we have users that can make orders and can also confirm the orders.
To achieve our use case and be build custom functionalities that we need and Strapi does not provide, we’ll get our hands on the backend code and build out those functionalities.
Prerequisites
- Basic JavaScript knowledge
- Node.js (I’ll be using v16.13.0)
- A code editor, I’ll be using VScode, you can get it from the official website.
- Prior Strapi knowledge is helpful, but not required.
Setting up
Let’s set up a basic strapi application with the --quickstart option. This creates a strapi instance with a simple SQLite database.
    yarn create strapi-app strapi-backend --quickstart
    #OR
    npx create-strapi-app@latest strapi-backend --quickstart
I’m using Strapi v4.1.9 which is the latest at the time of creating this project
After installing the Strapi app, run the following command.
    yarn develop
    #OR
    npm run develop
This should open up a new tab in the browser to http://localhost:1337/admin, which will redirect us to the registration page where we will create an admin user.
We’ll enter our details and once this is done, hit the “Let’s start” button. A new admin account will be created and we’ll be redirected back to http://localhost:1337/admin/.
Creating our Models
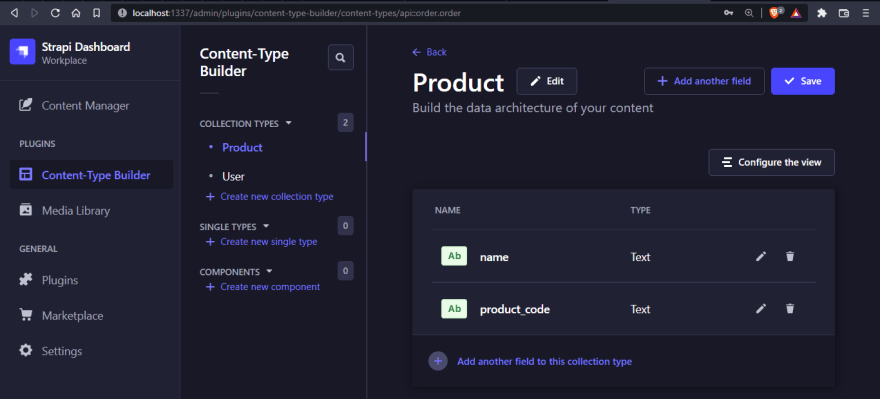
Now, let’s quickly create two content types: Products & Orders
- "Product" should include the following fields:
-
name- Short Text -
product_code- Short Text
-
Here’s what the content type should look like:
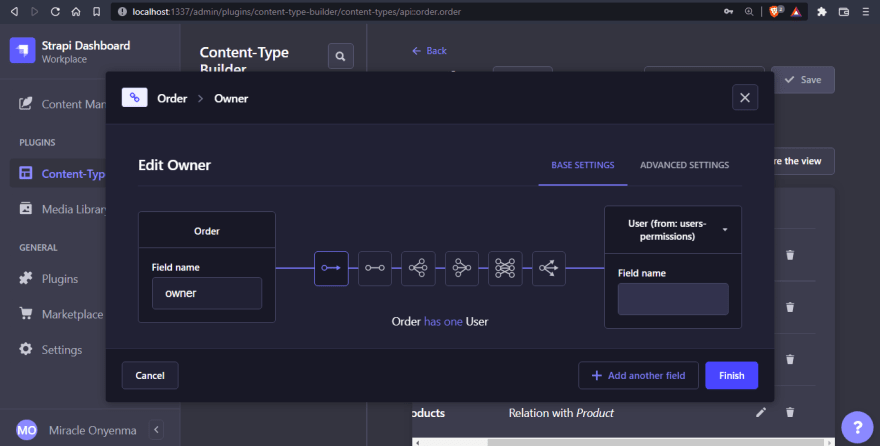
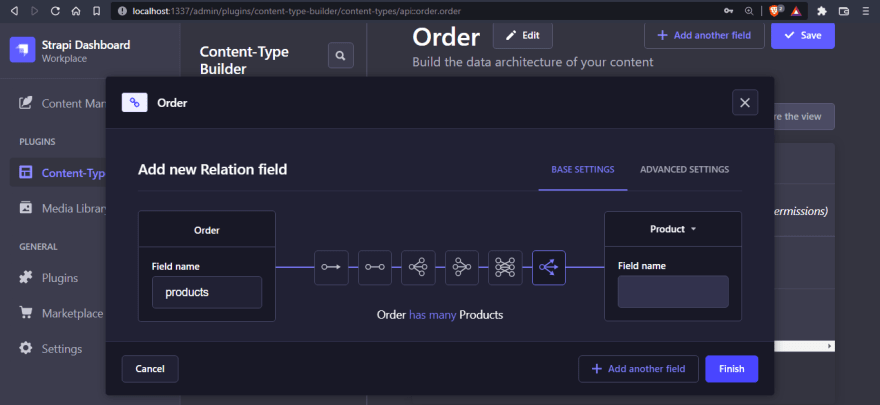
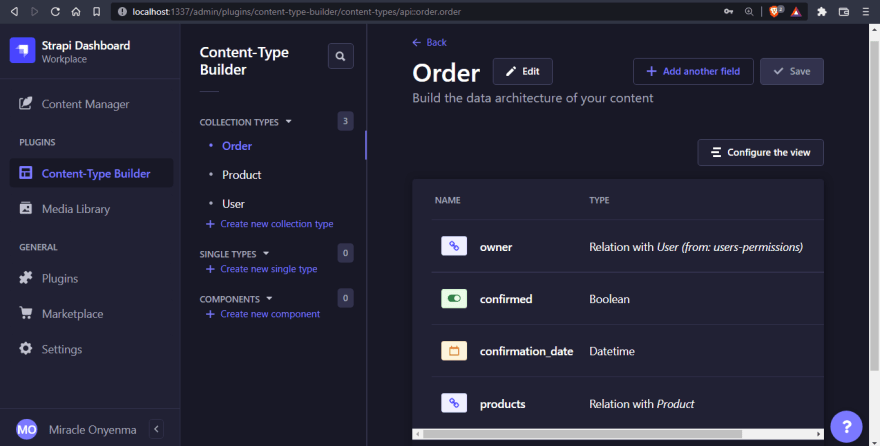
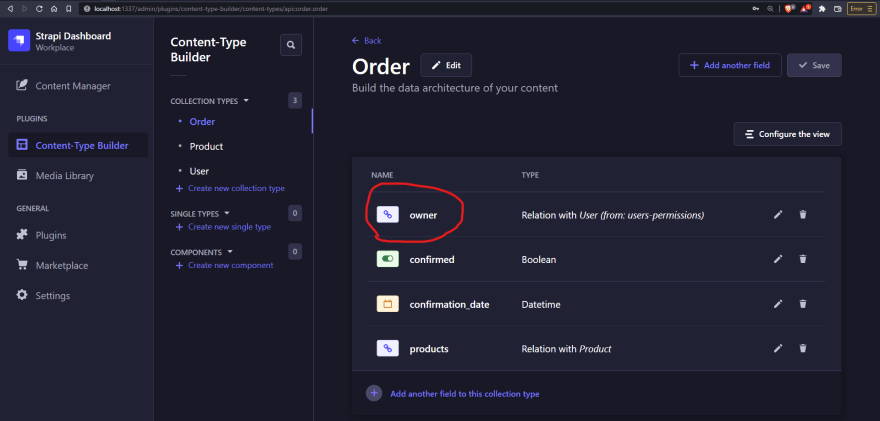
- "Order" should include the following fields:
-
owner- Relation (one-wayrelation with User from users-permissions)
-
productsRelation (many-wayrelation with Product )
-
confirmed- Boolean -
confirmation_date- Datetime
Here’s what the content type should look like:
We just created content type models using the Content-Type builder in the admin panel. We could also create these content types using the strapi generate with Strapi’s interactive CLI tool.
The content-types has the following models files:
-
schema.jsonfor the model's schema definition. (generated automatically when creating content-type with either method) -
lifecycles.jsfor lifecycle hooks. This file must be created manually.
Product Content-Type Schema
We can check out the model schema definition for the Products in the ./src/api/product/content-types/product/schema.json file in our Strapi project code.
    // ./src/api/product/content-types/product/schema.json
    {
      "kind": "collectionType",
      "collectionName": "products",
      "info": {
        "singularName": "product",
        "pluralName": "products",
        "displayName": "Product"
      },
      "options": {
        "draftAndPublish": true
      },
      "pluginOptions": {},
      "attributes": {
        "name": {
          "type": "string"
        },
        "product_code": {
          "type": "string"
        }
      }
    }
Order Content-Type Schema
The model schema definition for Order would also be in the ./src/api/order/content-types/order/schema.json file.
    // ./src/api/order/content-types/order/schema.json

    {
      "kind": "collectionType",
      "collectionName": "orders",
      "info": {
        "singularName": "order",
        "pluralName": "orders",
        "displayName": "Order",
        "description": ""
      },
      "options": {
        "draftAndPublish": true
      },
      "pluginOptions": {},
      "attributes": {
        "owner": {
          // define a relational field
          "type": "relation",
          "relation": "oneToOne",
          "target": "plugin::users-permissions.user"
        },
        "confirmed": {
          "type": "boolean"
        },
        "confirmation_date": {
          "type": "datetime"
        },
        "products": {
          "type": "relation",
          "relation": "oneToMany",
          "target": "api::product.product"
        }
      }
    }
Now that we’ve seen what the models look like in the backend code, let’s dive into what we're trying to build while exploring these customizations.
What We’re Building
As we previously discussed, we’re trying to create a store API and currently Strapi automatically provides us with routes that perform basic CRUD operations and we can take a look at them if we go to SETTINGS in our admin dashboard and then USERS & PERMISSIONS PLUGIN > ROLES > PUBLIC.
In the image above, we can see the default pre-defined routes that Strapi creates for our Order content type.
Now, we want to take it a step further and add another level of customization. The feature that we’re going for is for users to be able to create orders and confirm those orders they’ve made.
A very basic way of achieving this would be by using the update route on the Order content type to modify the confirmed and confirmation_date fields. But in a lot of situations, we might need more than just that and that’s what we’ll be working on.
Custom Controllers and Routes
The first thing that we’ll be doing is to make sure that we have controllers and routes set up, knowing that we want to be able to confirm our orders .
Controllers are a very important aspect of how Strapi works and play a big role in customizing the backend. So, let’s go ahead and create a blank controller and a route for it.
Create a Controller
To define a custom controller inside the core controller file for the order endpoint or collection type, we can pass in a function to the createCoreController method which takes in an object as a parameter and destructuring it, we’ll pass in strapi.
    // ./src/api/order/controllers/order.js
    'use strict';
    /**
     *  order controller
     */
    const { createCoreController } = require('@strapi/strapi').factories;

    module.exports = createCoreController('api::order.order', ({strapi}) => ({
      confirmOrder: async (ctx, next) => {
        ctx.body = "ok"
      }
    }));
Here, the function we passed to createCoreController returns an object where we can specify an async function confimOrder, which takes ctx and next as parameters. Within this function, we can define a response, ctx.body = "ok".
That’s how we can create a custom controller within the core controller in the default order route file. For illustration, we can completely overwrite an already existing controller, like find for example:
    // ./src/api/order/controllers/order.js

    ...
    module.exports = createCoreController('api::order.order', ({strapi}) => ({
      confirmOrder: async (ctx, next) => {
        ctx.body = "ok"
      },
      find: async (ctx, next) => {
        // destructure to get `data` and `meta` which strapi returns by default
        const {data, meta} = await super.find(ctx)

        // perform any other custom action
        return {data, meta}
      }
    }));
Here, we’ve completely overwritten the default find controller, although we’re still running the same find function using super.find(ctx). Now, we can start to add the main logic behind our confirmOrder controller.
Remember that we’re trying to create a controller that allows us to confirm orders. Here are a few things we need to know:
- What order will be confirmed, and
- Which user is confirming the order.
To know what order is being confirmed, we’ll have to get the id of that order from the route, so the route path we’ll create later on is going to include a dynamic :id parameter. Which is what we’ll pull out from ctx.request.params in our controller.
    // ./src/api/order/controllers/order.js

    module.exports = createCoreController('api::order.order', ({strapi}) => ({
      confirmOrder: async (ctx, next) => {
        const {id} = ctx.request.params
        console.log(id);
      },
    }));
The next thing we need to do is to create a route that will be able to run our controller.
Create a Route
We’re going to create custom route definitions for our confirmOrder controller. If we take a look at the already created order.js route, we’ll see that the core route has already been created:
    // ./src/api/order/routes/order.js

    'use strict';
    /**
     * order router.
     */
    const { createCoreRouter } = require('@strapi/strapi').factories;
    module.exports = createCoreRouter('api::order.order'); // core route already created
We don’t have to make any modifications here in order to create our custom routes; we can create a new file for that. In order to access the controller we just created from the API, we need to attach it to a route.
Create a new file to contain our custom route definitions in the order/routes directory - ./src/api/order/routes/confirm-order.js
    // ./src/api/order/routes/confirm-order.js

    module.exports = {
      routes: [
        {
          method: "POST",
          path: "/orders/confirm/:id",
          handler: "order.confirmOrder"
        }
      ]
    }
What we’re basically doing here is creating an object with a routes key, which has a value of an array of route objects.
The first object here defines a route with the method of POST and a path - /orders/confirm/:id, where the /:id is a dynamic URL parameter and is going to change based on the id of the order we’re trying to confirm.
It also defines the handler, which is the controller that will be used in the route and in our case, that would be the confirmOrder controller we created.
Test the Custom Controllers and Routes
Let’s test our custom routes and controllers now shall we? Run:
yarn develop
Once the app is running, we can start sending requests with any API tester of our choice. I’ll be using Thunder Client. It’s a VSCode extension, you can download it from the marketplace.
Once, you’ve gotten your API tester set up, send a POST request to http://localhost:1337/api/orders/confirm/1.
As you can see, we’re getting a 403 forbidden error. That’s because Strapi doesn't return anything for unauthenticated routes by default. We need to modify the Permissions in Strapi in order for it to be available to the public.
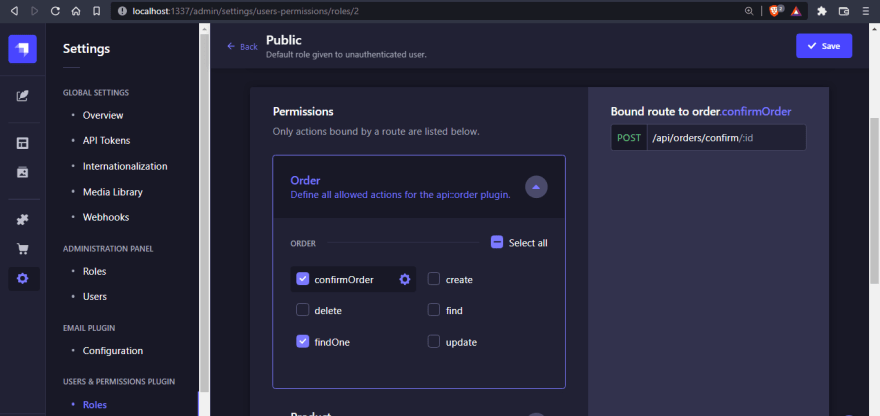
To do that, go to the Strapi admin dashboard, then go to SETTINGS in our admin dashboard and then USERS & PERMISSIONS PLUGIN > ROLES > PUBLIC.
As you can see, we have a new action - confirmOrder. Enable it and click on SAVE. Now, if we try to send the request again, you should see the screenshot below.
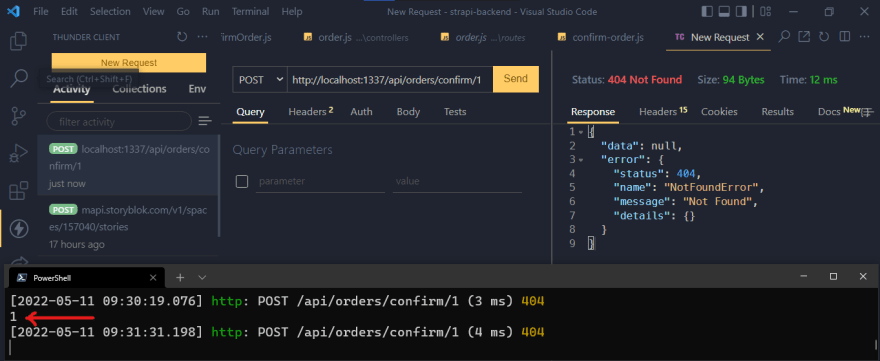
On our server, we can see that it logged the id as we defined in our controller. We’re now getting a 404 error, don’t worry, a different error is progress. We’re getting a NotFoundError because we never returned any response in out confirmOrder controller, we only did a console.log. Now that we’ve seen that it works, let’s build the main functionality.
Building the Logic for the "confirmOrder" Controller
Remember there are a few things we need to know:
- What order is going to be confirmed - from the request order
id - What user is confirming the order - from the context state
Getting the Order id
In the controller, let’s return the id instead of simply logging it:
    // ./src/api/order/controllers/order.js
      confirmOrder: async (ctx, next) => {
        const {id} = ctx.request.params
        return id
      },
Send the request again:
Great! That works. We’ve been able to get the order id, let’s move further to get the user sending the request.
Getting the User
In the confimOrder controller, we can get the authenticated user from the context state - ctx.state
    // ./src/api/order/controllers/order.js
    ...
      confirmOrder: async (ctx, next) => {
        const {id} = ctx.request.params
        console.log(ctx.state.user)
        return id
      },
Now, if we send this request, we’ll see that the server logs out undefined.
That’s because we’re sending a request without authentication. Let’s create a new user to send requests from. In the Strapi dashboard, go to the CONTENT MANAGER > USER and click on CREATE NEW ENTRY to create a new user.
Make sure to set the role to Authenticated.
Next, we’re going send a login request with our newly created user details. In our API tester, send a POST request to the http://localhost:1337/api/auth/local endpoint and we’ll have all the details of that user including the JWT.
We’ll go ahead and copy the token in the jwt field. We’ll need that to get our user in the confirm confirmation request. To do that, we’ll have to set Authorization headers in our API Tester.
In the case of this extension, we can use the Auth options provided and place the token in the Bearer field.
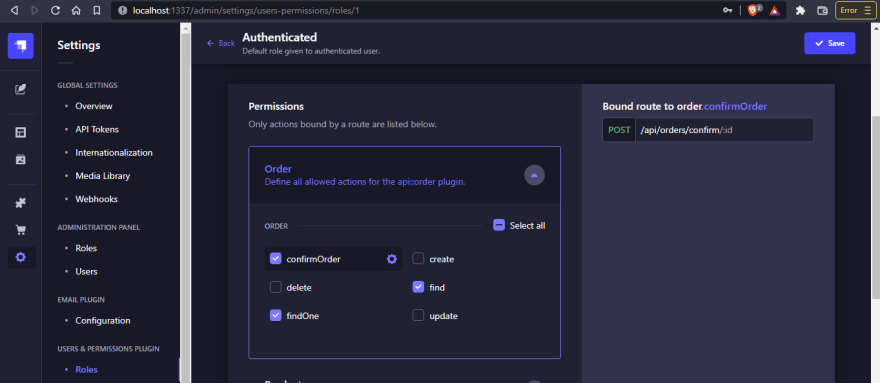
Now, we’ll head over to the Strapi admin and set the permissions for Public and Authenticated users. In the Strapi admin dashboard, go to SETTINGS and then USERS & PERMISSIONS PLUGIN > ROLES > PUBLIC. Disable the Order actions and click the Save button. Next, go back to ROLES and select AUTHENTICATED. Enable the actions for Order.
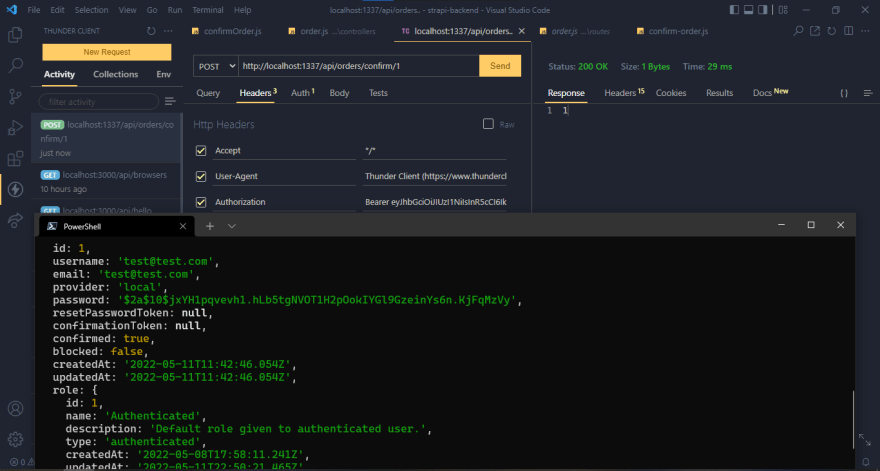
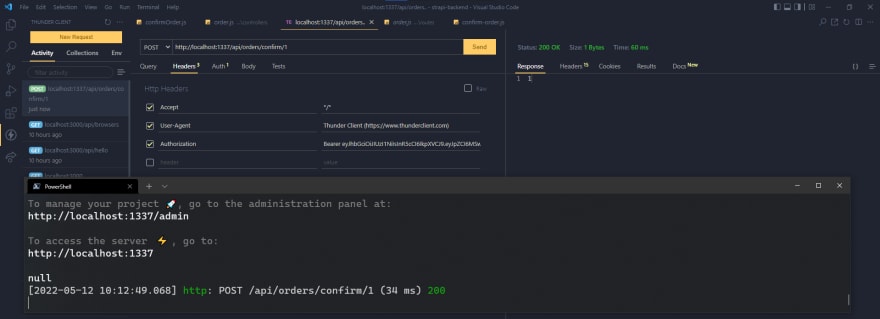
Once this is done, we’ll head back and send the request to http://localhost:1337/api/orders/confirm/1 with the authorization headers.
Awesome! We see that all the user details are being logged out here on the console.
Make sure to never return sensitive user information contained in the user object as an API response. Ensure you always sanitize your responses from sensitive data.
Getting the Order Data
Moving on, now that we have the order id and are able to see who's confirming the order, we are going to get the order data by using Strapi’s entityService. Here’s an example of how we can use the entityService
    // ./src/api/order/controllers/order.js
    ...
      confirmOrder: async (ctx, next) => {
        const {id} = ctx.request.params
        const user = ctx.state.user

        // using the entityService to get content from strapi
        // entityService provides a few CRUD operations we can use
        // we'll be using findOne to get an order by id
        const order = await strapi.entityService.findOne("api::order.order", id)
        console.log(order)
        return id
      },
The entityService.findOne() takes in two parameters:
- The
uidof what we’re trying to find, which for the order isapi::order.order - The parameters, which is the
idof the order in this case
Save the changes, wait for the server to restart and then send another request to the confirm endpoint
So, it returns null which is okay since we don’t have any order created yet.
Next, we need to change the state of its confirmation and change the confirmation date
Update Order Data
To do that, we’ll use the update method from entityService to update the order
    // ./src/api/order/controllers/order.js
    ...
      confirmOrder: async (ctx, next) => {
        const { id } = ctx.request.params
        await strapi.entityService.update("api::order.order", id , {
          data: {
            confirmed: true,
            confirmation_date: new Date()
          }
        })
        return {
          message: "confirmed"
        }
      },
Here, you can see that we’re passing two things to the update() method:
- The
uid-api::order.orderand - The
idof theorderwe want to update and - The
paramsobject which contains adatakey with the value of an object where we setconfirmedtotrueand assign aconfimation_datewithnew Date()
Now that we’ve seen how we can update an order, remember that we don’t have any order created yet. Let’s work on that.
Create an Order
Before we go into that, if we take a look at the order content type, we’ll see that it has an owner field.
When creating a new order using the default order controller, the owner will have to be provided with the API request. That way, any user can send a request and still specify a different user in the owner field. That would be problematic. We don’t want that.
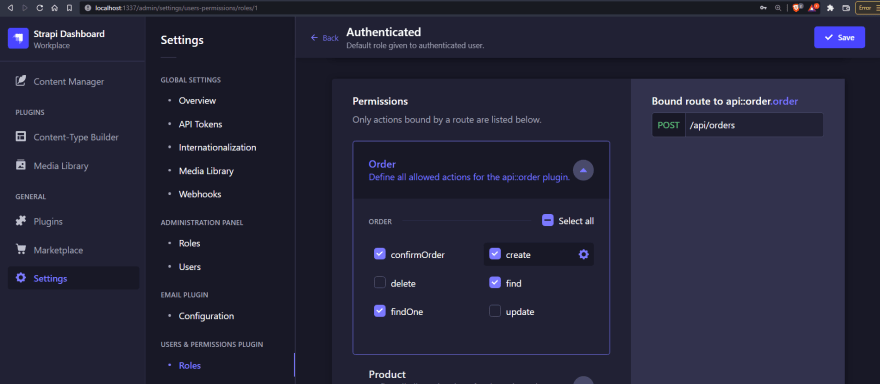
What we can do instead is to modify the default controller so that the owner of the order can be inferred from the request context. Let’s enable the create action for orders in the Authenticated Permissions settings
Hit Save. Now, we can go back to our code to customize the create controller
Let’s see how we can achieve that:
    // ./src/api/order/controllers/order.js
    ...
      confirmOrder: async (ctx, next) => {
        ...
      },

      // customizing the create controller
      async create(ctx, next){
        // get user from context
        const user = ctx.state.user
        // get request body data from context
        const { products } = ctx.request.body.data
        console.log(products);
        // use the create method from Strapi enitityService
        const order = await strapi.entityService.create("api::order.order", {
          data: {
            products,
            // pass in the owner id to define the owner
            owner: user.id
          }
        })
        return { order }
      }
We have a few things going on here. We:
- Get the user from
ctx.state.user, - Get the products from
ctx.request.body.data - Create a new order with
strapi.entityService.create(), pass theuid-"api::order.order"and an object. The object we’re passing as parameters is similar to our request body but with the addition of the ownerid. - Then, return the created order
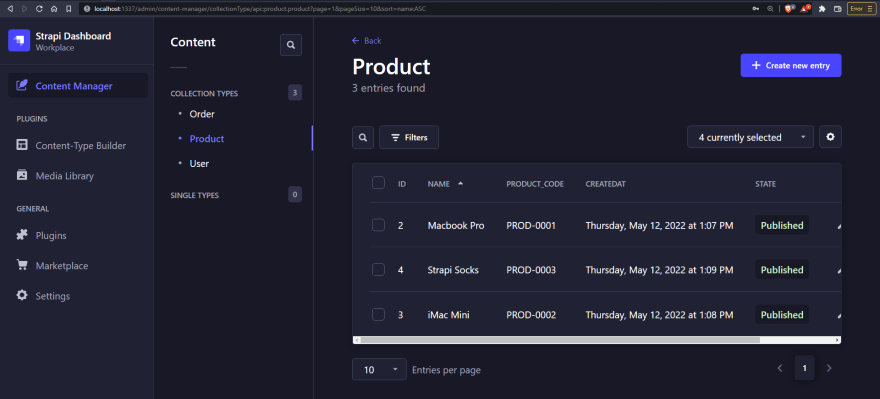
To try out our customized create order controller, we have to create a few products first. So, let’s head back to Strapi admin and navigate to CONTENT MANAGER > COLLECTION TYPES > PRODUCT > CREATE NEW ENTRY and create a new product.
Enter the name of the product and the product code and click on SAVE and then PUBLISH.
Create More Products
Great!
Now, let’s send a new POST request to the orders endpoint - http://localhost:1337/api/orders with authorization and the following body:
    {
      "data": {
        "products": [
          2
        ]
      }
    }
We should see a new order created with the owner field populated.
If we check the dashboard, we can see the new order:
Great!
Confirm an Order
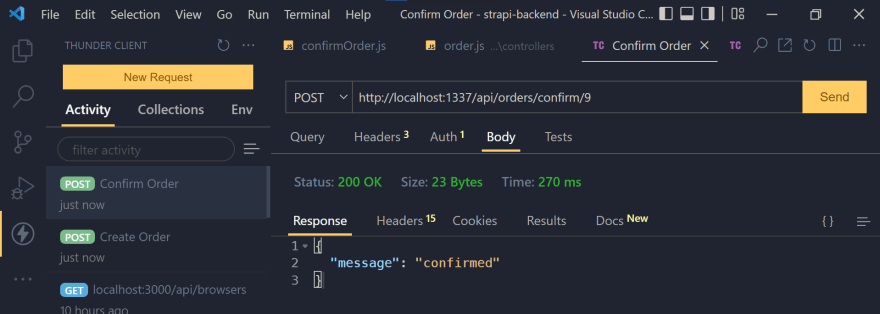
Let’s try to confirm our newly created order and see what happens.
It works! If we check our Strapi dashboard, we should see it confirmed too.
Conclusion
We’ve been able to create custom routes and customize Strapi controllers, allowing us to perform custom actions, which we would not be able to with the default Strapi functionality.
Currently, orders can be confirmed by just passing the order id to the request body. This means that any (authenticated) user can pass that id in a request and confirm that order. We don’t want that. Although orders can only be created by an authenticated user, we only want the user who created the order to be able to confirm the order.
Resources
In the next part of this article, we’ll complete building out our order confirmation use case while exploring other customizations like Policies, utilities.
The backend code for this part of the article can be accessed from here.

![Cover image for Strapi Internals: Customizing the Backend [Part 1 - Models, Controllers & Routes]](https://media2.dev.to/dynamic/image/width=1000,height=420,fit=cover,gravity=auto,format=auto/https%3A%2F%2Fdev-to-uploads.s3.amazonaws.com%2Fuploads%2Farticles%2F93fjaf7y4w0zyli6unz1.png)










Top comments (0)