Summary:
This article describes configuring an OAuth account to Google Pub/Sub in webMethods.io Workflow
Pre-requisites:
• User needs to have a Google account
• Working webMethods.io Integration tenant
Contents:
Section 1: Configure a Google OAuth
Section 2: Setting up a Google OAuth account in webMethods.io Integration tenant
Section 1. Configure a Google OAuth
- Login to Google Console with the username and password
- From the projects list, select a project from the dropdown or create a new one if required

- To use Google Cloud API , user must enable an Google Cloud Pub/Sub API for a project using console
i. On the left, click on Navigation Menu
 ii. Under APIs & Services choose Library , select the API and enable it.
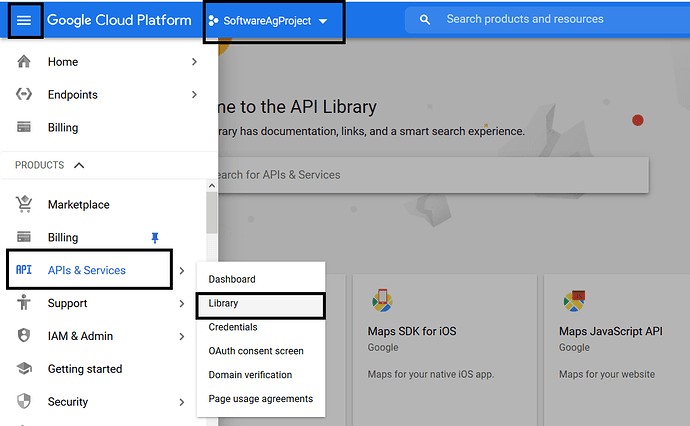
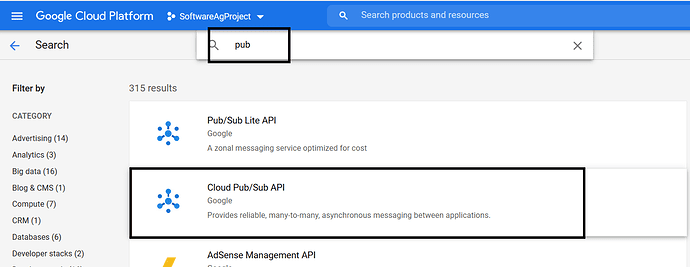
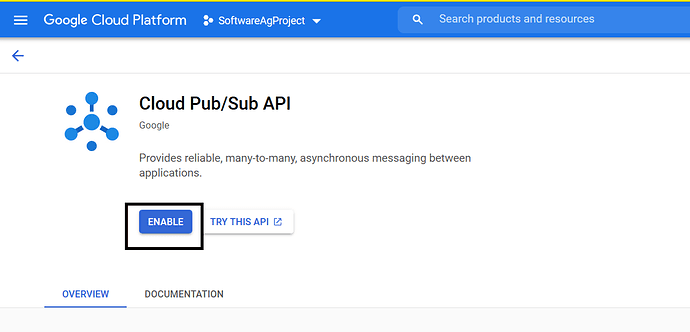
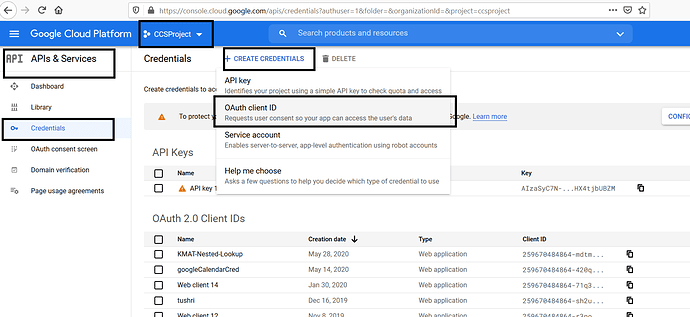
- If the APIs & services page isn’t already open, open the console left side menu and select APIs & Services
- On the left, click Credentials
- Click + Create Credentials , then select OAuth client ID
- Users setting up Google Cloud Console for the first time, they need to configure the Consent Screen to get the Client ID click Configure Consent Screen.

- In the next screen choose the user type as External click Create.
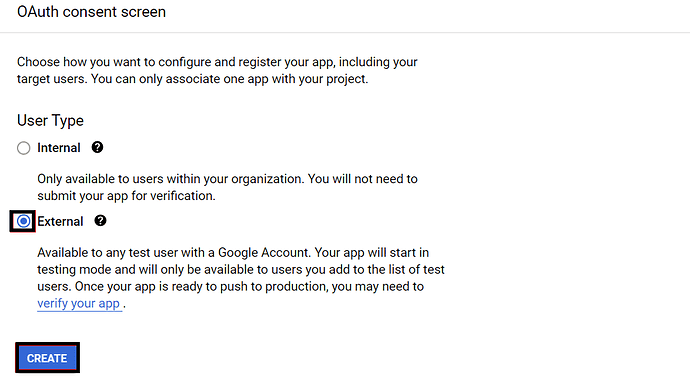
- Next screen will show for Edit app registration , provide the App name & User support email.

- Provide the details for Application home page & Authorized domains.
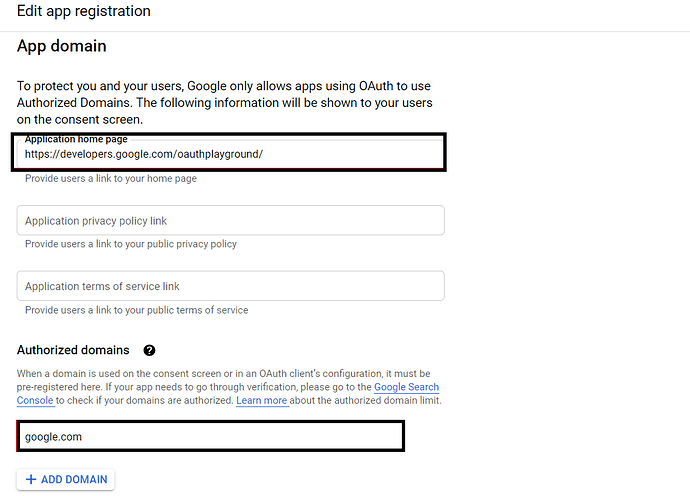
- Provide the details for Developer contact information & click Save and continue.

- Next screen will show for configuring the Scopes , click on Add or remove scopes then select the ** API Check box** & click Update.
9i8wrqcvgng
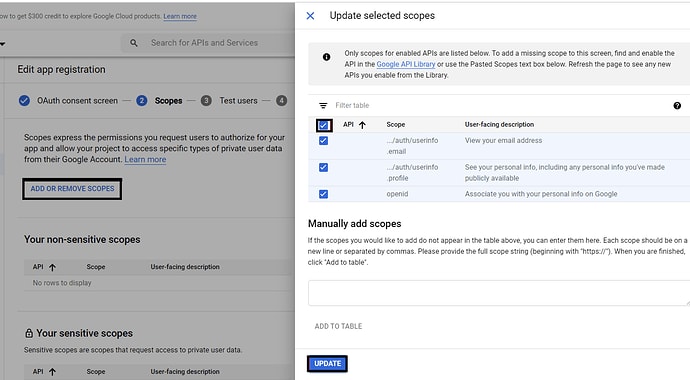
- Click Add Users to add some extra users for the app & click Save & Continue.
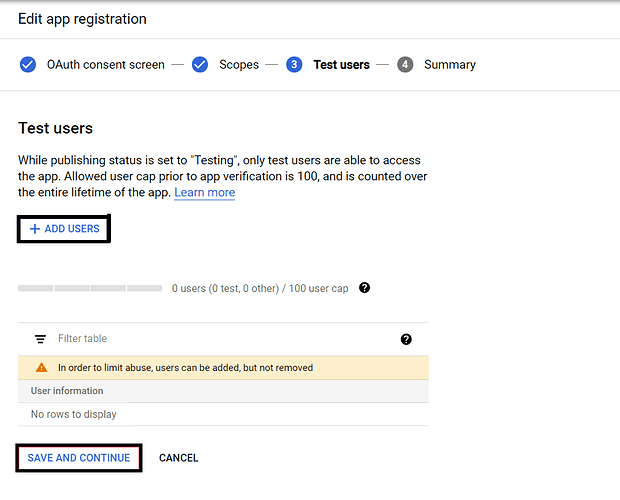
- Review the Summery section, then click Back to Dashboard. Now we have successfully configured the Consent Screen.
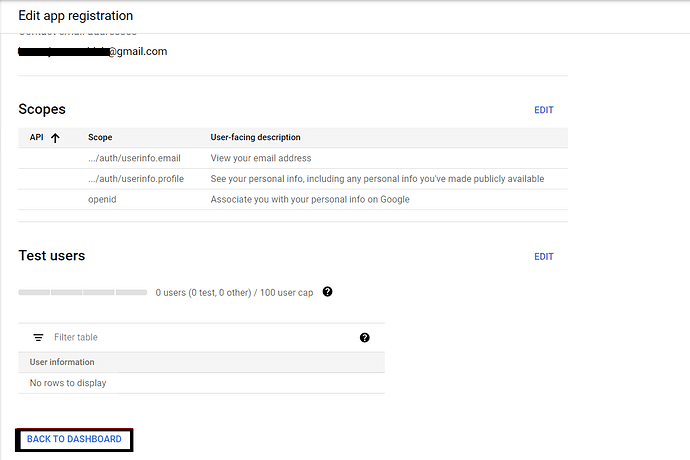
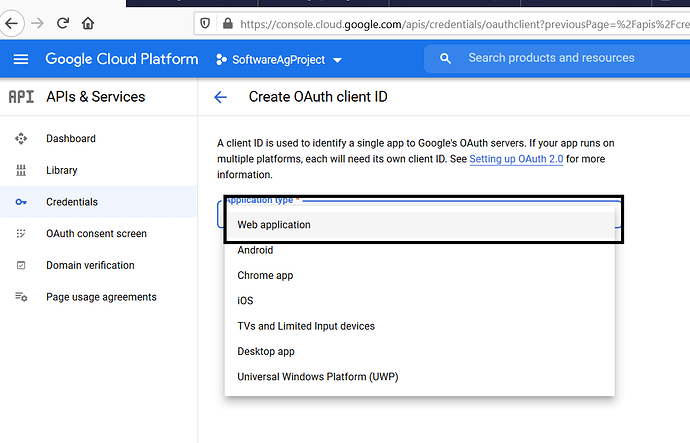
- Click +Create Credentials again & Select the appropriate application type (In this case application type is web application ) for your project and enter any
additional information required
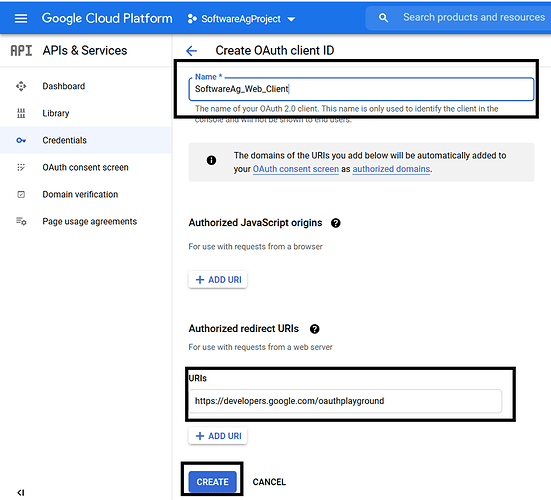
- Select Authorized redirect URI’s and add the redirect URI as OAuth 2.0 Playground and hit
Create
- Note down the Client Id and Client Secret created w2as
- Open the browser and point the browser to Google Oauth Playground
- On the right corner of the page, click on gear icon and fill in OAuth Client ID and OAuth Client Secret generated
(from Step 8) and click on Close

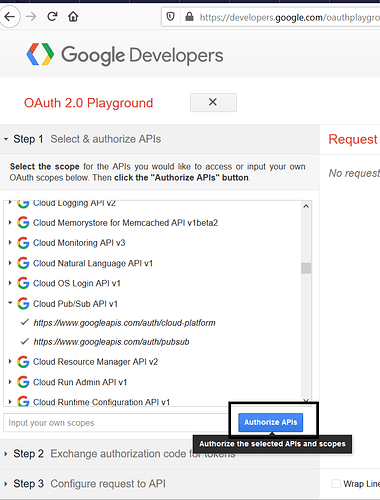
- On left side panel, select the scopes required
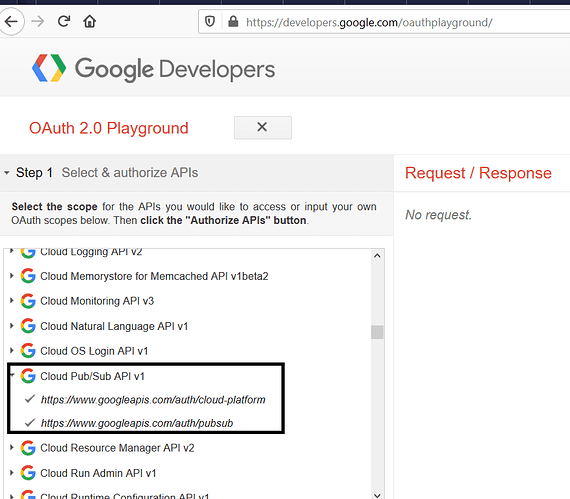
- Hit on Authorize APIs
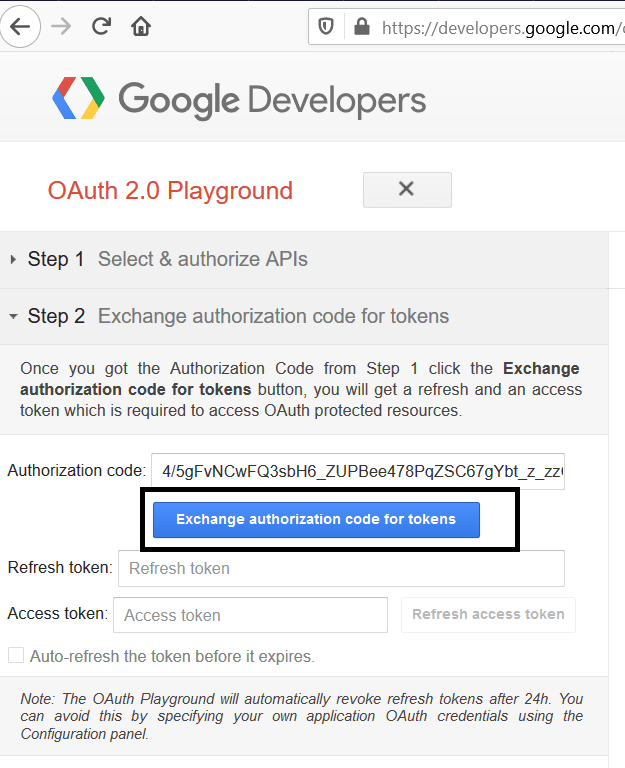
- Click on Exchange authorization code for tokens
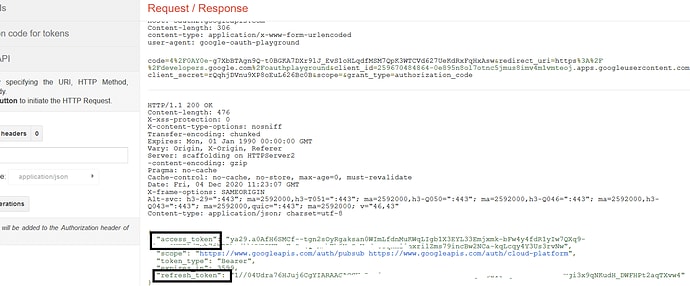
- Note down Access Token and Refresh Token
Section 2: Setting up Google OAuth account in webMethods.io Integration Workflow
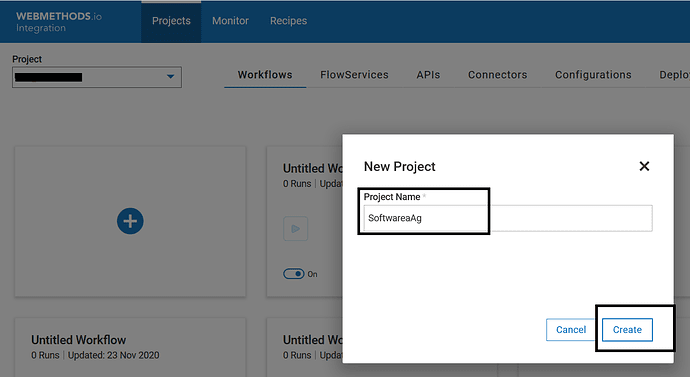
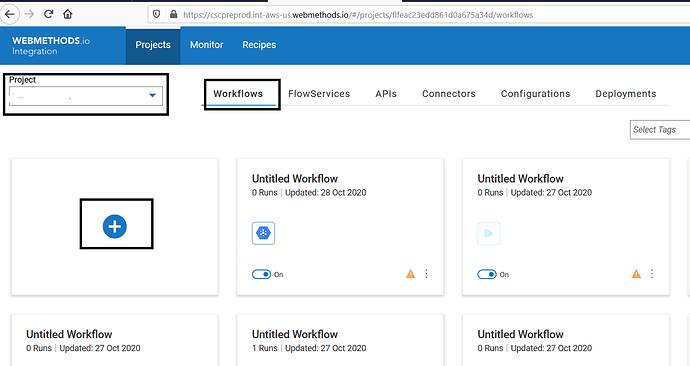
- Login to webMethods.io Integration tenant and choose your project or click on “+” to create new project
- Choose your workflow or click on “+” to create new workflow
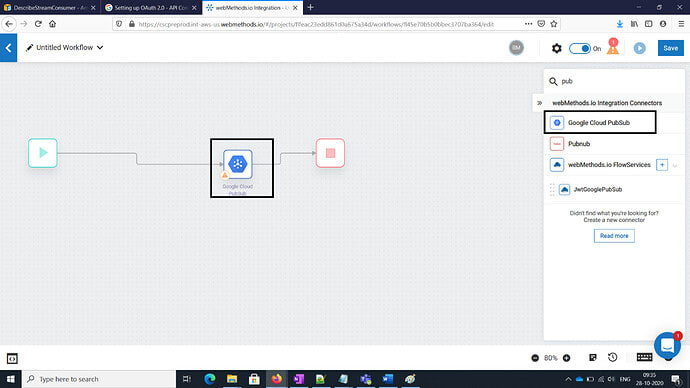
- From the right-hand panel of connectors list. Drag and drop a Google Cloud PubSub Connector
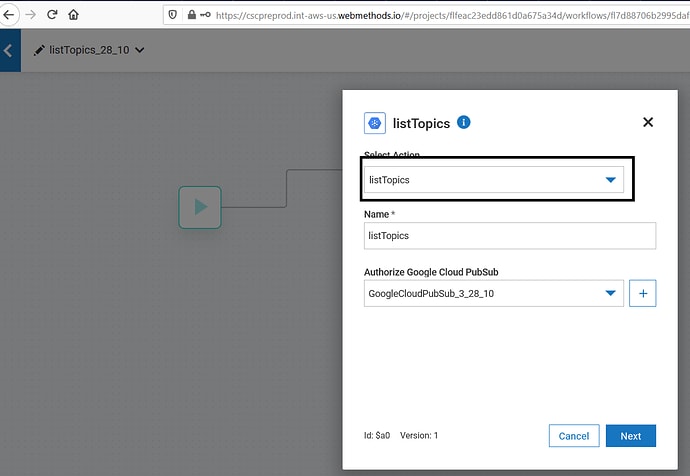
- Click on gear icon on the connector and choose any predefined operation (Example: listTopics) and click on “+” to
add account
- Fill in the Client Id , Client Secret obtained from Step 8 and Access Token , Refresh Token obtained from Step 14
Refresh URL: https://www.googleapis.com/oauth2/v4/token
Grant_type : refresh_token
[
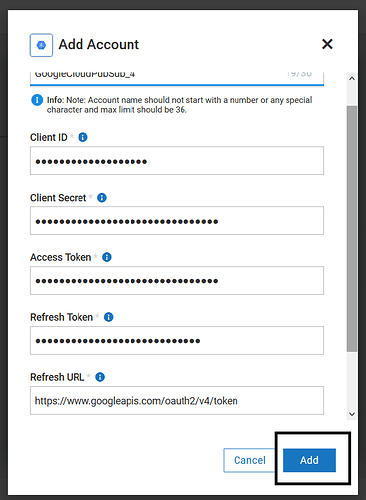
- Click on Add and Hit Next and pass the required inputs (In this case “listTopics” requires projectId to be passed)
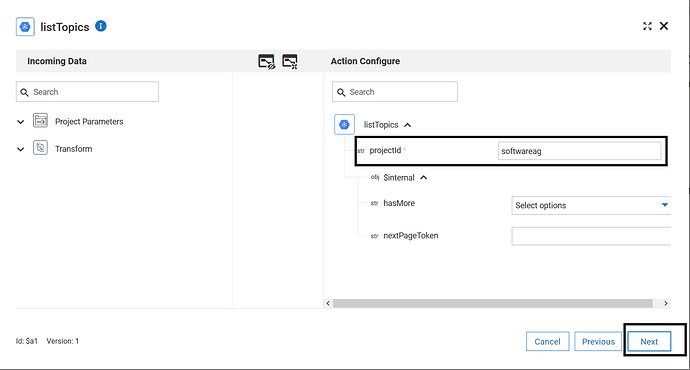
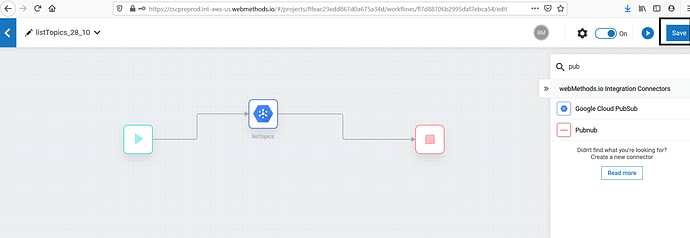
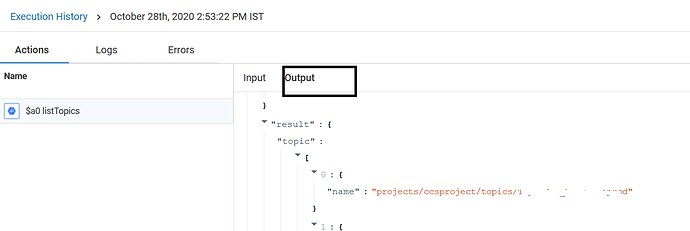
- Click on Save and Run the workflow


Top comments (0)