Hi, Welcome back to part 5 of this series.
In today's post we are going to implement the functionality that allows a customer to view an order they have placed and for the admin to view a list of orders placed by customers as well as a specific order's details.
Project steps
- Backend - Project Setup
- Backend - Authentication
- Backend - Place order
- Backend - View orders list and view a specific order 📌
- Backend - Update order
- Frontend - Authentication
- Frontend - Place order, view orders list, and view order details
Let us begin by implementing the functionality to fetch an order by it's id from the perspective of a customer. We are going to add checks to verify if the id submitted is valid, if the order it refers to exists, and finally, if the user who is making this request is the one who placed that order.
Later on, we could build on top of this functionality to add features such as Quick re-order and Order live-tracking.
- Update
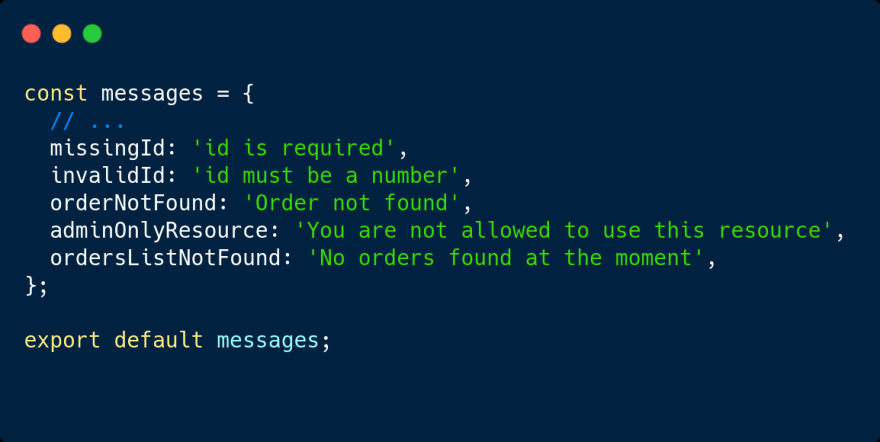
src/utils/messages.jsand add the following new messages:
- Update
tests/orders.test.jsand add thecustomer get ordertest suite:
In the last two test cases we placed a new order, then we try to fetch it by it's id. We are also checking to see if the data object in the returned response has all the information related to that order, like its contents, and the details of the user who placed the order.
- Update
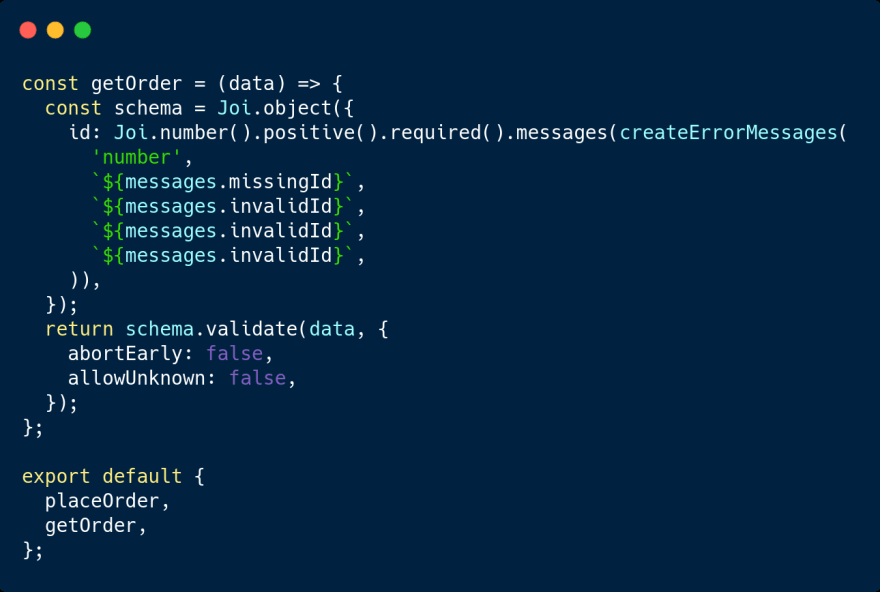
src/validations/orders.jsand add thegetOrderfunction which will help us to validate the order id:
- Update
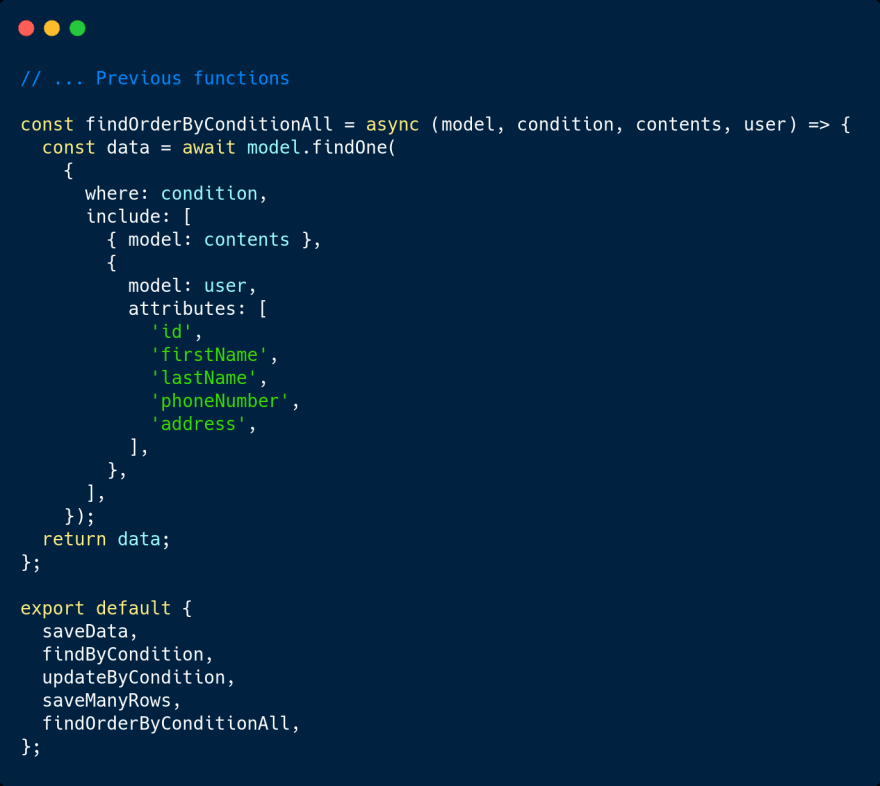
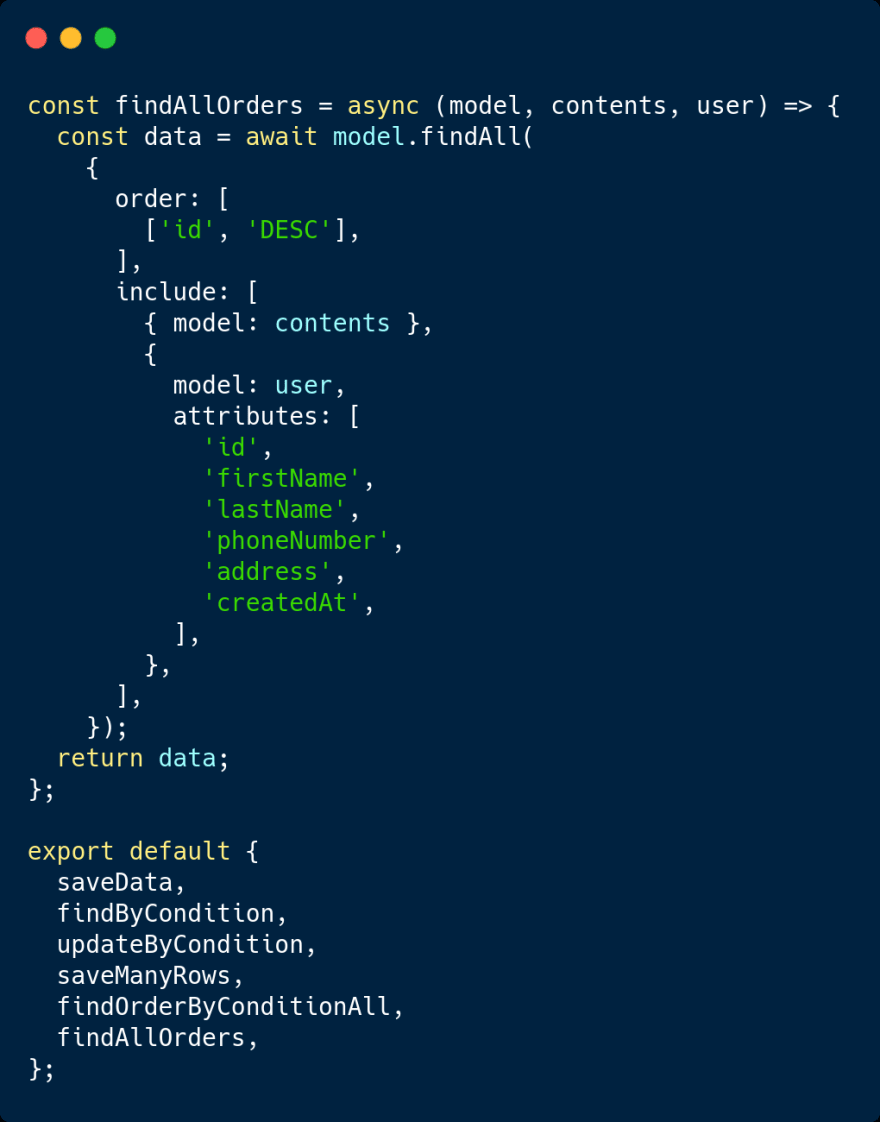
src/services/services.jsand add thefindOrderByConditionAllfunction that will help us to find an order given certain conditions. In this case, we want to find an order given it's id and the id of the user who placed it. Sequelize allows us to use logical operators to filter queries as you would with normal SQL queries. Learn more here. We can even go as far as fetching associated models provided that we have made these associations before. In our case, we want to fetch the order's contents and the details of the user who placed it.
Note how we included the entire model of Contents and how we selected only the relevant fields that we want on the User model.
- Update
src/middlewares/orders.jsand add thevalidateGetOrderandfindUserOrderByIdfunction.
validateGetOrder will help us to use our getOrder validation function.
Note how instead of passing req.body to getOrder as a parameter, we pass req.params. This is because the id we want to validate will not be generated by the user, instead it will be mapped to our route. This means that, given a route /orders/:id, the id property is available as req.params.id.
In findUserOrderById we destructure that id from params then create a userId variable from req.userData (this is the id of the user who's making this request). Then we use id from params and userId to put together our condition object which we use in the findOrderByConditionAll service.
- Update
src/controllers/orders.jsand addgetSpecificOrdermethod:
- Update
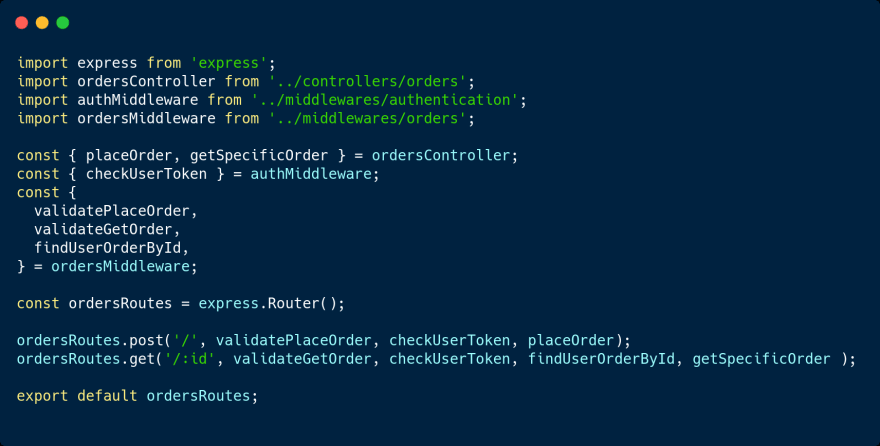
src/routes/ordersRoutes.jsto look like the following:
Now run the tests and they should all pass.
So far a customer can place an order and she can view that order's details.
Let's now see how fetching orders looks like from the perspective of the admin.
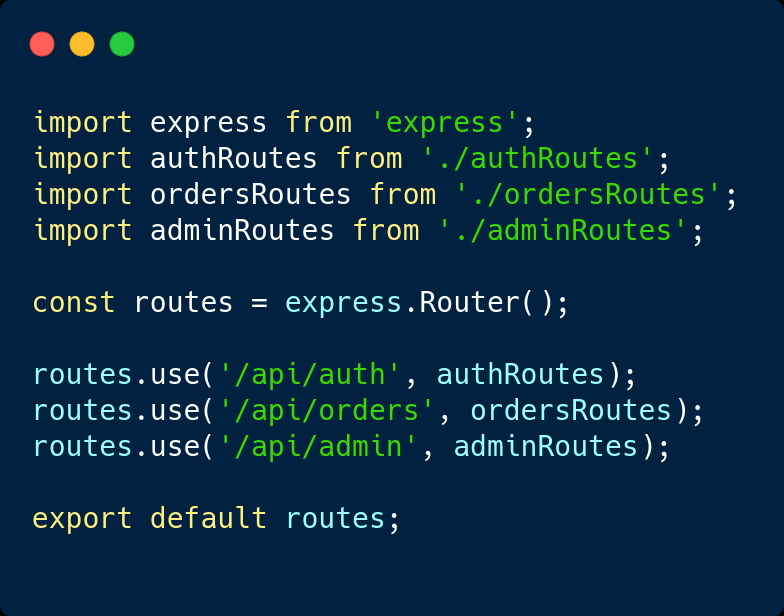
For the admin, we will create a new route path where all the admin related sub routes will go. This means that in our route index file we will have 3 parent routes: /api/auth, /api/orders, and /api/admin.
But before we create the routes, let us write our tests.
- Update
tests/orders.jsand add the following:
Note how we added our new tests suite before and after CUSTOMER PLACE ORDER and CUSTOMER GET ORDER suites. This allows us to test the Not Found or Empty scenario and the Success scenario respectively.
In short, we are testing the absence of something, then create something, and finally test the presence of that thing. Does it make sense?
This is one way to do it though.
Let us now create a service that will allow the admin to fetch all the orders placed by customers, starting with the most recently placed:
- Update
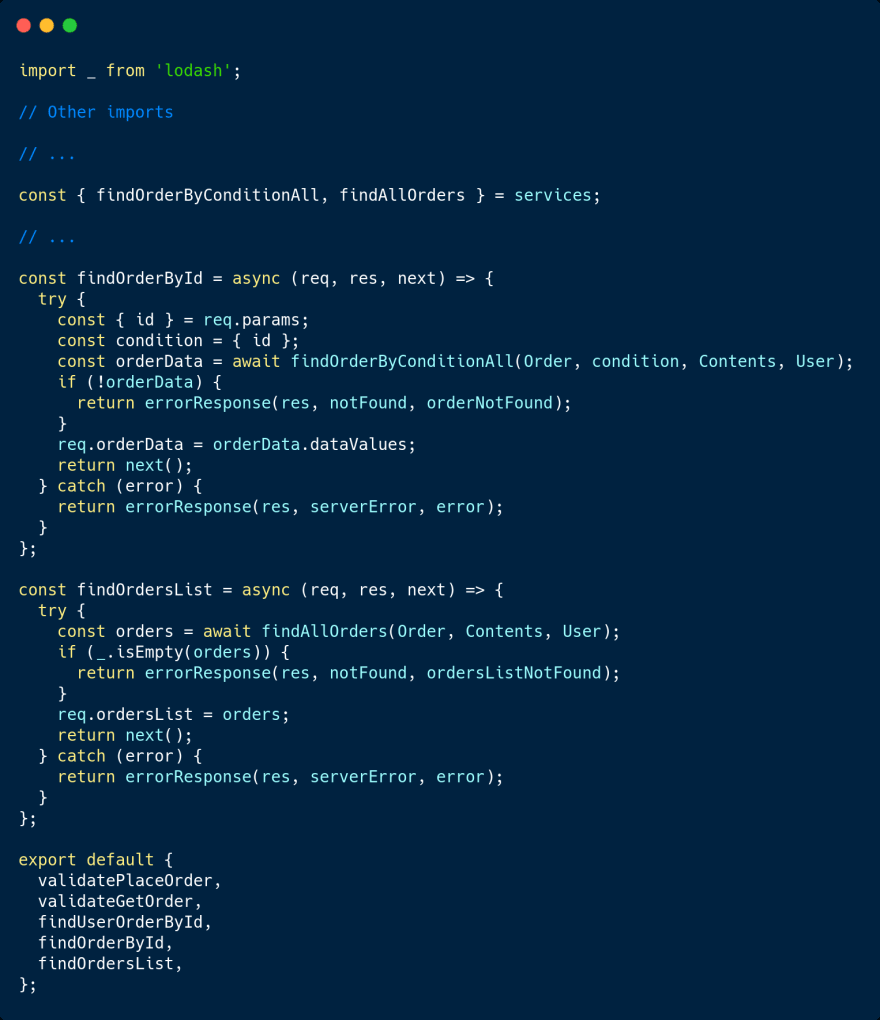
src/middlewares/orders.jsand add thefindOrderByIdandfindOrdersListfunctions:
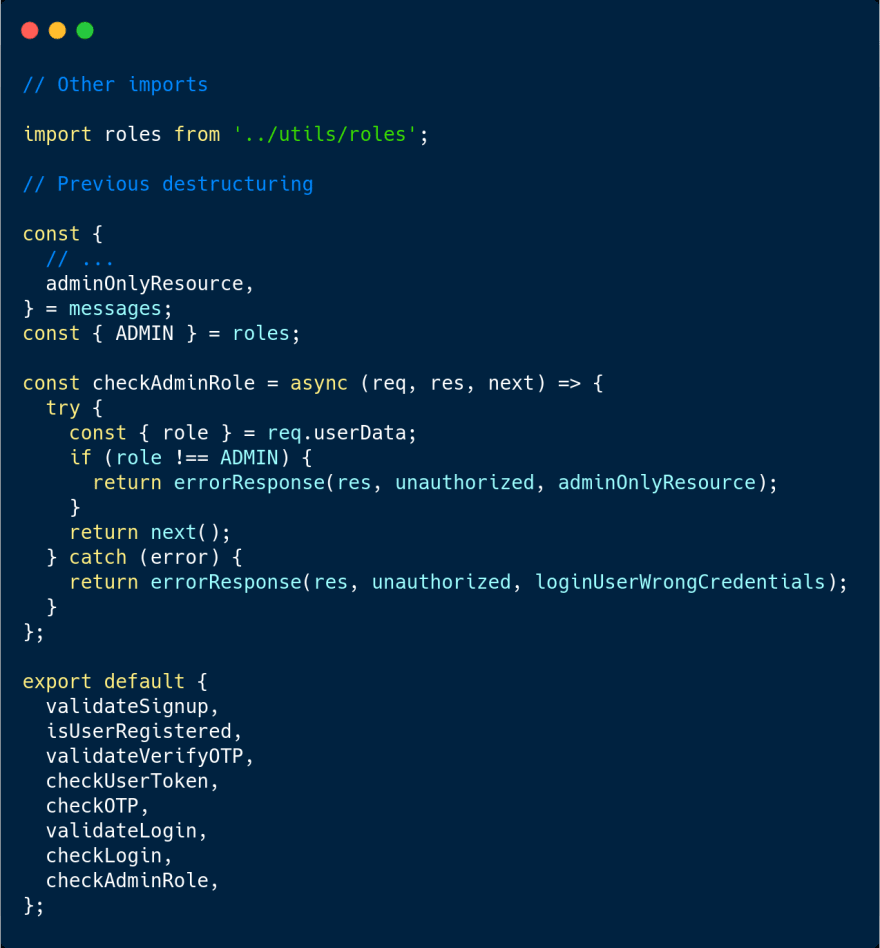
To make sure the middlewares we just created are only accessible to the admin, we need to create another middleware that checks the role of the user who is making the request and then grants access or not.
- Update
src/middlewares/authentication.jsand add thecheckAdminRolefunction:
- Update
src/controllers/orders.jsand add thegetOrdersListmethod:
Now let us create the admin sub routes and include them in the main routes.
- Create a new
src/routes/adminRoutes.jsfile and paste the following inside:
- Finally, update
src/routes/index.jsand include the admin routes:
Now run the tests and they should all pass.
Now we can commit our changes to GitHub, open a PR, wait for Travis to successfully build then merge the PR to trigger a new production build.
Thank you for following this series.
In the next post, we are going to wrap up our API with the functionality that allows the admin to update the status of an order.
The code in this post can be found here
See you in the next one!










Top comments (2)
It looks really interesting as a project. Definitely gonna walk your steps here and try this for myself. Thanks for sharing.
Thank you @labibllaca , Im glad you find it interesting. Please reach out to me if you get any issues. See you in the next posts.