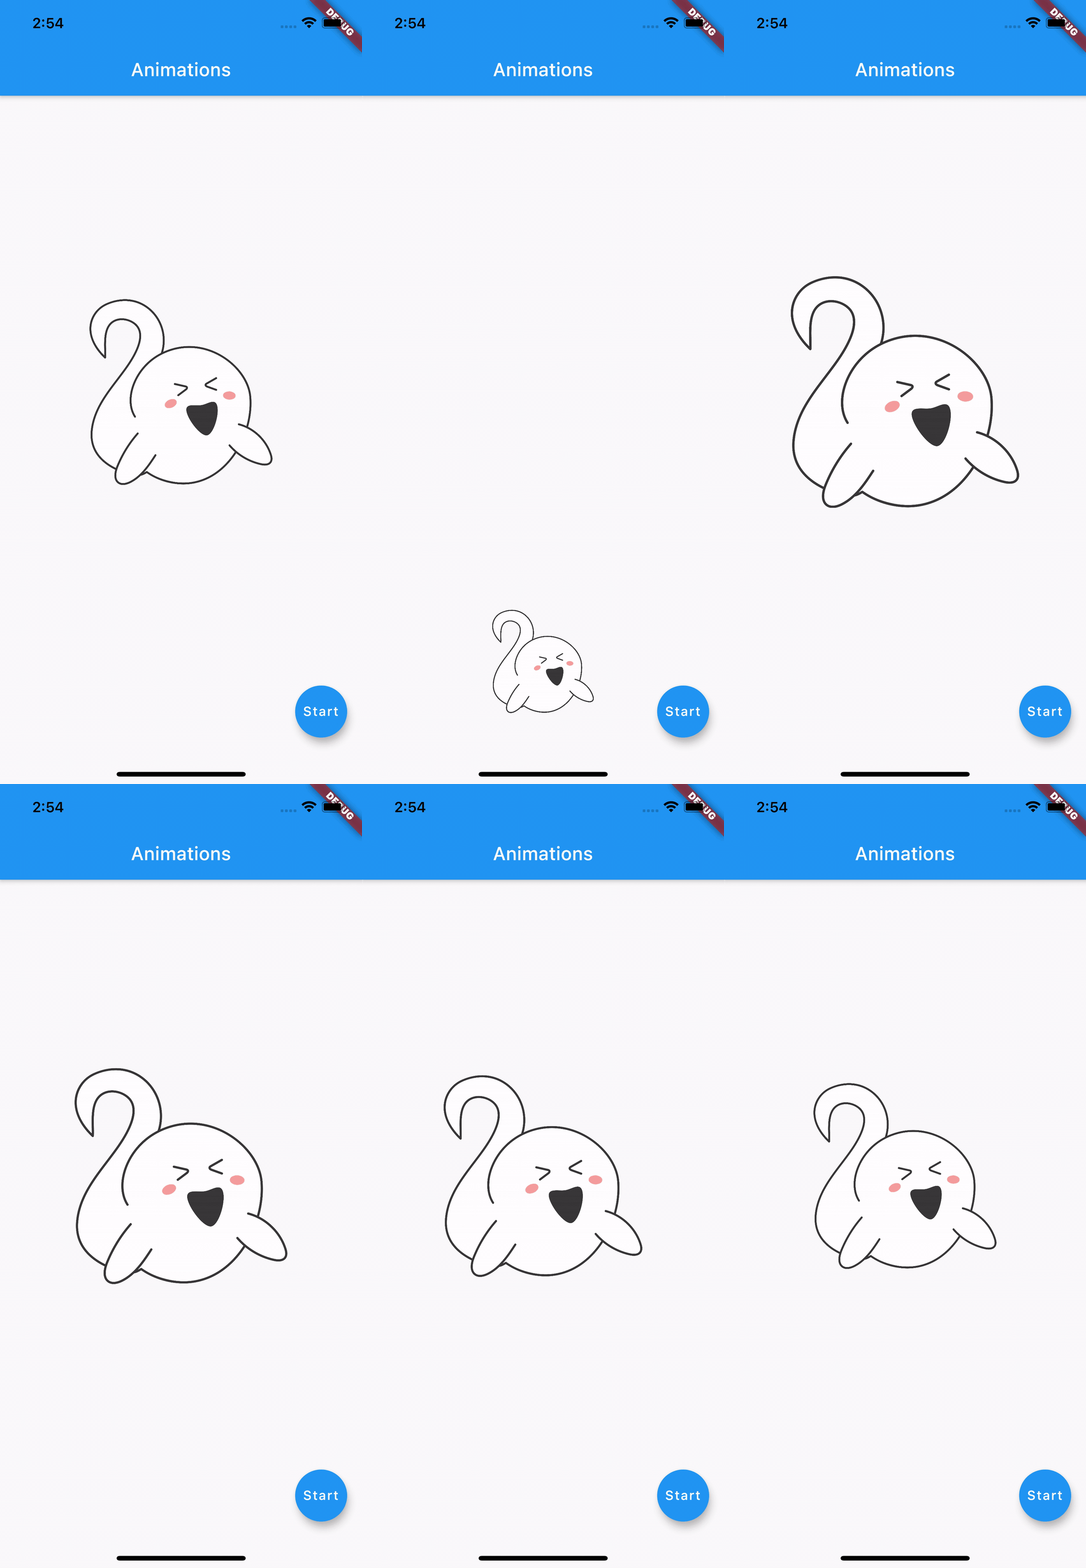
This is the second part of a series of tutorials to build animations with Flutter. In this pat we will learn how to use the Animations and AnimationControllers, to build more precise animations.
The final result will be like this video, you can find the asset of the image that we've used here:
The first thing that we need to do is to create our Ghost Widget that we will use to build the animation.
import 'package:flutter/material.dart';

class Ghost extends StatelessWidget {
  const Ghost({Key? key}) : super(key: key);

  @override
  Widget build(BuildContext context) {
    return Container(
      width: 200,
      height: 200,
      child: Image.asset(
        'images/ghost.png',
        fit: BoxFit.contain,
      ),
    );
  }
}
Then, let's create a Stateful Widget that will represent our Scaffold, with the Ghost in the center of the screen.
import 'package:flutter/material.dart';

import 'ghost.dart';

class AnimationsScaffold extends StatefulWidget {
  AnimationsScaffold({Key? key}) : super(key: key);

  @override
  _AnimationsScaffoldState createState() => _AnimationsScaffoldState();
}

class _AnimationsScaffoldState extends State<AnimationsScaffold> {
  @override
  Widget build(BuildContext context) {
    return Scaffold(
      appBar: AppBar(
        title: Text('Animations'),
      ),
      body: Center(
        child: Ghost(),
      ),
      floatingActionButton: FloatingActionButton(
        child: Text('Start'),
        onPressed: () {},
      ),
    );
  }
}
If you analyze the final result that we want to obtain you can see that we have 2 animations.
We need to change the position and the scale of our ghost, together.
So we will need 2 animations and one animation controller to control them.
Let's define and initialize them in our state.
class _AnimationsScaffoldState extends State<AnimationsScaffold>
    with TickerProviderStateMixin {
  late AnimationController _animationController;
  late Animation<double> _positionAnimation;
  late Animation<double> _scaleAnimation;

  @override
  void initState() {
    const int totalAnimationDuration = 3;
    _animationController = AnimationController(
      vsync: this,
      duration: const Duration(seconds: totalAnimationDuration),
    );

    _positionAnimation = Tween<double>(begin: 0, end: 1).animate(
      CurvedAnimation(
        parent: _animationController,
        curve: Interval(
          0.0,
          0.35,
          curve: Curves.linear,
        ),
      ),
    );

    _scaleAnimation = TweenSequence<double>(
      [
        TweenSequenceItem(tween: Tween(begin: 0.0, end: 1.25), weight: 35.0),
        TweenSequenceItem(tween: Tween(begin: 1.25, end: 1), weight: 65.0),
      ],
    ).animate(
      CurvedAnimation(
        parent: _animationController,
        curve: Curves.linear,
      ),
    );

    _animationController.forward();

    super.initState();
  }

  @override
  void dispose() {
    _animationController.dispose();

    super.dispose();
  }
As you can see the AnimationController object needs a async property with is an object that conforms to TickerProvider, we can use our state object declaring the TickerProviderStateMixin mixin.
We've defined the position animation that goes from 0 to 1 in the first 35% part of the duration of the whole animation.
Then we've defined the scale animation that goes from 0 to 1.25 in the first 35% part of the animation (using the weight parameter) and then it scales back from 1.25 to 1.0 in the rest 65%.
Note that we need to dispose the animation controller in the dispose method of our widget.
Now let's use those animations in our build method, using an AnimatedBuilder. The AnimatedBuilder takes the animation object as a parameter (we're using the animation controller) and a builder that will be called when the values of the animations are updated.
It has also a child parameter, that will be passed in the builder function, to prevent unnecessary builds, we're using the Ghost widget here.
...
      body: Stack(
        children: [
          AnimatedBuilder(
            animation: _animationController,
            builder: (context, child) {
              double initialPositionY = -cardSize;
              double finalPositionY =
                  MediaQuery.of(context).size.height / 2 - cardSize / 2;
              return Positioned(
                bottom: initialPositionY +
                    (finalPositionY - initialPositionY) *
                        _positionAnimation.value,
                left: MediaQuery.of(context).size.width / 2 - cardSize / 2,
                child: Transform.scale(
                  scale: _scaleAnimation.value,
                  child: child,
                ),
              );
            },
            child: Ghost(),
          ),
        ],
      ),
...
We're done! 🎉
We have our animation that starts when the Widget is created.
The only little piece that's missing is to connect the floating action button to restart the animation. There's nothing as easy as this: you just need to call the reset function of the animation controller and then the forward function to start the animation.
      floatingActionButton: FloatingActionButton(
        child: Text('Start'),
        onPressed: () {
          _animationController.reset();
          _animationController.forward();
        },
      ),
Want to check new Flutter tutorials every week? Look at our site!


Top comments (0)