Hi, guys!🤗 Hope you’re doing well. I want to show you how to make a website with Django! Hope you will enjoy it!😄
Prerequisites:
- Basic knowledge of Python 🤓
- Understanding what is HTML, CSS, JavaScript🤓
Okay, let's get started🤩. First of all, we have to establish an environment for our project and install Django. Open your favorite IDE (Integrated development environment) or command prompt with an empty folder. I opened it in VS Code.😎
You can download it here https://code.visualstudio.com/

Put this command python -m venv env in your terminal. It will make a virtual environment which is called env. 🖖

Next, let’s activate the environment by this command env/Scripts/activate on Windows, try source venv/bin/activate on Mac, if it doesn’t work just look it up on the Internet for your OS. If it is activated you will see (env) on the left of the prompt.🧑💻

Install Django using this command: pip install django👨💼

Then create a new project using this command: django-admin startproject my_project ., I called my project my_project. Point in the end adds our project to our folder without adding a new folder with the same name.

We have a lot of files, most of them we are not going to use in this tutorial. 😵😵😵
Setting.py It’s our main file where we can change some configuration of our project,
Urls.py Here we will add path to our apps.
Manage.py We will be using it during migrations and adding new apps.😲
Let’s add a new app python manage.py startapp main 🤔:

We have a new app called main.

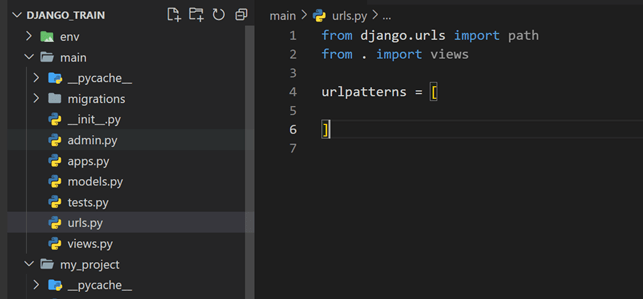
Let’s add a new file urls.py in the main app and import path from Django.urls, from . (point means import from this app ) import views, write urlpatterns = []🤯:
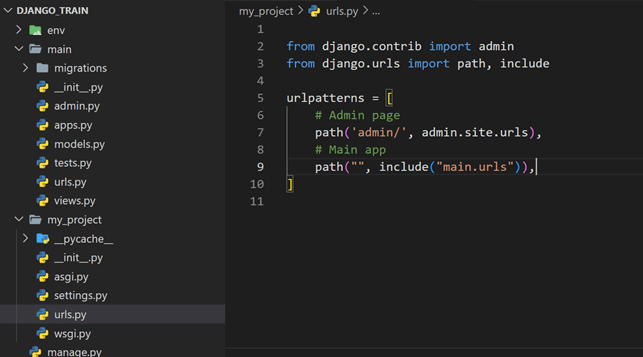
Add your app path in my_project urls, import include from Django.urls as well:
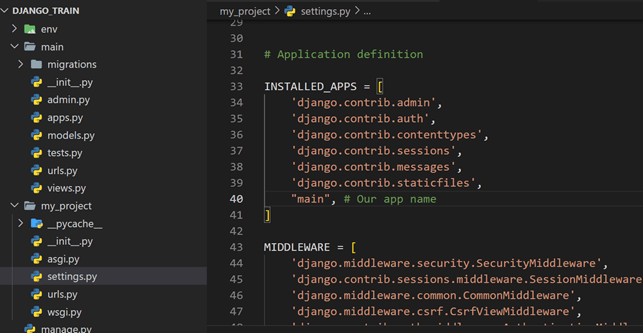
Then in my_project settings.py add app name (main) into INSTALLED_APPS like this🙃:
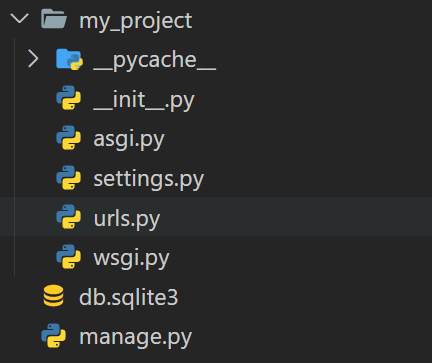
Make migration using this command: python manage.py migrate😮💨

This command saves everything in the database (SQLite), you can see the new file db.sqlite3:
Let’s create a superuser by using this command python manage.py createsuperuser, add username, email, and password 👮♂️:

We can run our project python manage.py runserver and open the admin page, just click on http://127.0.0.1:8000/ + CTRL, if you want to stop CTRL+C👩💻:

And put in your URL http://127.0.0.1:8000/admin, then put your name and password to log in admin page👩💻:

You will see Django administration page:
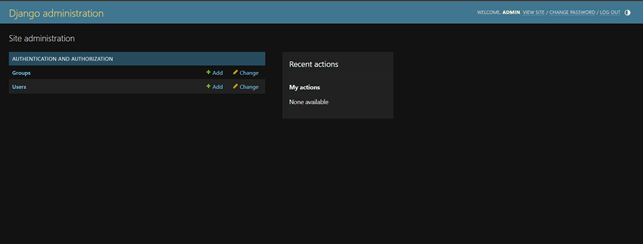
You can change the appearance by changing the configuration in admin CSS file(not in this tutorial).
Add in models.py new model👌 Almost done:
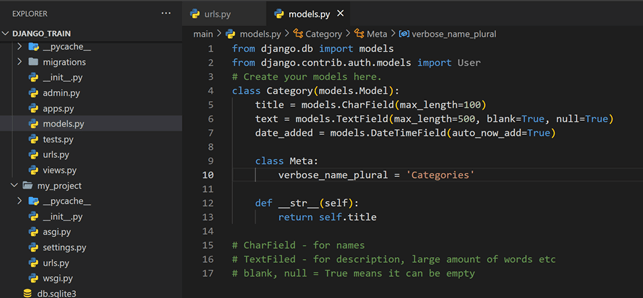
And make migrations python manage.py makemigration and python manage.py migrate:

After this, we can see it on our admin page:

We can add data into category👨🎨:
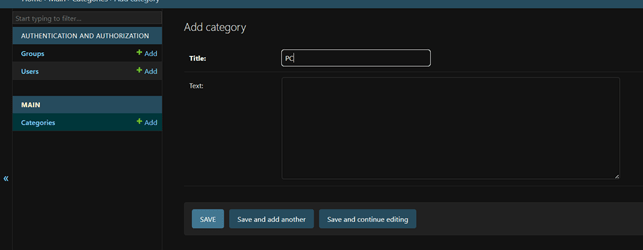
We have PC has blank text and it works because we added blank=True before in our model.👨🎓
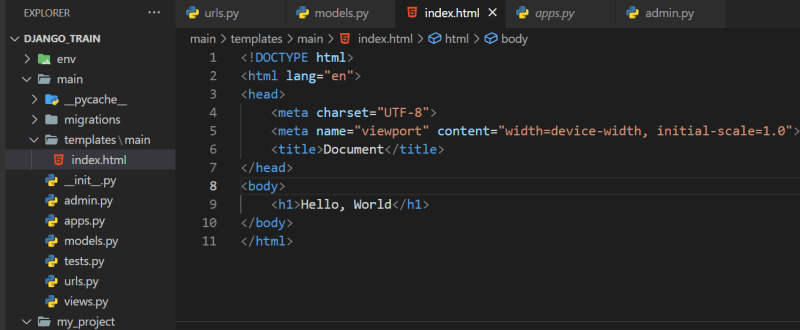
Create templates folder in main app and then inside this folder add a folder named main.

Add index.html file into this main folder.
Add this in views.py in main app:
Categories take our data from the database and return render shows on the screen.🤨

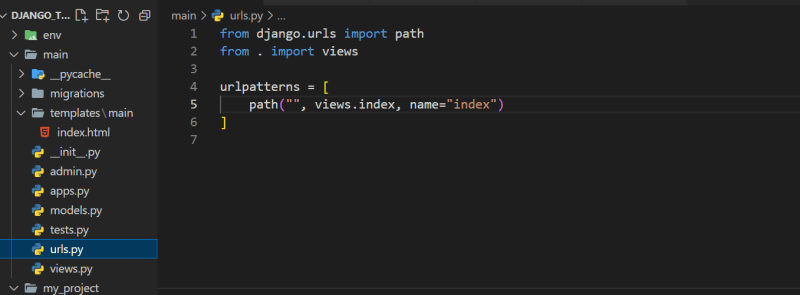
In main urls.py add path with imported views.
Add this to index.html file👩🎨:
block endblock – means start and end of dynamic part of the index.html
for endfor – it’s like for loop in Python.
category.title – it’s our data from database.🧐
On localhost page you will see our data😎:
Thank you for reading. I hope you enjoyed it!🥳🥳🥳
Let's connect on X(Twitter) https://twitter.com/volodys1ove
Discord: https://discord.gg/z8Dzb4Hv




Top comments (0)