This series is going to cover how to use Angular Elements.
Starting with basic topics, much like the oficial documentation, and going to more advanced ones, like routing and micro front-ends.
Web Components
Micro front-end is a hot topic nowadays, but it still not so mature.
One (and most common) way to accomplish that is using web components, more specifically Custom Elements.
Although ever-green browsers have support for Custom Elements, sometimes we need to develop for older browsers.
There are already polyfills to adddress this problem, but we may face another problems like routing, state management, caching, and so on.
Angular Elements
Like any other development trend, frameworks and libraries are trying to solve all of that for us and making our lifes easier.
Obviously, what we are going to talk about in this series is the work Angular team is doing, Angular Elements.
Angular Elements basically works like a bridge between the browser APIs and the so many features provided by Angular itself.
How it works
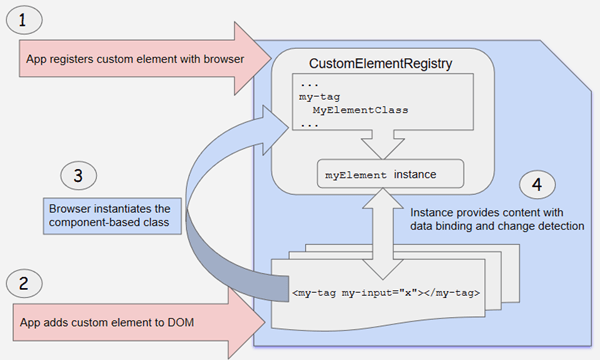
When an Angular Element component is placed on a page, the browser creates an instance and adds it to the DOM.
After the element is instantiated, Angular takes control and provides it's content, data binding and change detection through Angular Template Syntax.
The image below illustrates that:
Conclusion
Using Angular Elements, we can create our own Custom Elements, which behaves just like native elements.
Here, in this first article, I shared a quick introduction, also giving some articles and documentations about the topic.
The next articles will be more code detailed, explaining how to implement it.
If you have any question or concern, just drop a comment. Thanks!


Top comments (0)