Sometimes you may need a button that can show different links in different posts. That's a button with dynamic link. There are different ways to create it, one of them is using custom fields. Links will be saved into custom fields then pulled out and put into the button automatically. And, that's where the Meta Box plugin comes in handy.
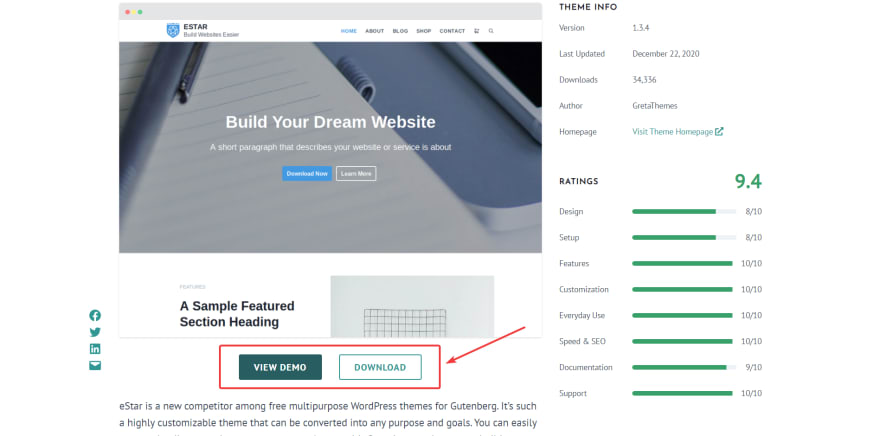
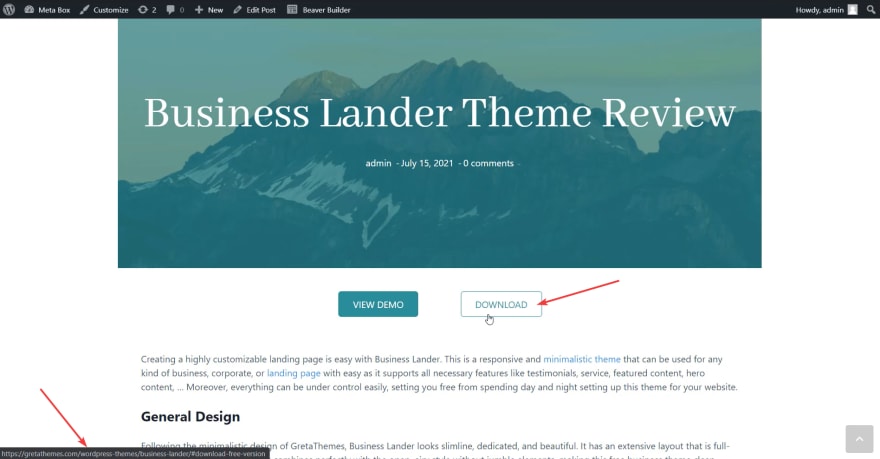
For instance, I have a website about theme reviews here. Each post about a theme has buttons to their own demo and download pages. They are dynamic links.
Let's find out how to create those buttons.
Before Getting Started
As I said, Meta Box is the first tool we put on the list.
If you love UI, Meta Box Builder is the next one for having UI on the dashboard. It's available in the Meta Box AIO or MB Core, so if you've had one of them, just check to make sure that you've already enabled the Meta Box Builder extension.
If you are using Elementor or Beaver Builder, please activate the corresponding integration from Meta Box. For others as Oxygen or Bricks, just go ahead.
In the event that you don't use any website builder, you may need MB Views.
I'm going to have a comprehensive tutorial for both non-using-page-builder and using page builders such as Oxygen, Beaver Builder, and Bricks as following.
Video Version
Create Custom Fields for URLs
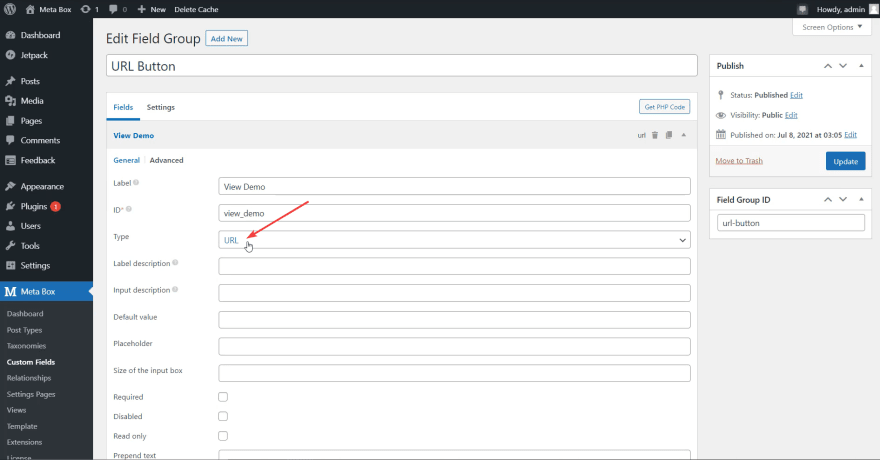
First, we need custom fields for saving URLs for each post. If you've had Meta Box Builder in your pocket, you will have a UI on the backend to create custom fields visually. Otherwise, please go to the Online Generator, create fields, generate code, then copy it to get the fields.
They are quite simple with type is URL and there are no special settings.
After having these fields, please go to post, input some links. That way you will have data to check if the buttons work.
Create Buttons Without Using any Page Builder
For someone who is not using any page builder on their site, this part may help. MB Views from Meta Box will help to create a button easier with a shortcode.
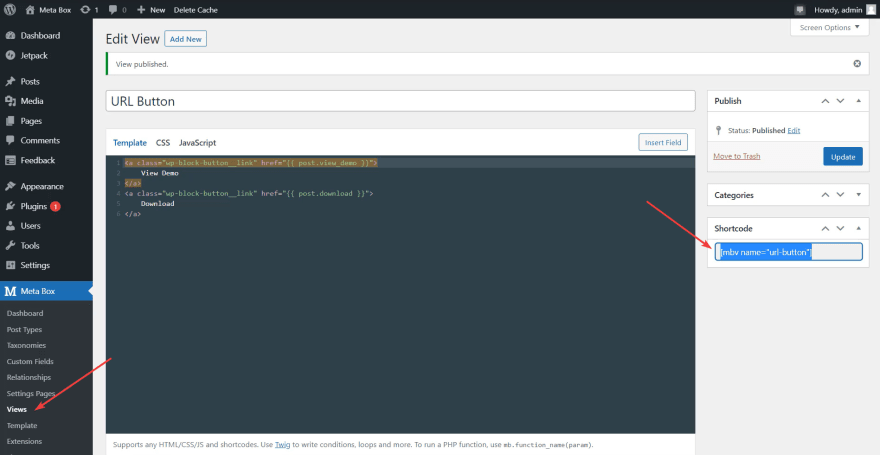
Just go to Views and create a new view with this code:
In there, view_demo and download are the IDs of the custom fields that we've created above. By the way, because I'm using the eStar theme, so I must use the wp-block-button__link class to create buttons.
The view will generate a shortcode as you see in the below image. Just copy and embed it somewhere.
For instance, I pasted it to a sidebar on the single blog post page and got these buttons.
Note that this look of the button is from the theme default.
Create Buttons with Dynamic Link using Oxygen
I've already pre-made a template using Oxygen. It is applied to blog posts.
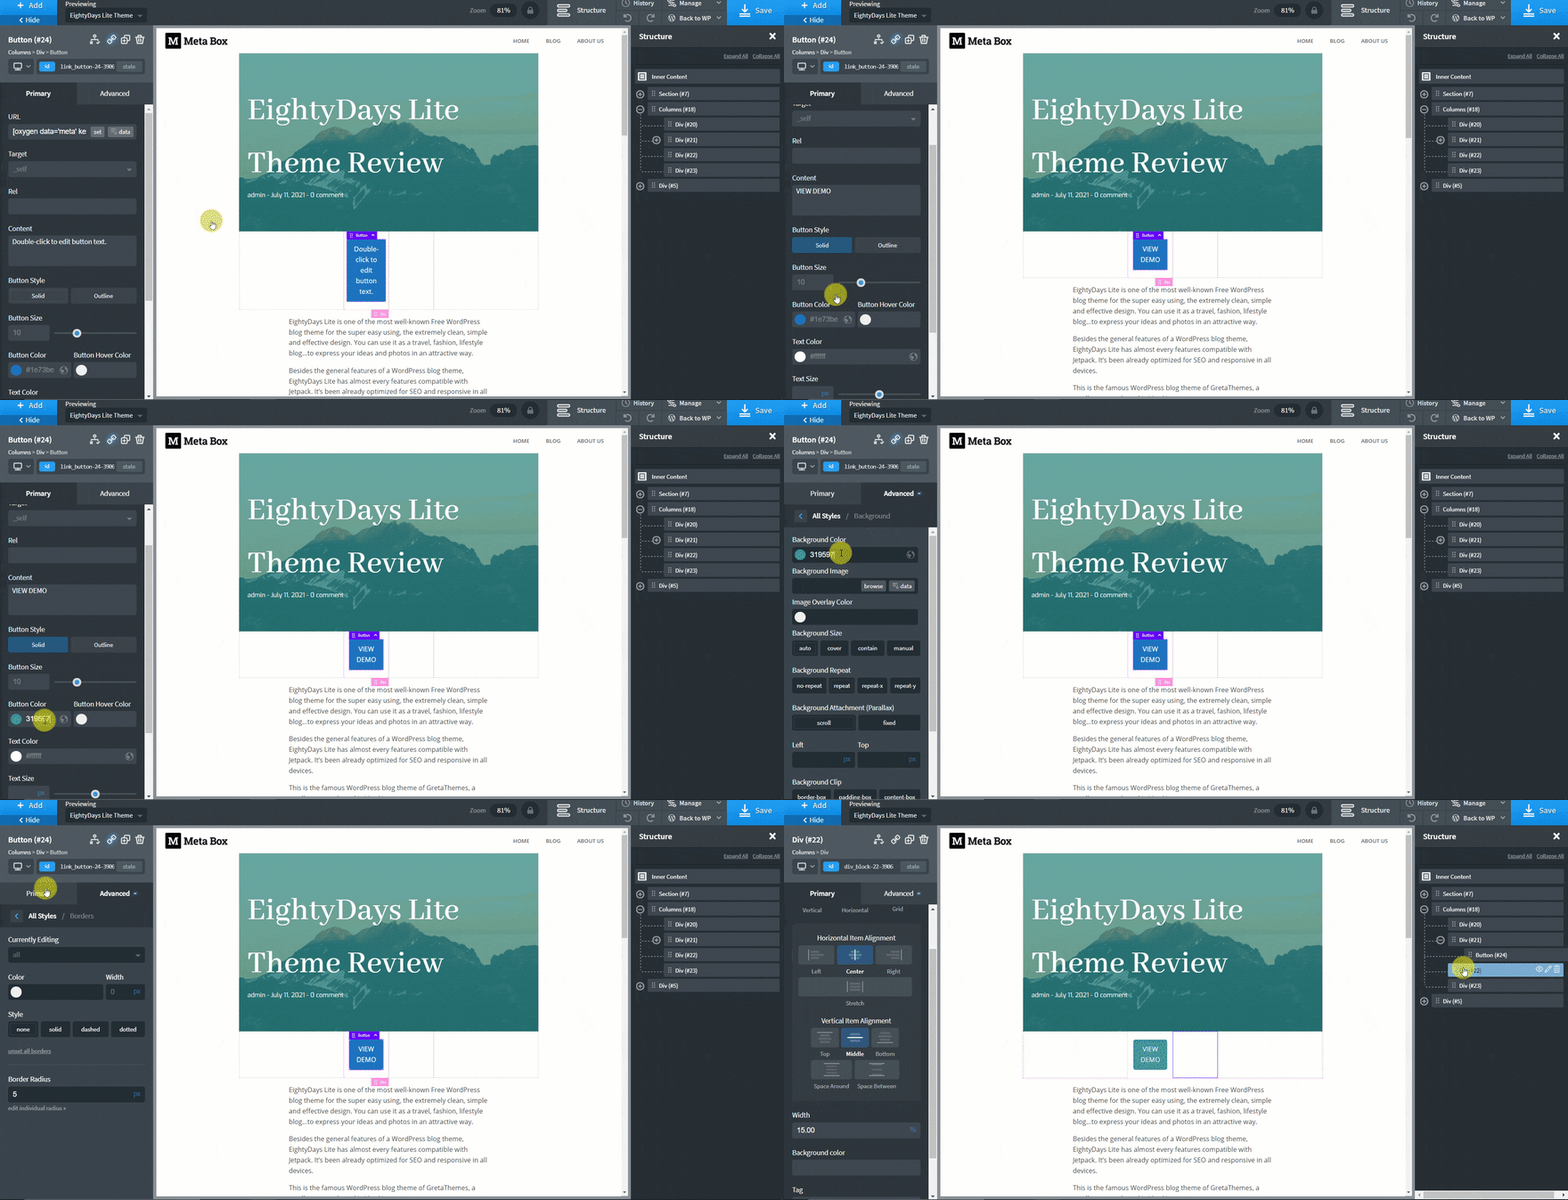
I will add two buttons right under the featured image of the post. However, before creating any button, we need to set a container for them.
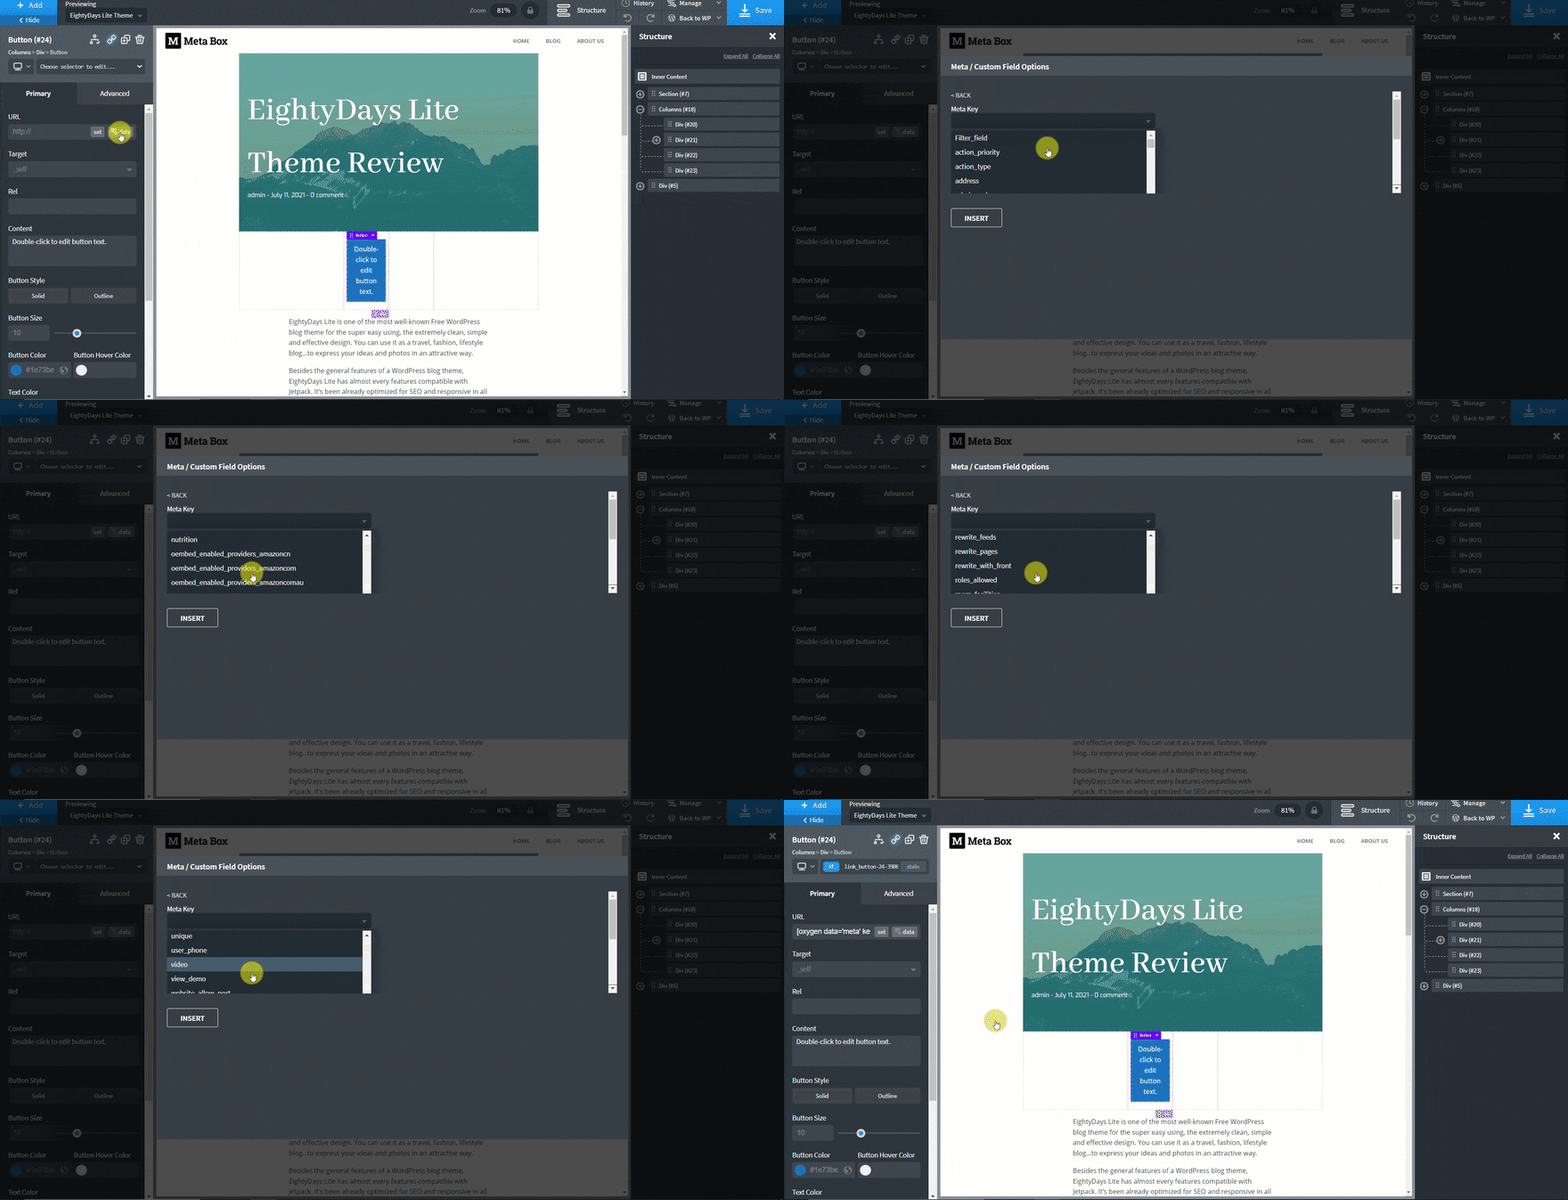
Now, add a button. At the end of the URL section, there is a button linked to dynamic data. Click it, then choose Meta / Custom Field in the Post section. Next, Scroll your mouse until you find out the ID of the wanted field to connect to the button.
The remaining thing to do is styling the button as you want.
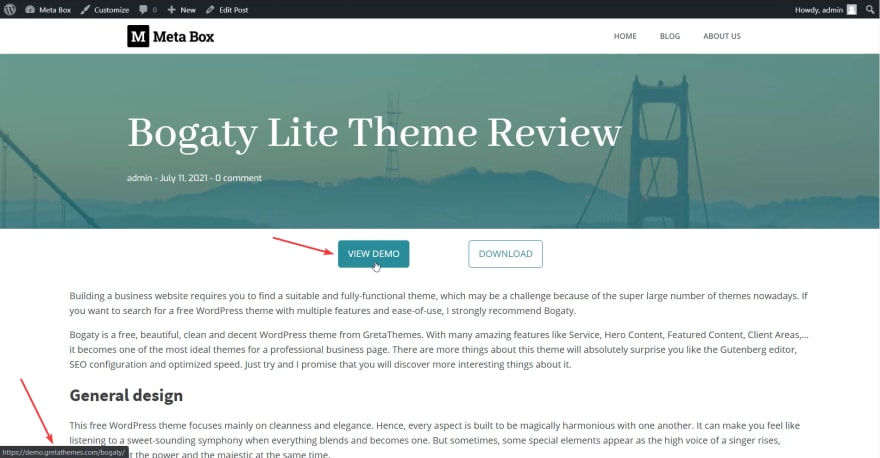
I also created another one with a new style and linked it to another field. And, here they are in a post, with links.
Create Buttons with Dynamic Link using Beaver Builder
On another website, I also have a pre-made template by Beaver Builder with the same location and style as the one made by Oxygen. The buttons also will be under the featured image.
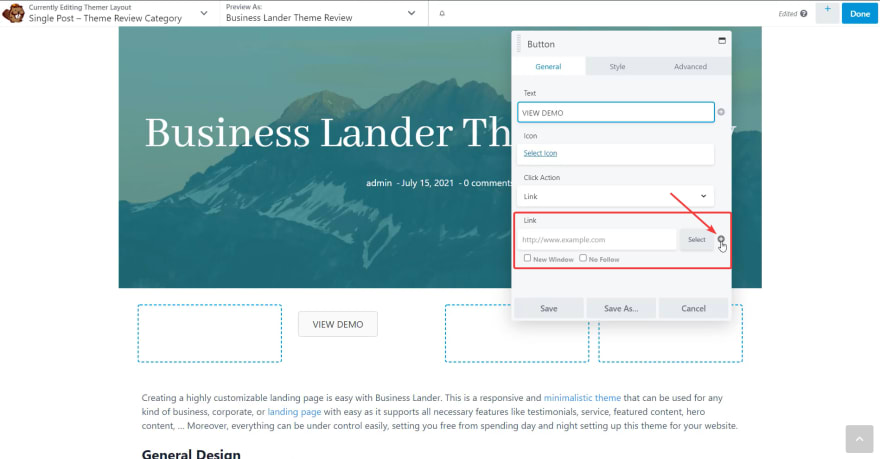
I also add columns to set the layout first, then add a button. There is also a Link section for inserting a static link in the button's settings. But, to get the URLs from Meta Box fields, please click the plus icon.
You will see the Meta Box Field option in the drop-down list. Choose it by clicking Connect.
Then, choose the name of the field you want.
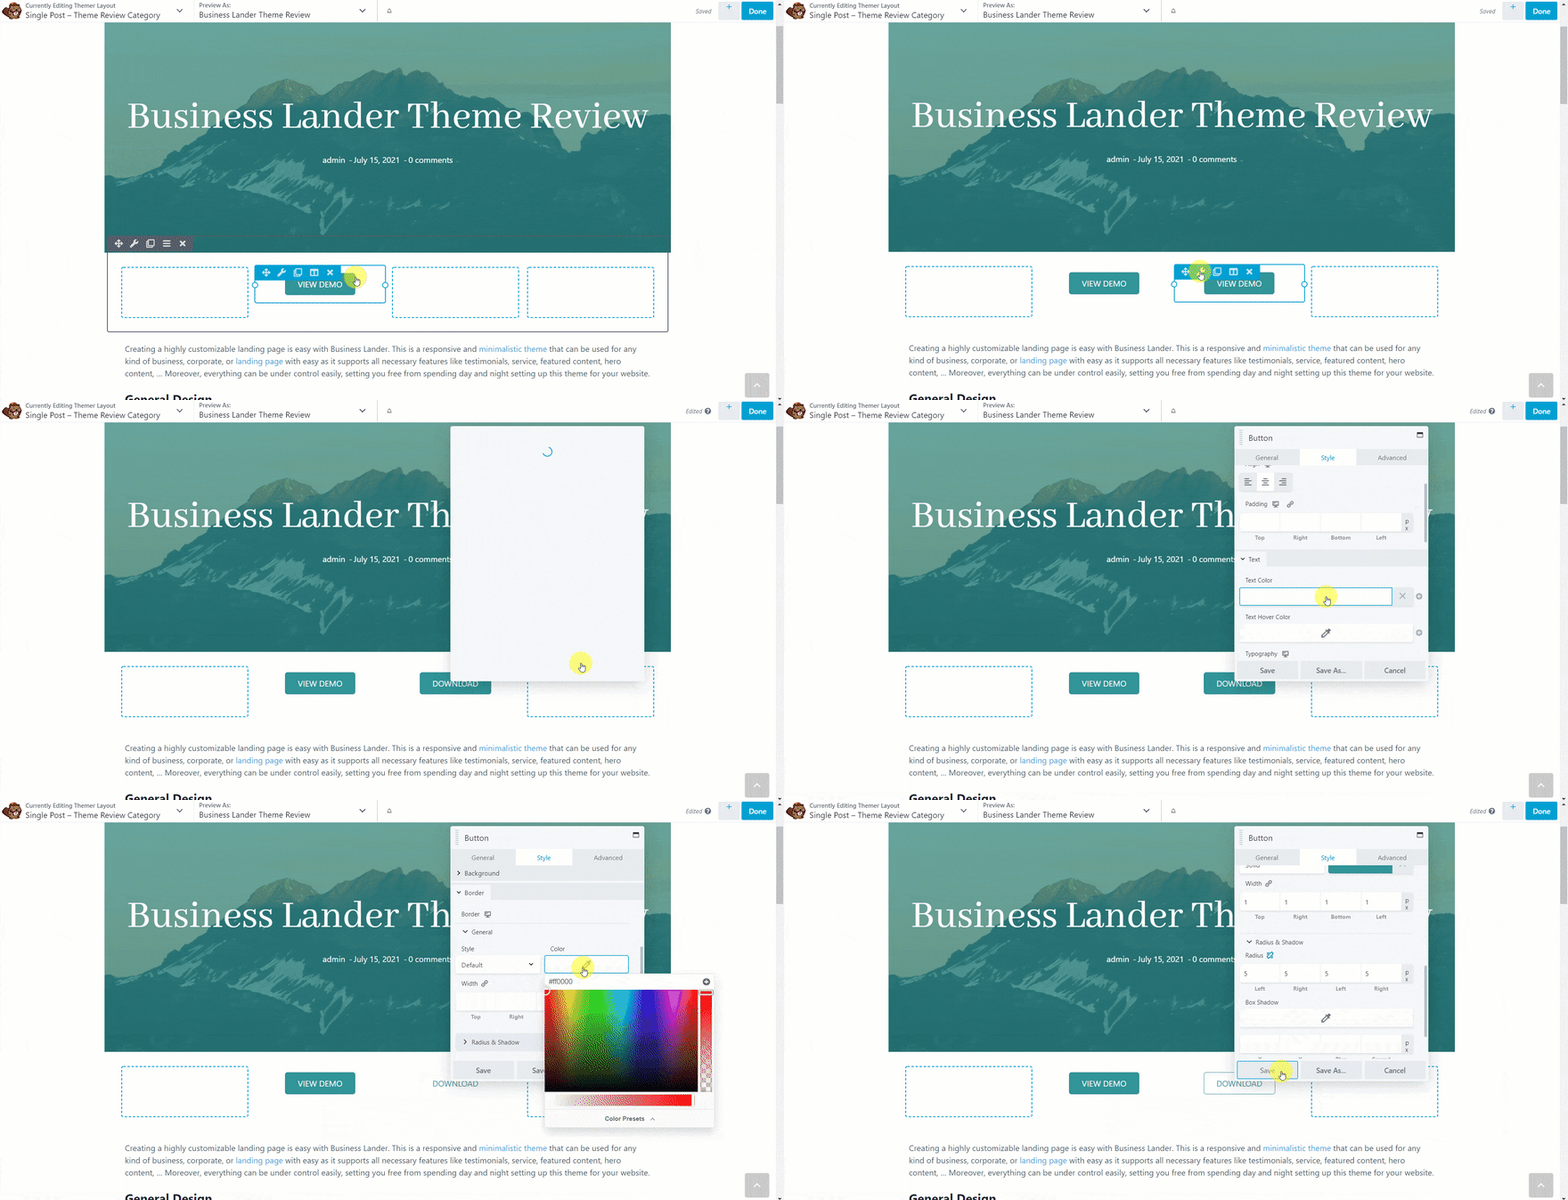
The last thing, style your button. That's all.
To have another button, you can duplicate this one to save time, then reconnect it to another field as well as restyle it.
Now, go to a post, you will see the buttons with links.
Create Buttons with Dynamic Link using Bricks
The last website builder in this tutorial is Bricks with the same template and position for buttons. In the same way, add a container with 4 columns first then buttons.
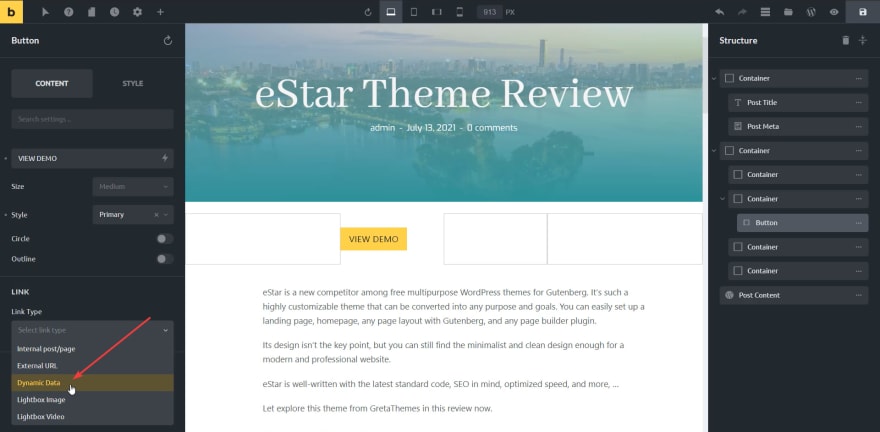
Different from other page builders, Bricks allows you to choose the type of link on a dropdown list. To get data from custom fields of Meta Box, please choose Dynamic Data.
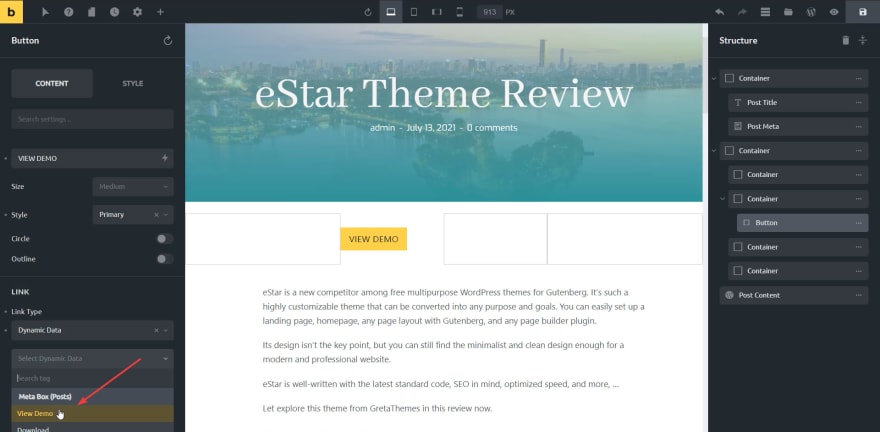
After that, you will see Meta Box is suggested with the name of custom fields following. Choose one as we want.
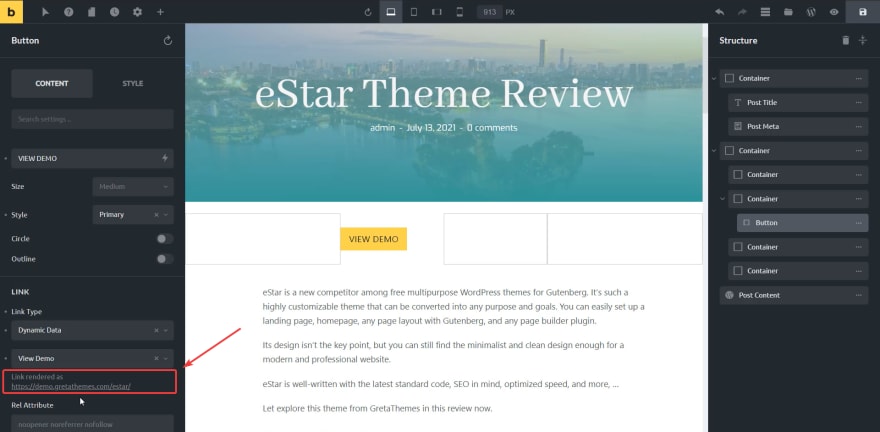
Bricks will render a corresponding link to this preview post that you can check if the data is correct.
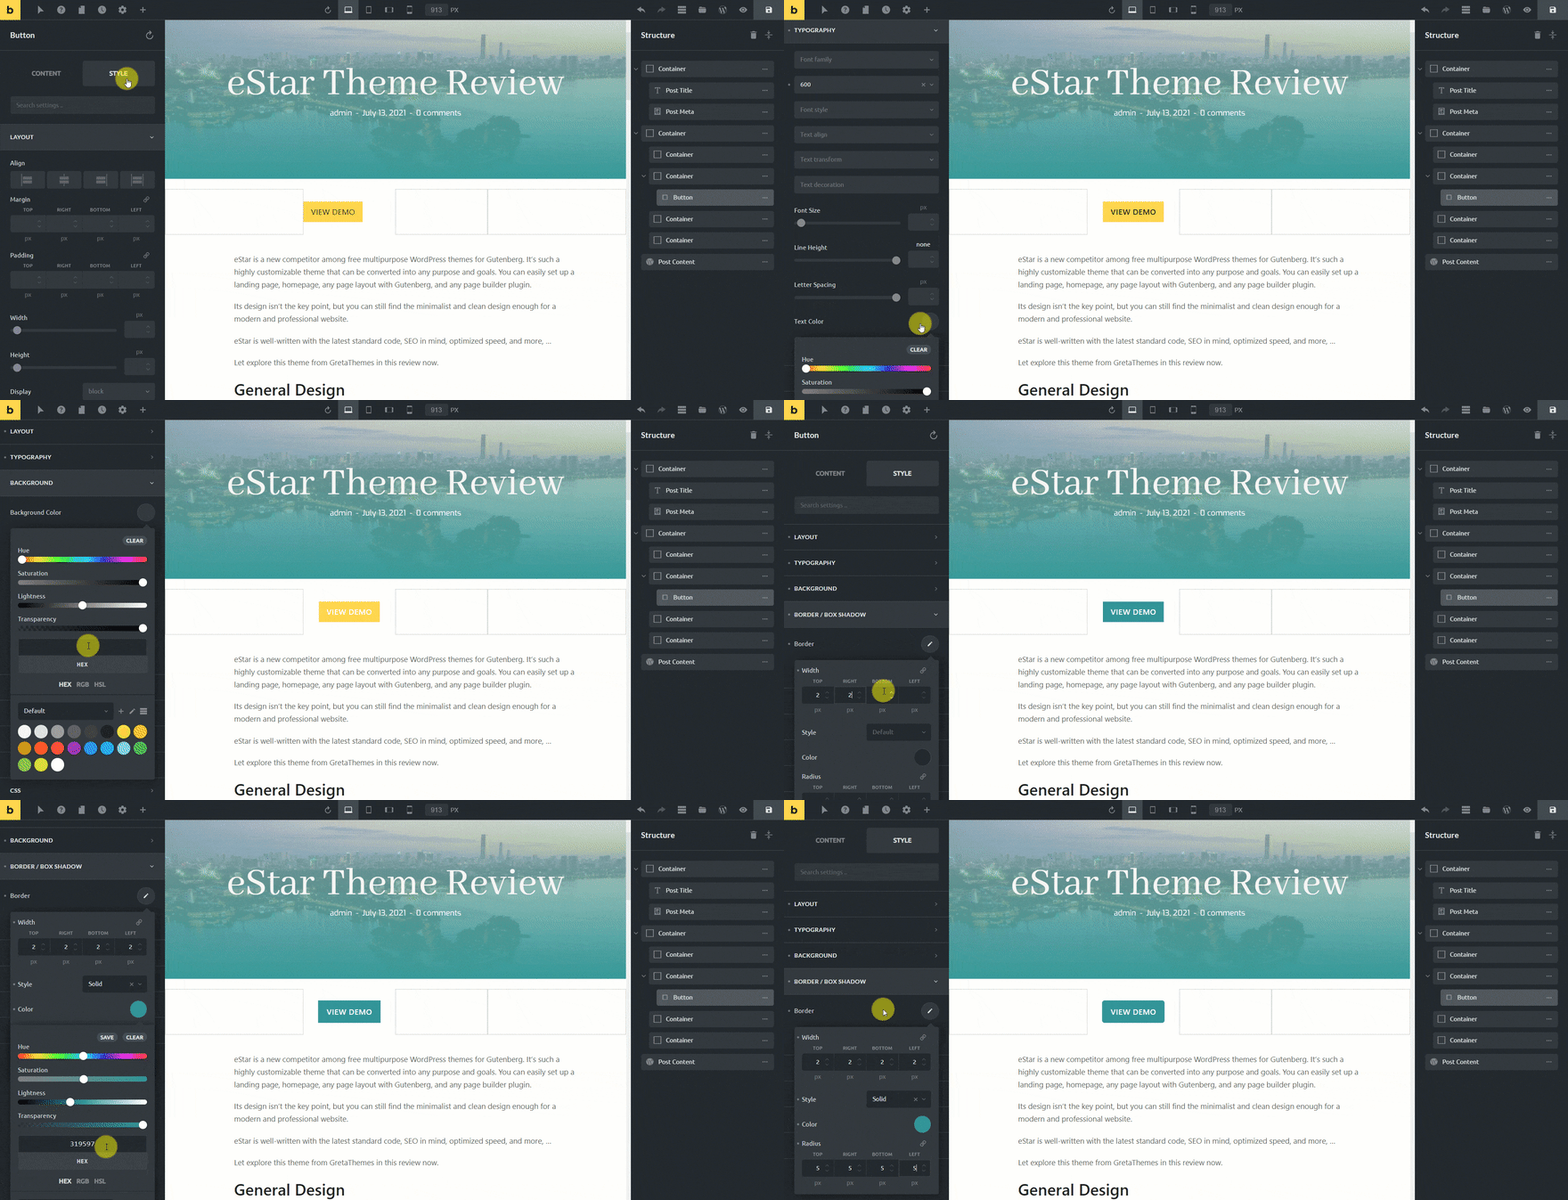
After that, all the work is styling.
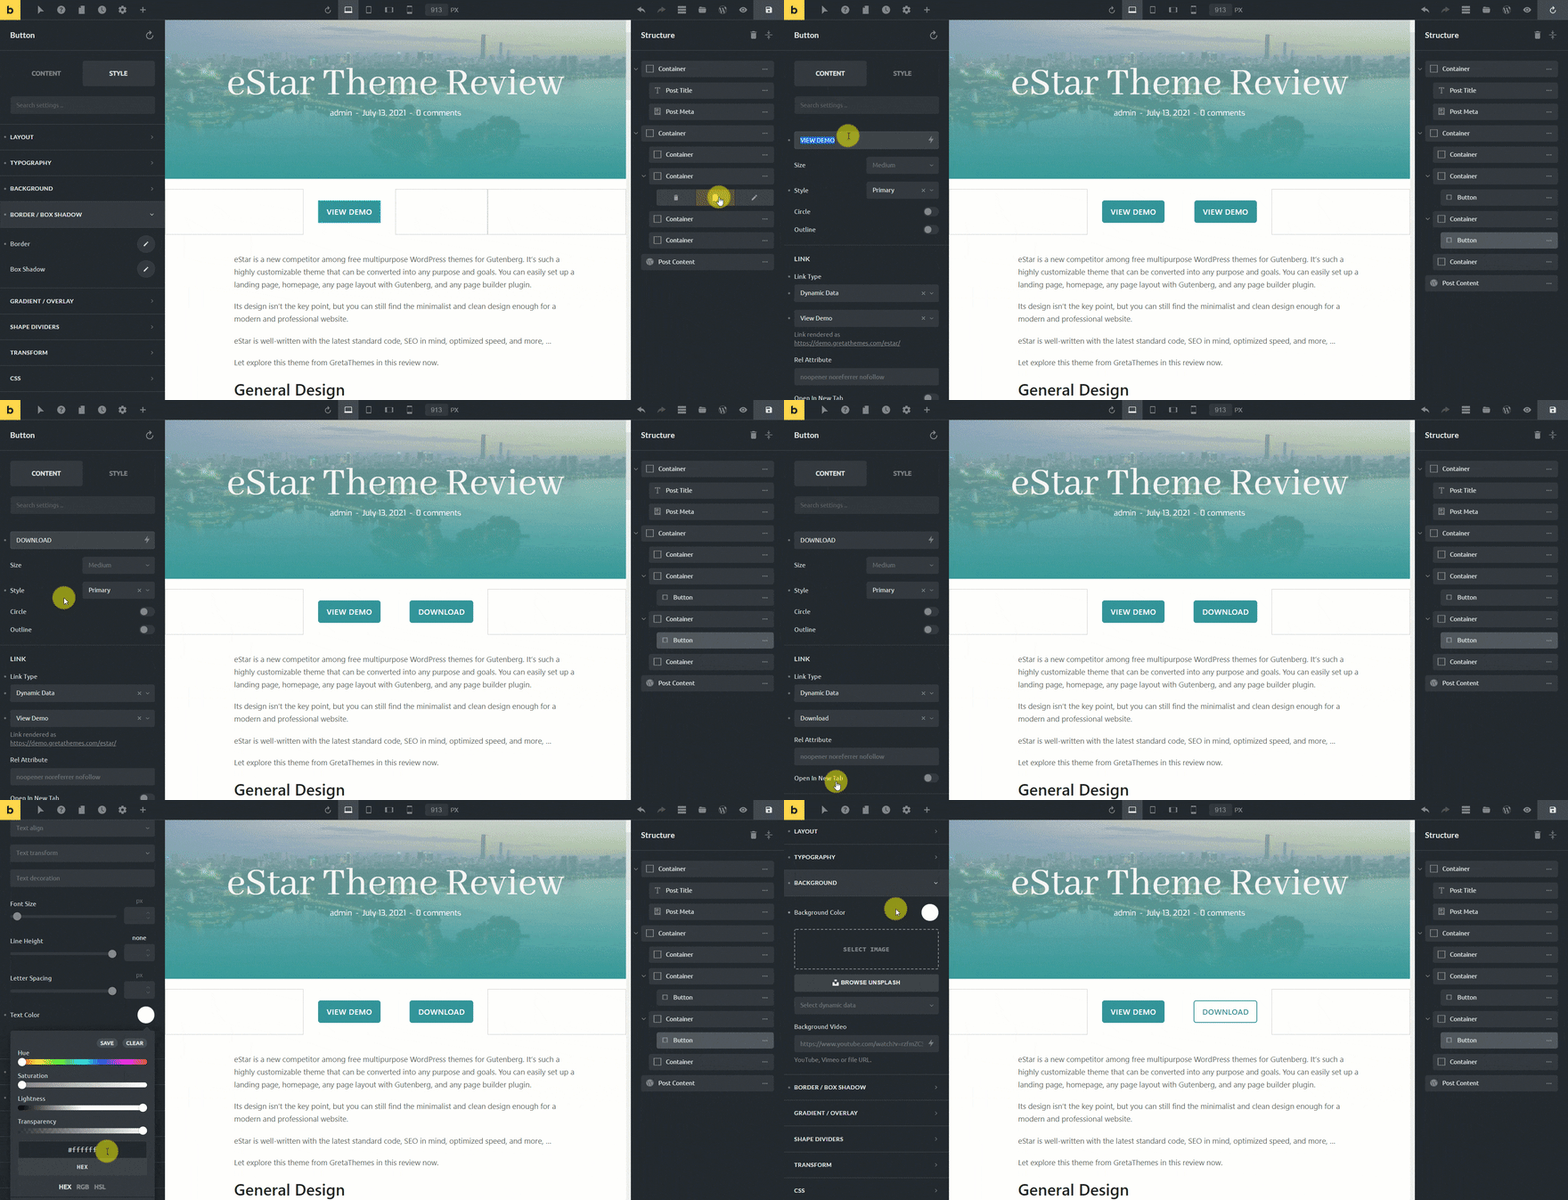
Then, I've got an ace button in the preview. Let's duplicate it to have a new one. I'll change the data's source and restyle this new button.
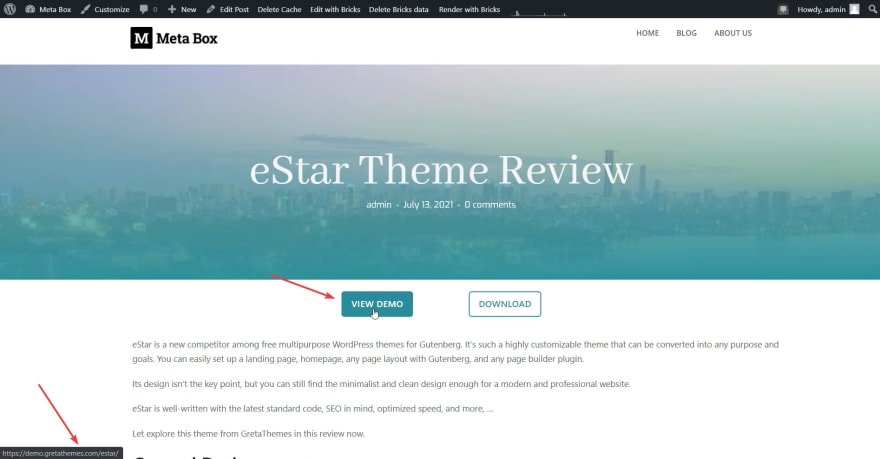
Finally, here they are on a post.
Last Words
These are just small tips for creating buttons with dynamic links. By the way, we also hope that you know somewhat how to connect custom fields created by Meta Box to a page builder element. Do you find it work for you?
If you have any questions, please feel free to leave us a comment below. And, remember to keep track of our blog to have more tutorials.







Top comments (0)