Info: This post is one of the article in context of this post: Huawei Cloud ECS server notes
I have installed ES on our Huawei CLoud server using docker just now. It's simple, but there is still something important to be aware of.
Make it Run in Docker
Create firstly my launch file:
touch ~/launchers/docker_es_8881.sh
vi ~/launchers/docker_es_8881.sh
Fill the following code into this file:
docker rm -f es_docker_8881
docker run -it -d --privileged=true --net bridge-network \
 --name es_docker_8881 \
 -p 8881:9200 \
 -e ES_JAVA_OPTS="-Xms256m -Xmx256m" \
 -e "discovery.type=single-node" \
 -v /home/jemaloQ/docker/es_8881/elasticsearch:/usr/share/elasticsearch \
 elasticsearch:7.5.2
Then I tried to launch the docker container using this launch file (sh ~/launchers/docker_es_8881.sh), however, the launched container is always in exited status (check it by executing docker ps -a | grep es_8881).
Thus I tried firstly changing the access permission of the mapping directory:
sudo chmod -R 777 /home/jemaloQ/docker/es_8881/elasticsearch/
However, I still had the same issue.
Then I tried to launch it without folder mapping using the following cmd line:
docker rm -f es_docker_8881
docker run -it -d --privileged=true --net bridge-network  --name es_docker_8881  -p 8881:9200  -e ES_JAVA_OPTS="-Xms256m -Xmx256m"  -e "discovery.type=single-node"  -v elasticsearch:7.5.2
Now the container started to work. So I then copied its content to the mapping folder in host machine:
docker cp es_docker_8881:/usr/share/elasticsearch/ /home/jemaloQ/docker/es_8881/elasticsearch
Then I tried again launching the docker container using our launch file (sh ~/launchers/docker_es_8881.sh), it works this time.
Setup Password of ES
By default, the ES database is not secured by a password. One needs to firstly enable the xpack feature.
sudo vi /home/jemaloQ/docker/es_8881/elasticsearch/config/elasticsearch.yml
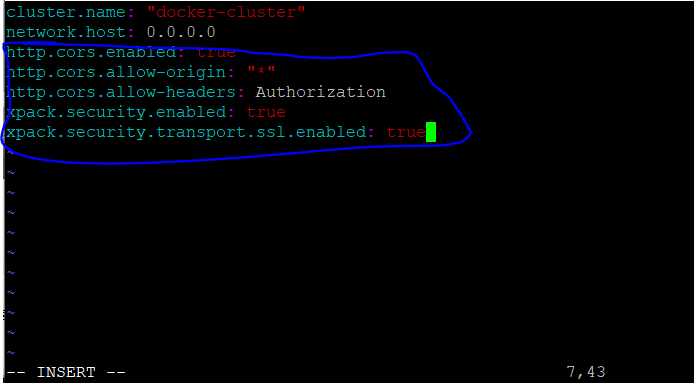
Add the following lines into this config file and save
http.cors.enabled: true
http.cors.allow-origin: "*"
http.cors.allow-headers: Authorization
xpack.security.enabled: true
xpack.security.transport.ssl.enabled: true
Now relaunch our container. Then enter the inside bash of the container and setup the password
sudo docker exec -it es_docker_8881 /bin/bash
cd bin/
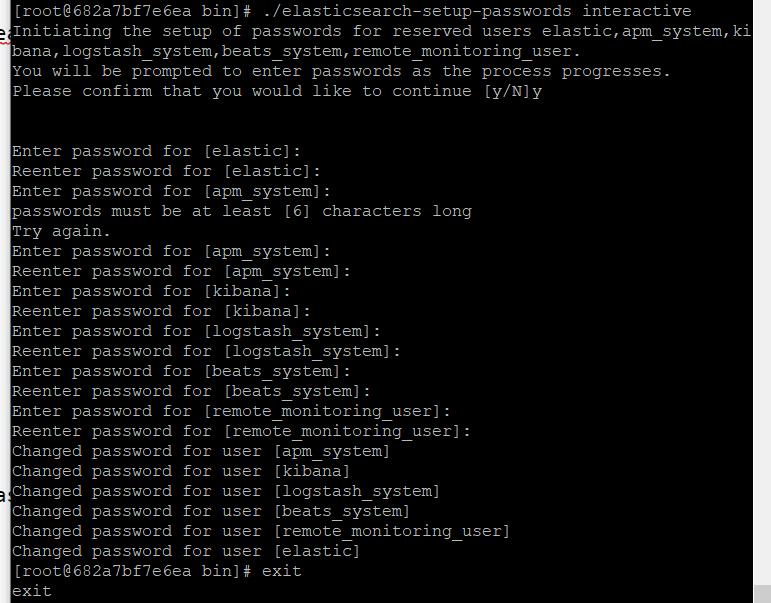
./elasticsearch-setup-passwords interactive
Then setup a series of passwords in interactive mode:
Connect ES via Python
Now test our ElasticSearch database in Python:
from elasticsearch import Elasticsearch

#es = Elasticsearch('IP:9200')
#es = Elasticsearch('http://host:9200')
es = Elasticsearch('http://111.22.233.177:8881',http_auth=("elastic", "123456"))


es.indices.get_alias()


Top comments (0)