In this post, we will learn about the "C" in CSS, which stands for "Cascading". Understanding the CSS cascade is critical in successfully styling web interfaces.
This post will explore the concept of "scoped" versus "global" styles, and introduce 3 keys to the CSS cascade:
- descendants inherit from ancestors
- order of rules matters
- higher specificity always wins
Read on to learn how each key part of the CSS cascade works!
This is the eleventh post and video in a series on learning web development. Learn more about the series and see the post schedule >
You may need to check out the first post to learn how to get set up to begin coding:

Learn How to Make a Website: Set up Your Coding Environment
Stephanie Eckles ・ Jan 20 '20 ・ 3 min read
You may watch the following video or follow along with the expanded transcript that follows.
To begin this lesson, open the starter project you began in episode 1, or review the source files from episode 10.
To begin this lesson, open our project in VSCode.
If you are just joining us you can download the starter project to catch up, see the link in the video description.
In the Terminal, type the start command npm run start to run the project.
For this lesson we're going to start by reviewing what we've created so far in this series.
In the previous lesson, episode 10, we created additional styles intended to apply to the index HTML file. As you've learned, that's the page that appears first when we launch our project on localhost:3000. We put the styles we created in our single CSS file, style.css. However, that file is also included in several of our other HTML files.
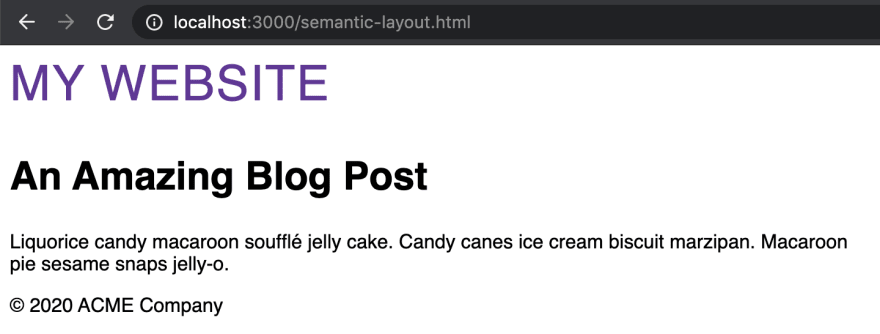
First, let's look at our semantic-layout.html file in the browser. All the type now uses a sans-serif font, and the h1 and h2 styles look like what we created in the last lesson.
Moving on to the blog-layout.html file, we see the same styles here as well. And you can probably guess, but if we open card-layout.html the styles are again being applied from the style.css file, including the :hover style on the link.
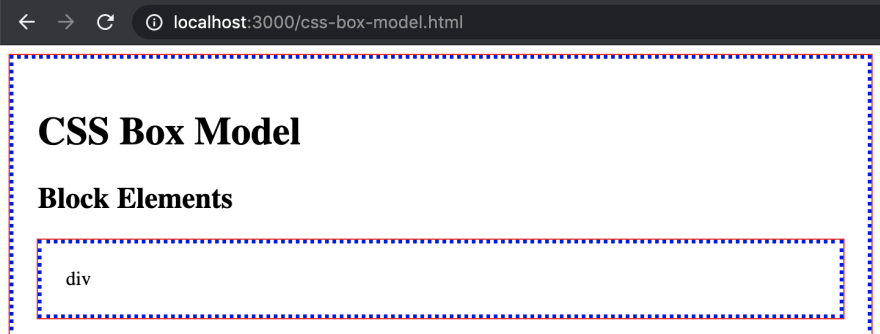
The exception is for our css-box-model.html file. If you recall, we removed the stylesheet link tag in the <head> and instead used the <style> tag to contain this pages styles.
Scoped styles
Using the <style> tag is one method of applying what's called "scope" to a set of styles. Only styles on the same page as the rules within the style tag can receive those styles.
Global styles
On the other hand, the reason we saw all the same style changes across the other files was due to them linking to the same style.css file. And within that file, use of element names as selectors means these styles were not scoped, but applied globally. Global application of styles means that, for example, every h1 the browser encounters will be styled as defined by the h1 CSS rule.
Typical web experiences use a mix of global and scoped styling. One way to begin to scope styles is by using classes, as we learned in episode 10.
Let's open the index file in the browser to review, and setup our screen to be split between VSCode and the browser. Then open the style.css file in VSCode.
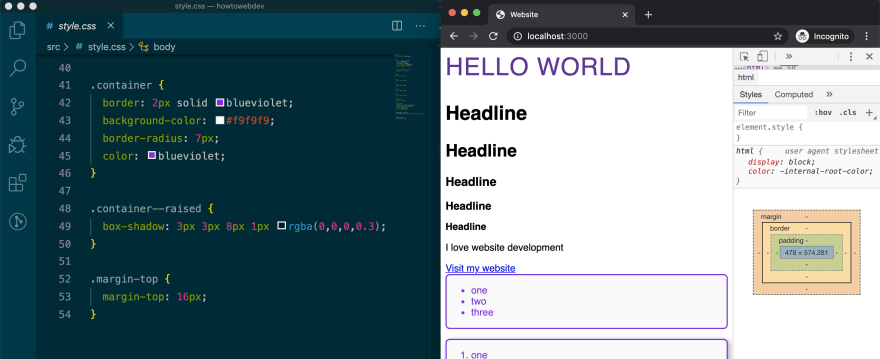
If we scroll down to our .container class rules, recall that we chose to create classes instead of just use div as the selector. The primary reason was that if we just used div then the styles created here would apply on any div the browser found, not just on this page, but across our application.
As an experiment, let's change the .container class to instead use div as the selector. We'll also comment out the .container--raised class. A reminder that comments are defined in CSS with /* comment text */.
div {
  border: 2px solid blueviolet;
  background-color: #f9f9f9;
  border-radius: 7px;
  color: blueviolet;
}

/* .container--raised {
  box-shadow: 3px 3px 8px 1px rgba(0,0,0,0.3);
} */
Save, and the page will not appear very different except for the loss of the box-shadow on the second div.
But now let's open the index.html file and add a div around the p.
<div>
  <p>I love website development</p>
</div>
Save, and see that it has picked up the styles that we only wanted applied to the divs around the lists.
Use of CSS classes prevents unwanted styles thanks to the scoping behavior.
Let's undo the changes we made by removing the div around the paragraph and re-instating the .container classes.
As for global styles, typography is an area where global application is typically desirable behavior, especially for rules such as font-family, font-size, line-height, and sometimes margin spacing. This assists in a cohesive reading experience across your website or application.
CSS Cascade Key #1
The way we added font-family within the body rule in the last lesson was actually your first rule taking advantage of the CSS cascade. The cascade refers in part to the behavior of descending styles inheriting from their ancestors.
Since body is a required parent tag for the entire HTML page, each typography element is considered a descendent and therefore inherits styles defined in body.
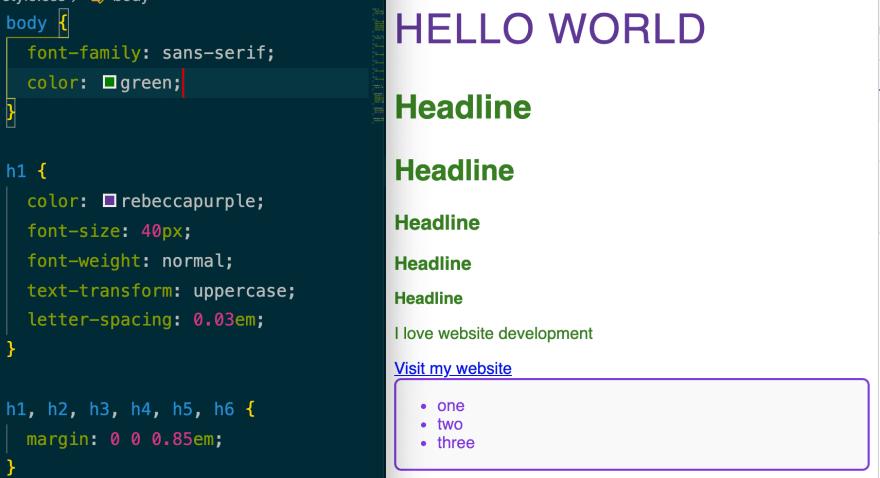
Let's demonstrate this by adding another property to our body rule.
body {
  font-family: sans-serif;
  color: green;
}
Save, and see heading levels 2-6 are now green, but not the other text found on the page because they are inheriting from scoped rules.
CSS Cascade Key #2
The second key to the cascade is that styles defined last for the same property applied to the same element "win" and are what is applied by the browser.
To demonstrate, let's add a new rule after our existing h1 rule for h2 :
    h2 {
      color: firebrick;
    }
Save, and see that the h2 is now a shade of red.
Next, at the bottom of our stylesheet add another rule for h2:
    h2 {
      color: palevioletred;
    }
Save, and see how the h2 is now a shade of pink.
CSS Cascade Key #3
The third key to the cascade is that the order of rules matters unless a rule with what's called "higher specificity" is used. Classes are one way to add specificity to a rule.
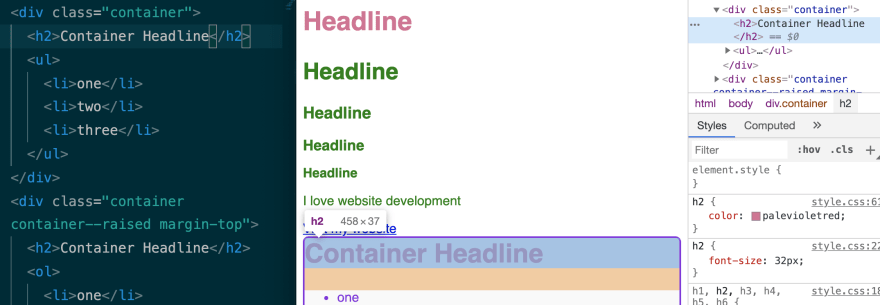
To demonstrate, let's add an h2 as the first item in the .container divs, using the text "Container Headline", and save.
Then, let's use Inspector to check out these new h2 tags. You may have expected the color to be blueviolet like the list text, but as Inspector reveals, the h2 rule for palevioletred is being applied due that rule for h2 following our .container rule.
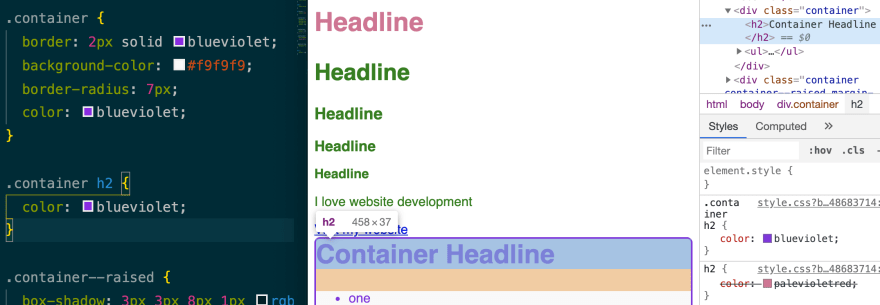
To change this behavior, we need to scope the h2 color to be specific to .container. To do this, we'll create a new rule which we can place after the existing .container rule, which will be:
    .container h2 {
      color: blueviolet;
    }
Save, and see that each container's h2 is now blueviolet.
This is because we've increased the specificity of the color definition by using a selector that says "apply to .container h2s" which is more specific than "apply to h2s".
We'll do one item of cleanup now that we've created this rule, which is to remove the color definition from the .container class, and extend our new rule to apply to .container as well.
.container {
  border: 2px solid blueviolet;
  background-color: #f9f9f9;
  border-radius: 7px;
}

.container,
.container h2 {
  color: blueviolet;
}
This reduced duplication assists in keeping related rules together, and also reduces errors in applying the cascade when you are explicit about how properties are defined.
There are a few more ways to increase specificity, and we will learn those and continue learning about how to be mindful of the cascade in our upcoming lessons.
Next up in Episode 12: Structure and Styling Considerations for Accessibility






Top comments (0)