So, we already configured the Spacelift environment and we run our first template through it. It is time to look around the Spacelift console a little bit.
In this episode we will take a look into Stacks and what information we can collect.
But the preparations first.
I've created a new branch and added this part to main.tf
resource "aws_s3_bucket" "mysecondbucket" {
  bucket = "thisismysecondtestbucketforspacelift"
}
And then I created another branch (from the newly created one) ad added outputs.tf with this content
resource "aws_s3_bucket" "mysecondbucket" {
  bucket = "thisismysecondtestbucketforspacelift"
}
I published my branches, of course.
Now, I merged the third branch to second one through Pull Request. Why I did this? To prove that Spacelift is smart :) With the configuration we did earlier, nothing should happen. And that is true, indeed.
Now it is time to create PR to main branch. This time something happened.
Navigate to PRs tab in Stacks section (select your stack, of course).
We have our PR here, in Spacelift! Let's click on it, and here we can see quite interesting things.
On the screenshots above we see details of the run performed against the code in PR. Spacelift did a terraform plan for us.
More tabs
We already visited Settings, Runs and PRs tabs. Let's take a look on other things there.
Tasks
In this tab we can run some commands against the collected inventory. By this term I mean the information and data which are available for Spacelift.
Let's take a look.
Of course the command is terraform output, I realized that typo after first run :)
And the effect is below.
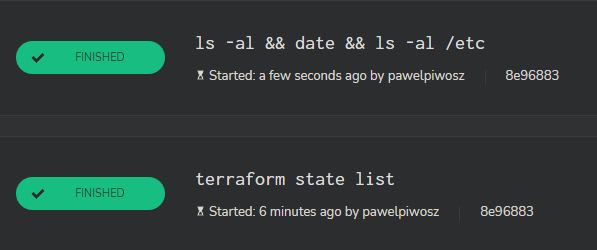
As we can see, the process is quite similar to normal run. In fact, we can call this functionality as 'ad-hoc execution'. So, if any one though how to deal with state file... Well, you can do it here. Let's try with terraform state list as an example.
Looks good, doesn't it? I miss one thing, though. Let me show you.
Imagine now even more crazy command. I would like to have an option to see these tasks by name. Why? Because we have possibility to re-run the task. With long and complicated command as title we need more "brain power" to locate and understand the task.
Environment
In this tab we see the default environment variables and we can define our own. Standard ones and secrets too. Nothing fancy, nothing different than typical behavior of CI/CD tool.
Resources
Here we can see graphical representation of resources created during the lifetime of the project. We can change the grouping and get details about each resource.
Outputs
Exactly the same like terraform output in case of our project. I do not like the layout, though. Seems to be incosistent with other pages of the service.
Dependencies and Notifications
At this point there is nothing much to say about them.
In Dependencies tab we can monitor, control and manage dependencies between stacks. In our case now, nothing is there.
We also do not have any notifications, so this tab is empty too.
Summary
We went through all functionalities in Stacks menu. We learn what information are there and how to get them and make useful. In next episode we will do something even more interesting :)


Top comments (0)