Until now, we’ve only been requesting data from our web application. What if we wanted to save some information instead? Using an HTML-first approach, we will lean on forms to collect data from users, but we still need somewhere to keep this data. The Begin CLI provides a way to scaffold these form-driven interactions quickly.
Scaffolding a form
The Begin CLI provides a scaffolding option to generate code for you to Create, Read, Update, Delete and List (CRUDL) data. For our web application, we want to set up a form where users can send us comments. The form will include the fields:
- Name
- Subject
- Message
With typical web application frameworks, this would be a chore, but with the Begin CLI, it’s a breeze. From the command line, execute the command:
begin gen scaffold Comment name:string email:email subject:string message:string
While the aws-sdk is being installed to simulate DynamoDB locally, let me explain a few things about this command. First Comment will be the name of the model the scaffold creates. This model will be codified under app/models/schemas/comment.mjs as a JSON Schema object. Each of the parameters after Comment will be split into a property name and type (e.g. property name “subject”, property type “string”). This JSON Schema document will be used to validate the form data both on the client and server sides.
You can specify a JSON Schema file as the input to the scaffold command. For example:
begin gen scaffold –file comment.schema.json
You may also notice an app/models/comments.mjs file as well. This is where we add the data access layer allowing you to store and retrieve comments from the database.
First, the command is going to set up a number of API routes:
- GET /comments - returns a list of comments
- POST /comments - creates a new comment
- GET /comment/:id - get comment with specific ID
- POST /comment/:id - update comment with specific ID
- POST /comment/:id/delete - delete comment with specific ID
You might wonder why the delete route uses a POST instead of a DELETE as it’s HTTP verb. It’s because your browser only supports GETs and POSTs. By limiting ourselves to these two verbs, we enable the progressive enhancement of our forms.
Our view code will use these API routes but they can also be called independently of our view code to provide a backend API.
On the view side, the scaffold creates two files.
-
app/pages/comments.mjswhere you can get a list of all the comments and create new comments -
app/pages/comments/$id.mjswhere you can edit a comment
Once the command is complete, your project should look like this:
12-days
├── app
│   ├── api
│   │   ├─– comments
│   │   │   ├─– $id
│   │   │   │   └── $delete.mjs
│   │   │   └── $id.mjs
│   │   ├─– about.mjs
│   │   └── comments.mjs
│   ├── elements
│   │   ├─– my-footer.mjs
│   │   ├─– my-header.mjs
│   │   ├─– page-wrapper.mjs
│   │   └── social-links.mjs
│   ├── models
│   │   ├─– schemas
│   │   │   └── $comment.mjs
│   │   └── comments.mjs
│   └── pages
│       ├─– comments
│       │   └── $id.mjs
│       ├─– about.mjs
│       └── comments.mjs
│       └── index.html
└── public
Wow, that’s a lot of code I didn’t need to write.
Test Driving your form
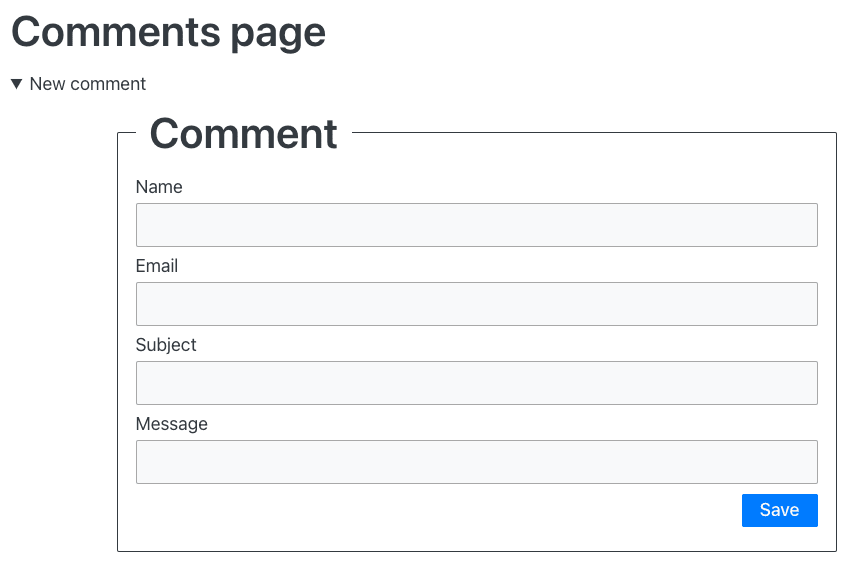
Open your browser to http:/localhost:3333/comments and you will see a page that looks like this once you expand the new comment section:
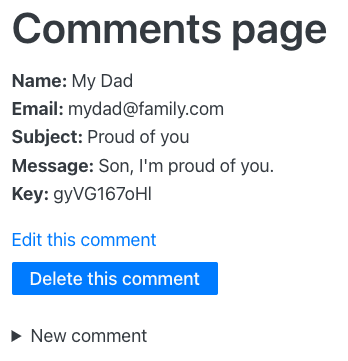
Go ahead and fill in the form, then click the Enter key to submit the form automatically. Did you type in a valid email address? If you didn’t you’ll notice the form was prevented from submitting because you didn’t follow the email format. If you did, your comment will be saved and you’ll be redirected back to the list of comments.
Editors Note: We reached out to Simon’s father to verify that he is indeed proud of him but we received “No comment” as a reply.
Play around exercising your form, where you can create, update, and delete comments. Then go to your browser tools and disable JavaScript. Try to create, update and delete comments.
It. Still. Works.
What magic is this? No magic, just an HTML first driven approach so that your application always works no matter what.
Next Steps
Come back tomorrow, and we’ll teach you how to progressively enhance your submit button to avoid a full page refresh when adding a new comment.
Homework
You are getting good at Enhance by now, so here’s some additional homework for you:
- Add a link to your comments page in the header component.
- Wrap the new comments page in the page wrapper component.


Top comments (0)