Now that we've had an opportunity to see howe we can implement webhooks using Amazon Web Services, we're going to replicate the process with Google Cloud. Much of the process will be very similar -- only using Google's version of the same or similar services to what we used with AWS.
Note: just like with AWS, the features we will be working with may require a credit card on file with Google Cloud to activate. However, our testing should not reach a level that would invoke actual charges on your account.
How it works
The Google Cloud products we will be using for this demonstration will be: Cloud Functions, and Cloud Pub/Sub.
Cloud Functions is Google's version of Lambda, and allows for us to execute serverless code running on Google Cloud's hardware. We will also be using node for our implementation, but Cloud Functions supports Go, Java, and Python as well.
We will be connecting our Cloud Function to a Cloud Pub/Sub topic, which will be how we invoke our function.
Cloud Pub/Sub is a messaging service for Google Cloud, and functions in a similar way to Amazon's Simple Queue Service, only with less focus on the queueing functionality (which we will not be needing anyway).
Step One: Create a Project
Google Cloud manages resources differently from Amazon Web Services. In AWS, resources are defined globally on the account and segmented by regions.
In Google Cloud, resources are managed in projects. A project is a separate entity within your Google Cloud account, and any resources you use (compute, networking, storage) are only available within that project.
That means, in order to start working with Cloud Pub/Sub and Cloud Functions, we first need to a project.
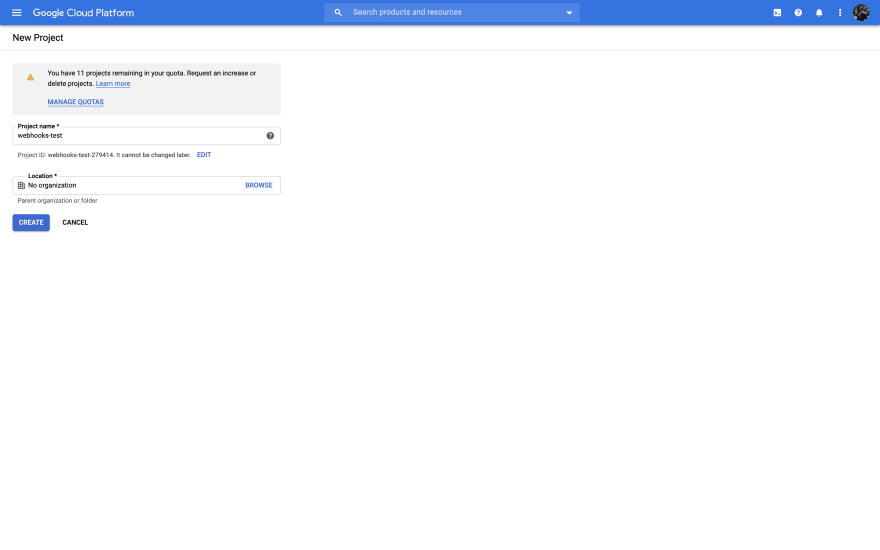
If you've never worked with Google Cloud before, you will be prompted to create a project when you start. If you already have an account, you can create a new one by clicking the dropdown menu next to the page title and selecting "New Project" in the top-right corner of the dialog.
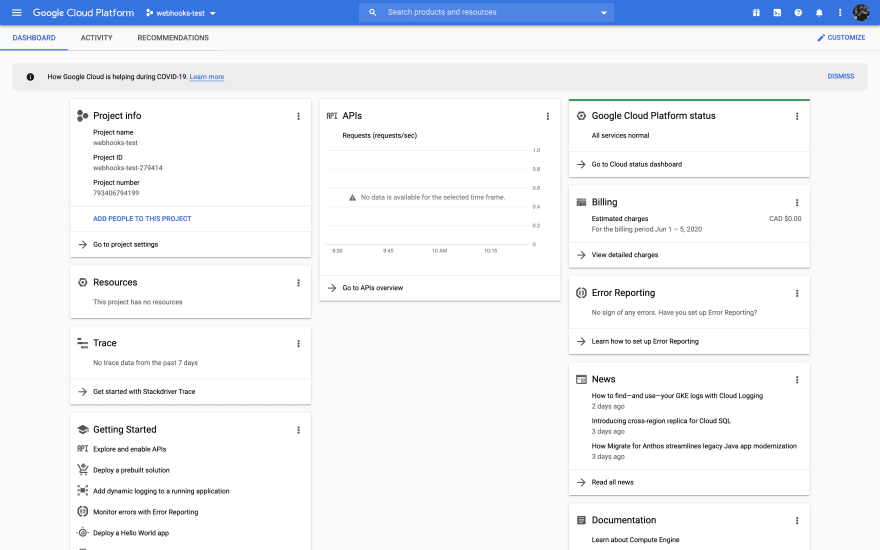
Give your project a name, and then click "Create". Once your project finishes being initialized, you'll be greeted with your new project's dashboard.
We're now ready to begin!
Step Two: Create the Pub/Sub Topic
In order to trigger our webhooks to fire, we'll be making use of Cloud Pub/Sub as a messaging bus. Messages sent to Pub/Sub are organized using "topics".
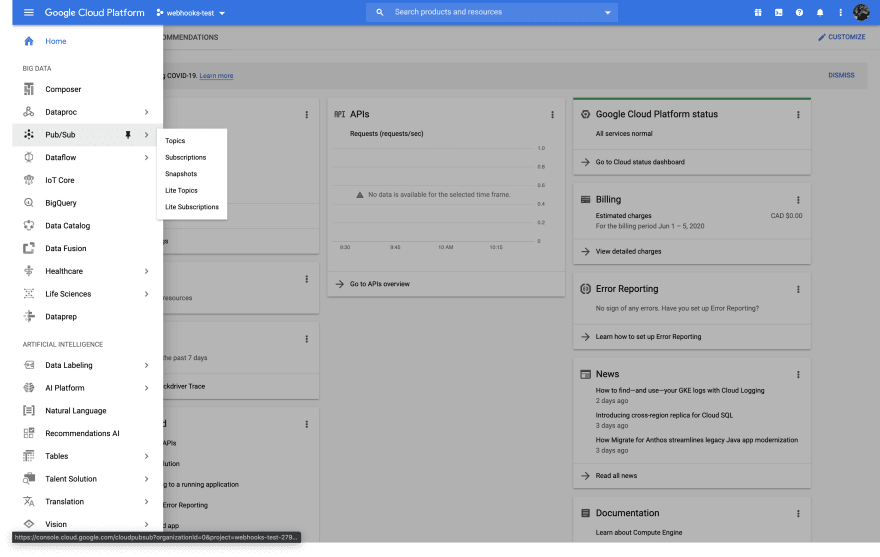
Open up the side navigation in Google Cloud and launch Pub/Sub (located under the "Big Data" header).
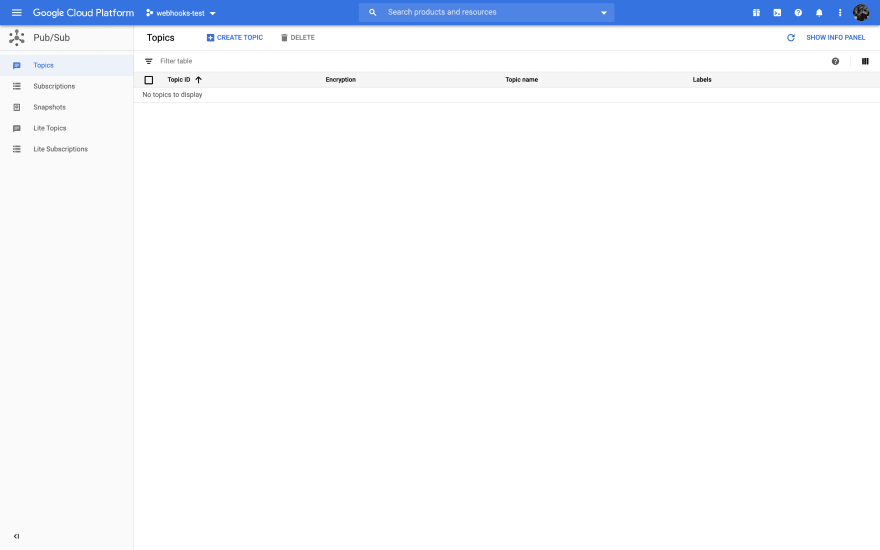
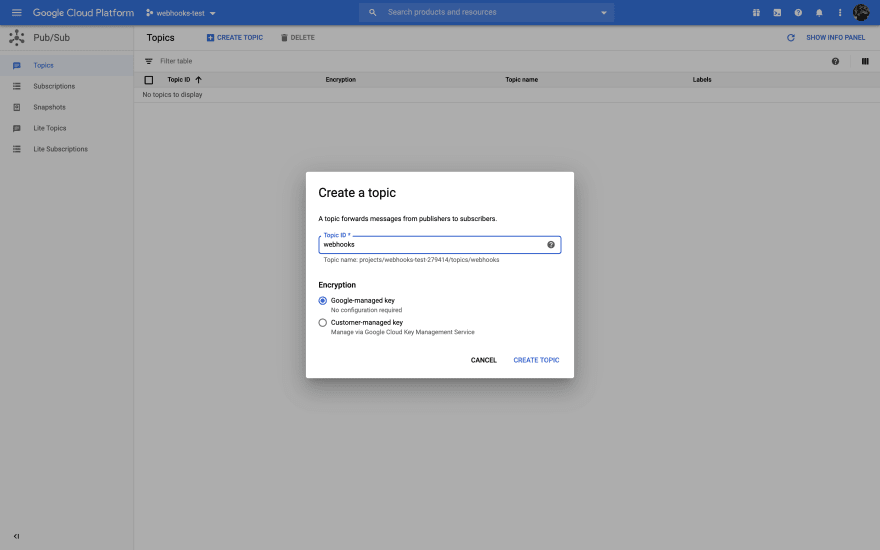
next, select "Create Topic" from the Pub/Sub landing page to create our webhooks topic.
Give your topic a name, and leave the encryption options as the default.
Your topic will take a few seconds to be generated, and then you'll see the topic dashboard.
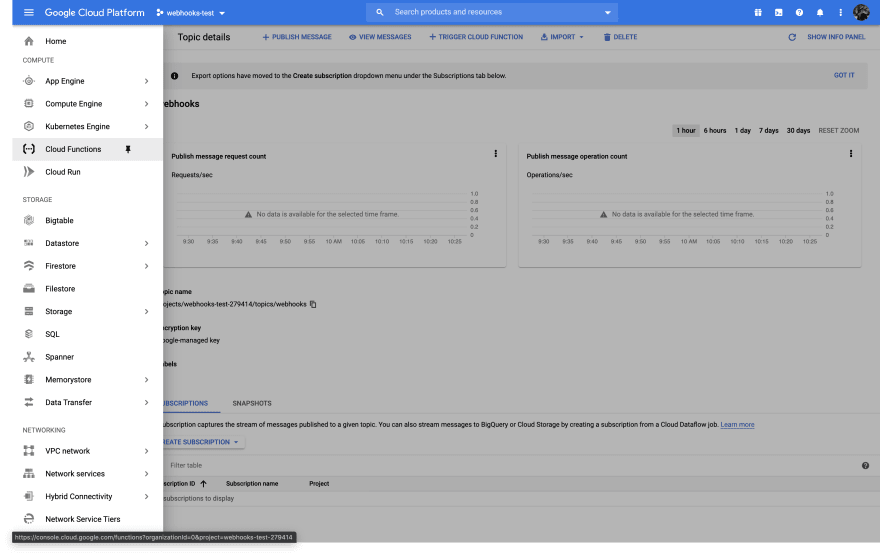
Note: it's so common for Pub/Sub to be connected to a Cloud Function that there are helpful shortcuts built into the page near the top!
Step Three: Configuring our Cloud Function
Now that our topic has been created, and we have a way to dispatch messages through our Google Cloud infrastructure, we need to build our message consumer so we can actually do something with those messages.
Open our side menu back up and navigate to Cloud Functions (located under the "Compute" header).
You'll be dropped on the empty list page for your project's Cloud Functions, so let's create one now.
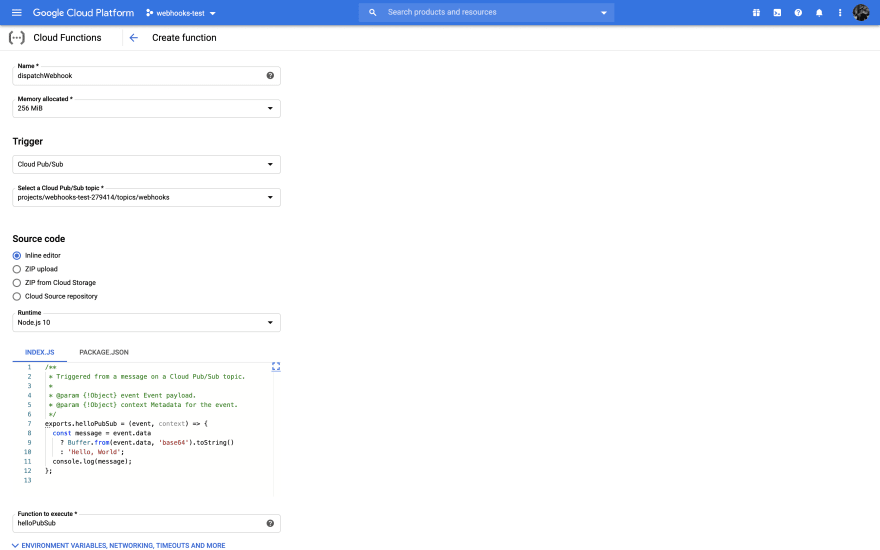
Start by giving your function a name, and then leave the "Memory Allocated" as the default value of 256 MB.
Next, change the value for "Trigger" from "HTTP" to "Cloud Pub/Sub", and then select the topic we created earlier.
Leave the rest of the values as their defaults, and click "Create" at the bottom.
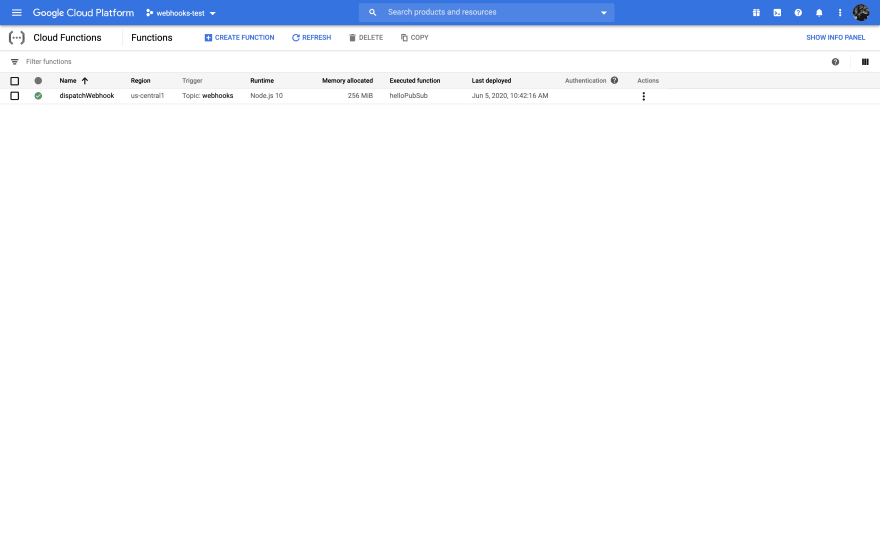
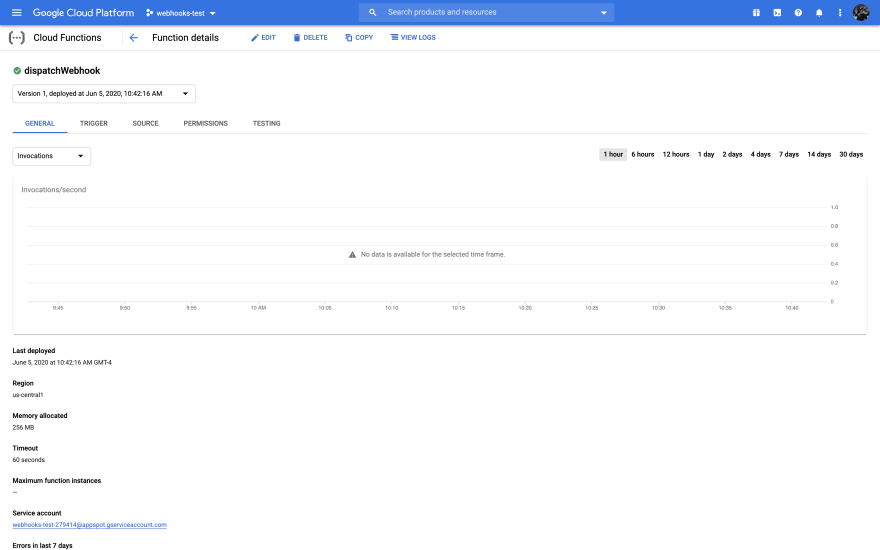
Your function will take a few minutes to prepare while Google Cloud initializes the environment. Once it's done, open up the function to review it's dashboard.
At this point, our function is still using the default "Hello Pub/Sub" function it was created with. We'll need to update the function to send our webhook instead.
Just like with AWS, we'll use a very simple node script to push our requests to our webhook endpoints.
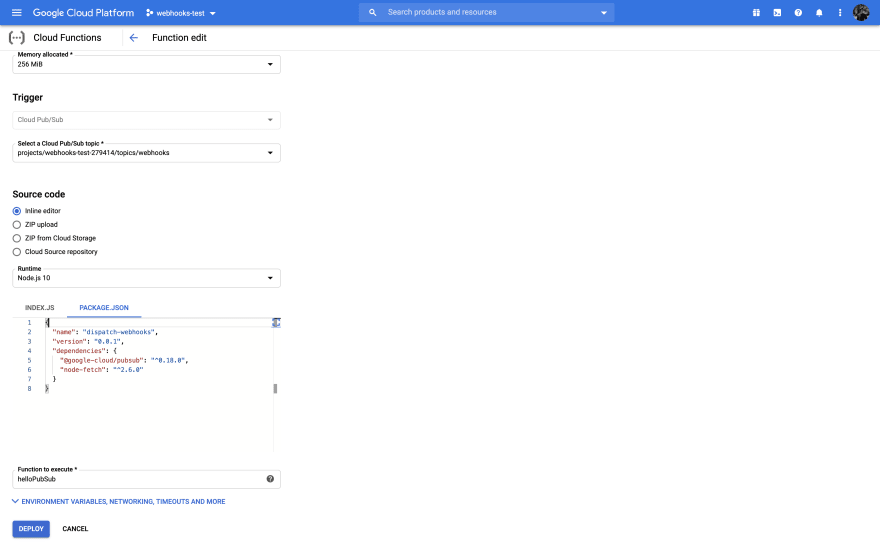
Our first step will be to modify the package.json file. The end result should look like this:
{
  "name": "dispatch-webhooks",
  "version": "0.0.1",
  "dependencies": {
    "@google-cloud/pubsub": "^0.18.0",
    "node-fetch": "^2.6.0"
  }
}
We'll leave the Pub/Sub dependency that's already there, and add our "node-fetch" package.
Next, we'll update our source code using the following simple script:
const fetch = require('node-fetch');

exports.dispatchWebhook = (event, context) => {
  const endpoint = event.attributes.endpoint;
  const eventName = event.attributes.event_name;
  const data = JSON.parse(Buffer.from(event.data, 'base64').toString());

  const headers = {
    "Content-Type": "application/json"
  };

  fetch(endpoint, { method: 'POST', headers: headers, body: JSON.stringify(data) })
    .then((response) => {
        console.log("Dispatched webhook for [" + eventName + "]: " + response.status);
    })
  ;
};
This script doesn't actually do very much. It pulls some event attributes for us from the Pub/Sub message (stored as the event object), and deserializes the body which is encoded.
Then, it pushes the data to the endpoint from the attribute and logs the eventName attribute.
Now that we know what our code will be doing, we can click the "Edit" button in the function toolbar, and then update our function. We'll start with the package.json, and then the index.js file.
Note: Remember to update the "Function to Execute" field with the name of our exported node function.
Once you're done, click the "Deploy" button to update our function.
Note: you may have noticed that unlike in our AWS example, Google Cloud manages our "node_modules" dependencies for us when using node as our runtime. This means we don't need to upload those dependencies in a zip like we had to with Lambda.
Step Four: Test our Solution
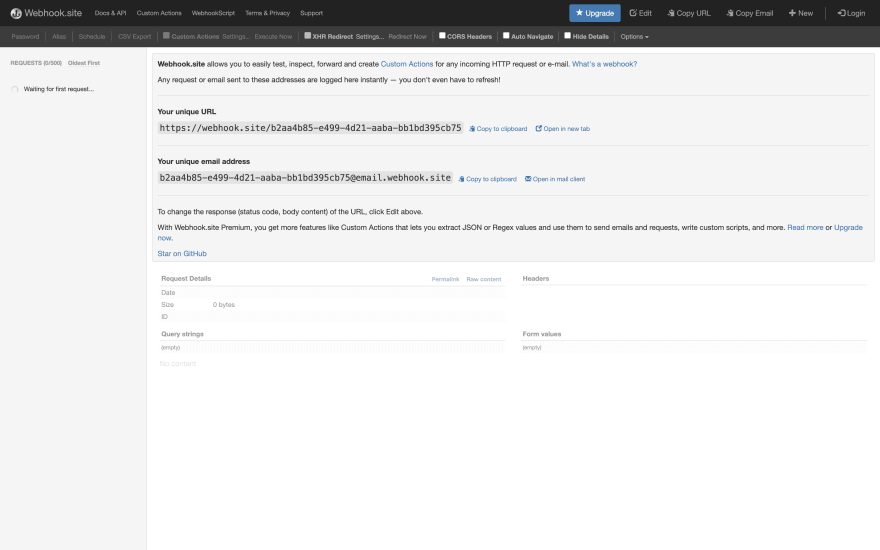
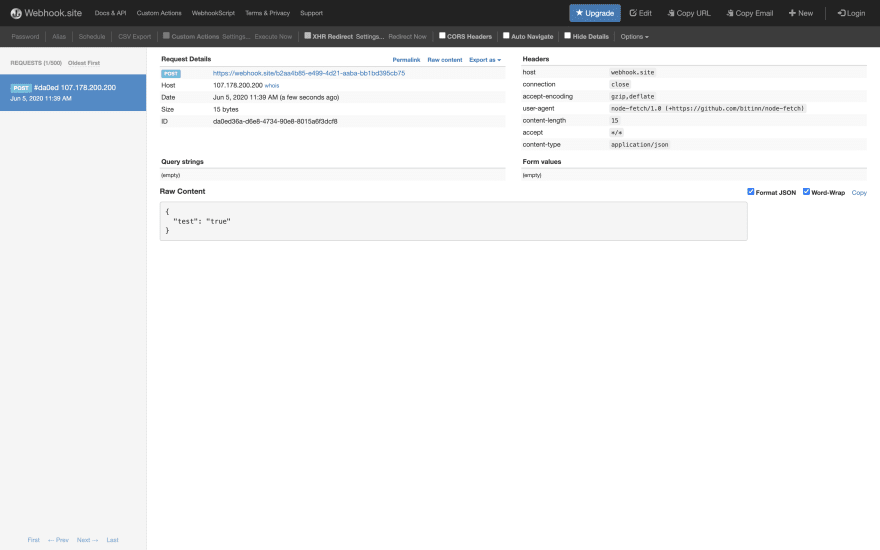
We're going to use the same tool to test our Google Cloud backed webhooks as we did with AWS: webhooks.site.
Head there now to generate a new test suite, and copy the endpoint URL from the page.
Next, we'll jump back to Cloud Pub/Sub and open up our topic.
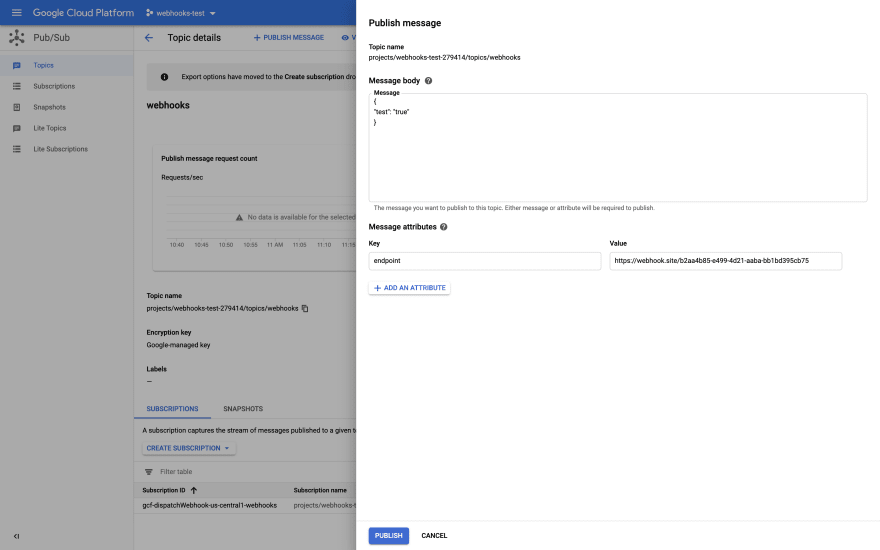
In the top header bar for our topic, click the "Publish Message" button to test our solution the same way we did with SQS on AWS.
In the "Message Body", add whatever data you want to test with. In my case, I'm testing a simulated JSON webhook.
Next, add an attribute called "endpoint", which we've told our function to look out for, and will contain the destination URL for our webhook event.
Click "Publish" to send our message, which will trigger our function and submit the request to our webhook.site endpoint.
After a few seconds, we should see our request in our webhook.site dashboard, confirming our backend functioning as expected.
Finally, we can review the results of our function's execution by navigating back to our function, and clicking "View Logs" from the top bar, which will bring us to Google Cloud's log viewer.
Note: Notice anything? Our function was successfully logged, but our log line says "Dispatched webhook for [Undefined]". This is because we did not test our Pub/Sub message with an "event_name" parameter, which our function uses to log. Oops!
Conclusion
Similar to AWS, our final step is to connect our own application to this infrastructure we've just built.
Google provides a number of SDKs in popular languages to support the seamless integration of Google Cloud with your products. Simply download the one that makes sense for you, connect it to your Google Cloud account, and start pushing messages to Cloud Pub/Sub.
Whether you prefer AWS or Google Cloud (or even Azure, Digital Ocean, or someone else), setting up your infrastructure to support webhooks is simple.
Extensibility should be considered an essential component in any software solution. The needs of your users will often evolve in ways that you won't anticipate, and trying to plan for everything is good way to end up overwhelmed and exhausted.
In less than half an hour you can set up a quick implementation to start adding webhooks to your application's lifecycle and immediately start working with external solutions to your users' needs.
Interested in learning more about my thoughts on extensibility and my other pillars of software design? Check out my take on Pragmatic Software Design!






Top comments (0)