Canonic:The simplest way for agile teams to build internal tools.
You can model your database in form of tables. The Graph tab is the default page that will pop up once you are inside your project. Working on a graph with Canonic comes at super ease with a mindmap-like interface.
Let's look into the various aspects of building a table, the required setting, and more.
→ Once you are inside your project in Canonic, you will see something like this:
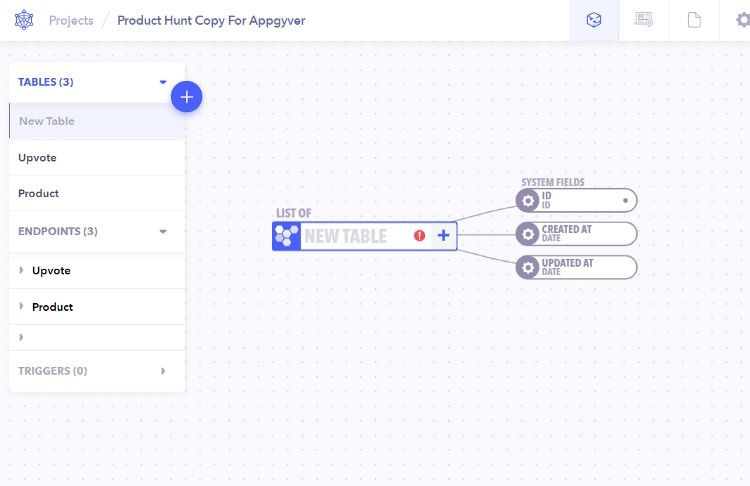
Step 1: Create a table for your database
Click on the + icon on the left-hand side panel. It will give you the following three options to choose from:
+TABLE
+ENDPOINT
+TRIGGER
While we will look into each of them in our upcoming articles, in this one we will explore the table section of the graph.
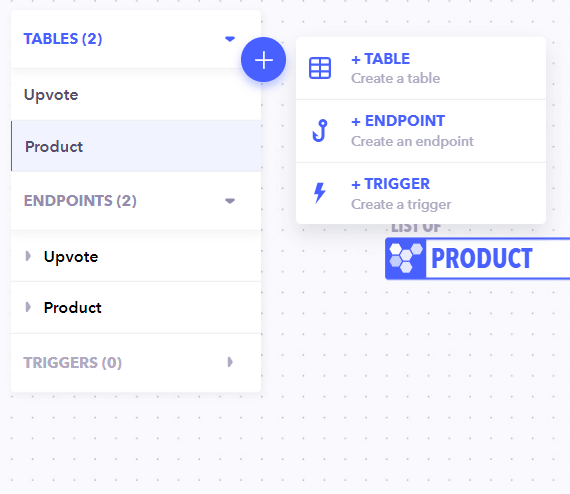
Select the first option - TABLE to create a table to hold all your fields.
Name the table and select the type:
Individual Tables: Stores a single piece of content for the graph that you define.
List Tables: Stores an array or a list of content entries for the graph that you define.
Identity Tables: A unique type of User table that enables you to manage and store your users' data as well as support multiple login providers.
You'll also have to define the KEY, a unique identifier that is used in APIs
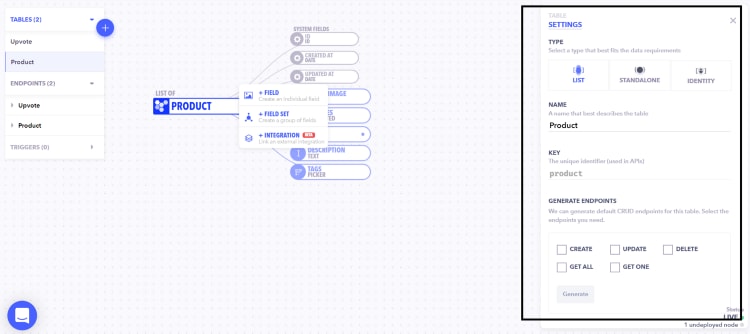
Step 2: Explore the Table settings
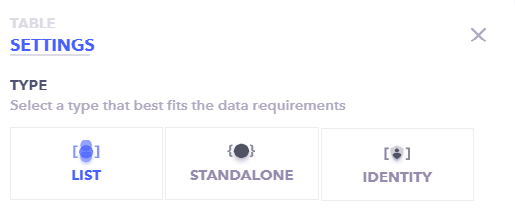
This is what the setting section looks like on the right-hand side panel:
The first option you get is to select the Type that fits best the data requirements, within which you've three options:
- LIST
- STANDALONE
- IDENTITY
→ Use LIST: If multiple data points can be defined

→ Use STANDALONE: If there's only a single data point per project

Next, you've to give the NAME & KEY for your project:
NAME - Choose a name that best describes the table
KEY - The unique identifier (used in APIs)
How to Modify your generated Tables:
If you wish to edit your created tables:
-> Editing Table - The table can be edited by clicking on the table and an editing panel will appear on the right side. There is a properties panel at the bottom of the table where all the necessary fields can be edited.
-> Deleting a Table - You can delete a table by right-clicking on it and selecting delete. All fields and fieldsets within the table will be deleted permanently.
Generating Endpoints for your database table
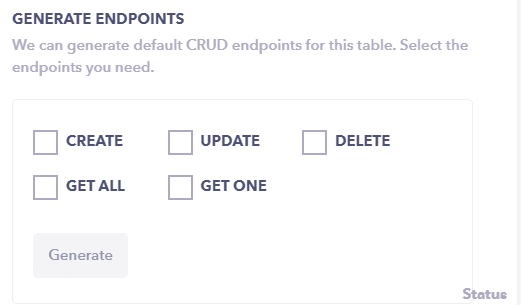
The last option in the table setting is 'GENERATE ENDPOINTS'. Here, you can select the endpoint that you require. In Canonic, you can generate default CRUD endpoints for the table:
CREATE, UPDATE, DELETE, GETALL, GETONE
Choose the one you require and hit 'Generate'. These endpoints can also be generated later on as you move ahead with your product development.
Step 3: Create Fields for your database table
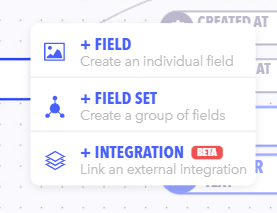
When you'll click the + button next to the table node on the graph, you'll get three options:
- Field - Choose when you want to create an individual field.
- FieldSet - Choose when you want to group the fields.
- Integrations - Choose when you wish to create an external integration.
Set 4: Exploring Fields and FieldSets
Fields define what data your table will contain and can be of different types such as text, image, file, date, time, etc. They directly impact how the CMS and the APIs work.
Click the + button next to a table or fieldset node on the graph to create a field. A new field will appear on the graph with the properties panel visible below it. Fill in the fields as needed and close the properties panel to save your changes.
When a table entry is created, all fields support setting default values that will be used if no value is provided for the field.
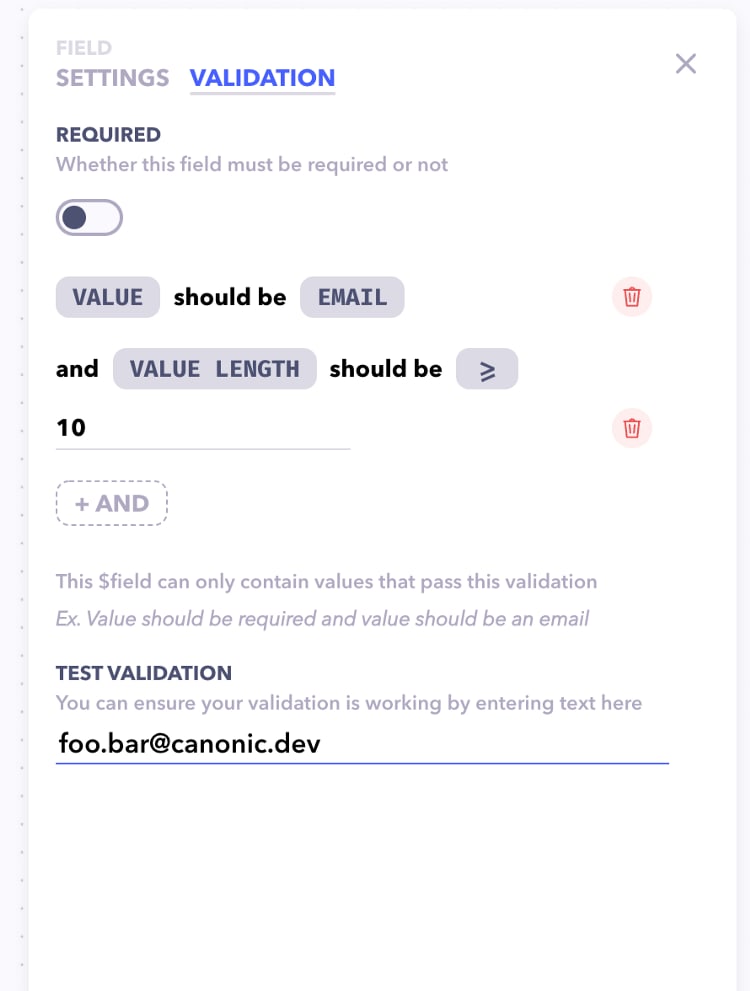
Field Validation:
By adding validations to the field, we ensure the correct data is being saved corresponding to the field.
FieldSets:
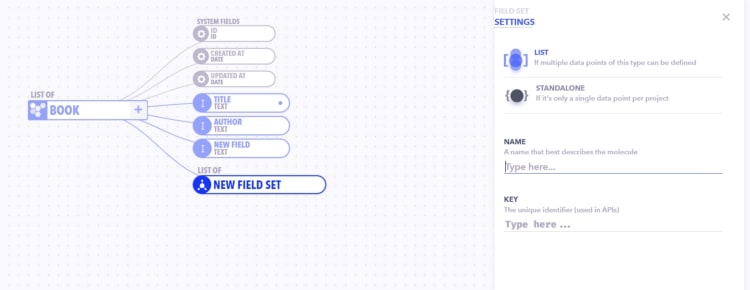
You can either use FieldSets to group together some fields based on semantics or to store a list of entries for that group of data. When you create a FieldSet, you'll see a section on the right that lets you select the type of FieldSet you're looking for:
List - To define multiple datapoints
Standalone - To define a single data point
Other than the type, you will have to give a 'Name' that describes the fieldset and the KEY as the unique identifier used in APIs.
FAQs:
1. How to link a database table to other tables?
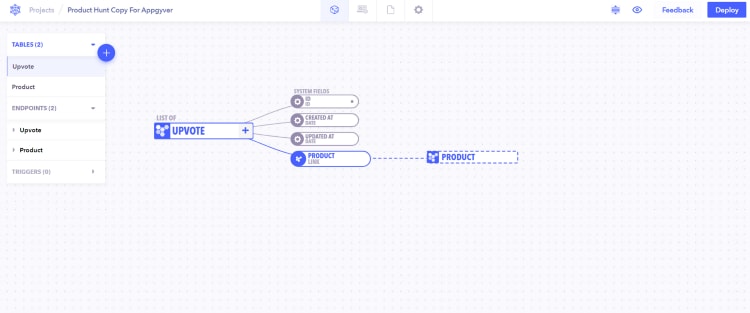
Tables in databases are often linked together using foreign keys; in Canonic, this is done using Resource Fields, allowing the field to contain the information that's populated from your other tables.
How to create a link:
- Make sure the table you're linking has been created.
- Create a new Resource field that will act as the foreign key.
- Now to create a Resource field - In the type properties of that field, select the table you wish to link to from the dropdown list.
- Publish your graph.
- You can now create CMS entries. Dropdown options for the field will be synced with entries for the table you linked to and will be presented as a drop-down in the CMS.
2. What are computed fields?
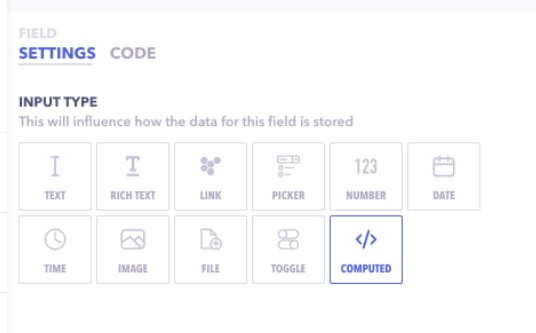
A computed field is the one that is computed whenever you request it. You can create a computed field by marking the input type as Computed while creating a new field. This computed field will always return an object and one can't directly set a value to these fields.
Learn more about computed fields here
And with that, you've modeled your database table 💃
Thanks for reading! We hope you're able to build the tables for your projects at ease.
You can also integrate your external databases with Canonic, know-how 👇
Integrating external databases with Canonic
If you have any suggestions, or feedback for us please feel free to reach out, it's always great to hear back from you.👯♀️
Give Canonic a try? 🚀



Top comments (2)
This post gives me a queasy stomach because of all the pain that will be foisted upon maintainers when they inherit badly designed data models created by the CEO's lowbrow cousin.
Interesting thought!