Resource locks protect your Azure resources from accidental deletion or modification. With Resource lock you can manage locks at subscription, resource group, or individual resource levels within Azure portal.
In this guide we will be creating a resource group, add a lock to it and test deleting a resource in the resource group
Creating a Resource Group
Step 1:
Visit portal.azure.com, login or sign up if you don't have an account, you can get a free account at azure.microsoft.com/en-us/free/
Step 2:
On the Azure portal page click the search box and enter resource group, then click resource group
Step 3:
On the resource group page click create
Step 4:
Enter any name of your choice for your resource group, and select any region of your choice, then click review + create button
Step 5:
After validation has passed click create button
Step 6:
After the resource group has been created, click go to resource group
Adding a Delete Lock
Step 1:
On the resource group page click locks on the left side
Step 2:
On the locks page click add
Step 3:
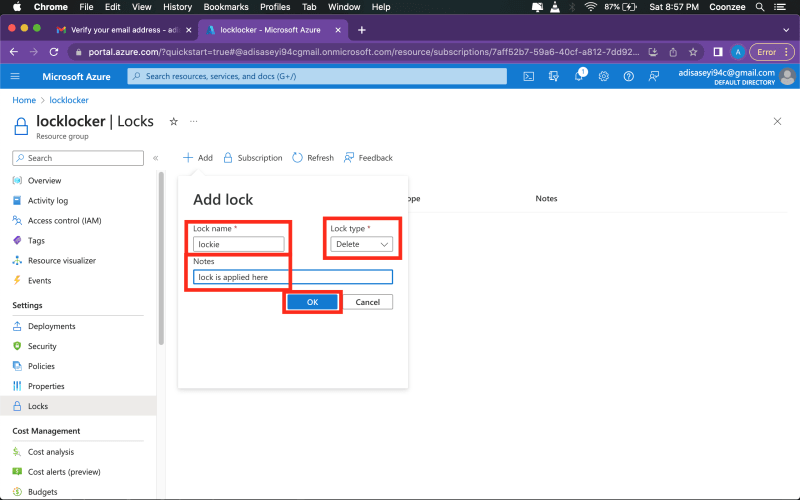
Enter a lock name of your choice, lock type select delete, then add a note and click ok
Test deleting a resource in the resource group
Step 1:
Go to Azure portal page click the search box and enter storage account, then click storage account
Step 2:
On the storage account page click create button
Step 3:
Select the resource group we created earlier
Step 4:
Enter a storage account name of your choice, select any region of your choice leave other settings as default, then click review
Step 5:
After validation has passed click create button
Step 6:
After deployment is completed click Go to resource button
Step 7:
Click delete button
Step 8:
Viola!!! the resource can't be deleted


Top comments (1)
good