HTML (HyperText Markup Language) is one of the popular languages to create a website. It sounds like HTML is only for developers, however, even a non-tech website owner should know how to use the HTML editor to add HTML to their WordPress site to help them out in many cases.
Specifically, when you need to handle some work, such as creating tables, changing font styles or font sizes, adding custom borders, etc. but WordPress doesn't support these customizations, so you need to use the HTML editor. You can add and edit the HTML code in post/page editor and widgets. But first of all, there are a few things that you need to keep in mind when adding HTML code to your WordPress website:
Note When Using the HTML Editor for Your Website
To ensure the HTML code displays on the WordPress site properly as you want, you need to check whether the syntax is correct or not by using code editors like Notepad ++. The incorrect syntax may cause errors in the website's display.
Second, you shouldn't write the <script> tag in the HTML code that you use in the HTML editor because it may be deleted and then your content will fail to display as expected.
Now, I will show you how to use the HTML editor to add the following code to create a simple table. This is just my example, you can try with your own code.
 <table style = "background-color: # 87ceeb;">

  <tbody>

    <tr>

      <td> Books </td>

      <td> Authors </td>

    </tr>

    <tr>

      <td> The magical power of emotional appeals </td>

      <td> Roy Garn </td>

    </tr>

    <tr>

      <td> How to win friends and influence people </td>

      <td> Dale Carnegie </td>

    </tr>

  </tbody>

</table>
Use the HTML Editor in Pages or Posts
You can add HTML to posts or pages by using the WordPress editor. The manipulation is just as simple as when you write and add a post on WordPress. It's supported by both Classic and Gutenberg editors.
Use Gutenberg Editor
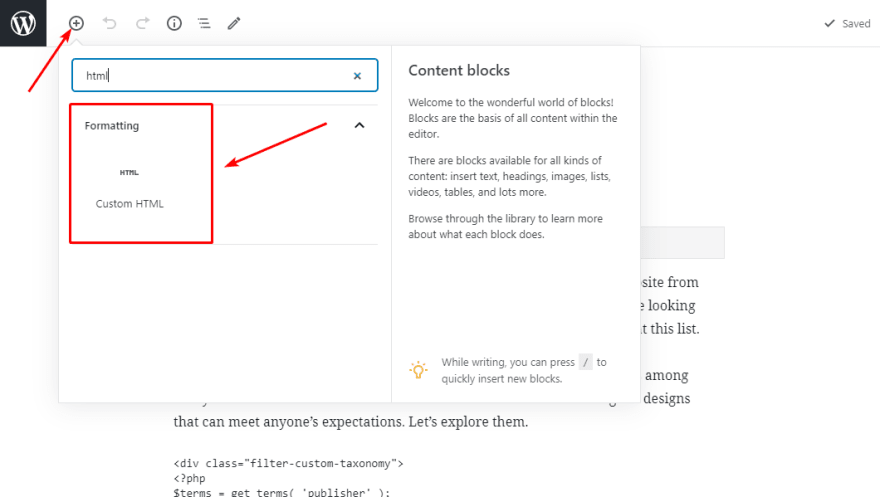
In the post/page editor, click the plus (+) symbol to add a new block and select the Custom HTML block. You should use the search bar to find it quickly.
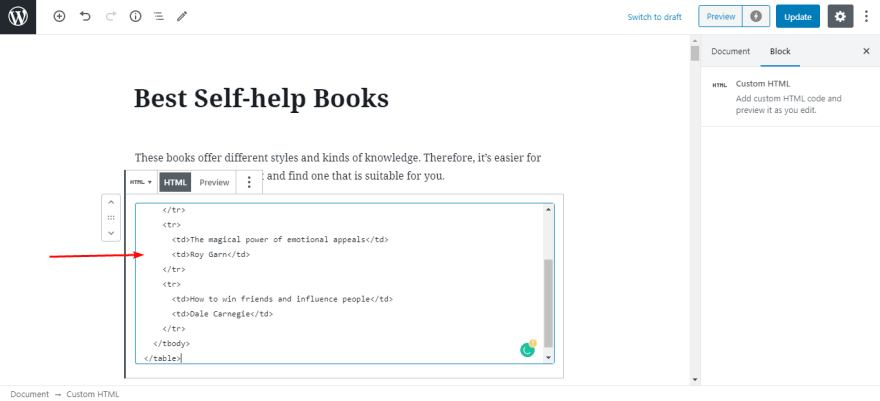
Then, insert the HTML code into the selected block.
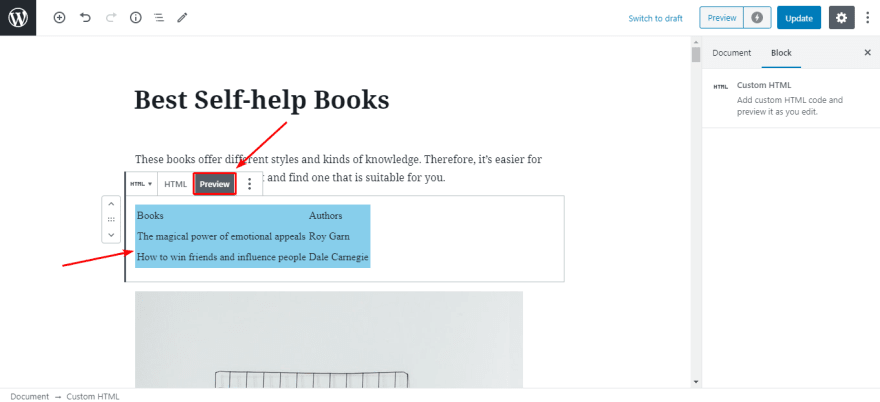
Click Preview to see how the HTML code is displayed on the front end.
Use Classic Editor
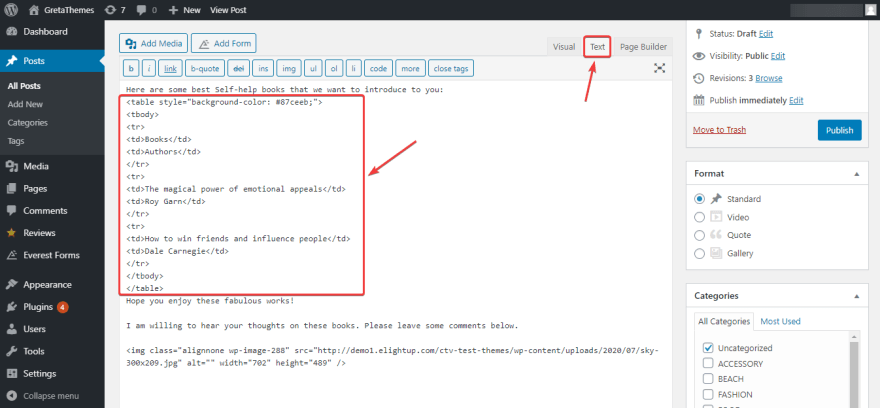
Many people are not familiar with WordPress's new Gutenberg editor, so they may switch from Gutenberg to Classic. Inserting the HTML code into the Classic editor is more simple than using Gutenberg. You only need to open the posts editor, click on the Text tab, then add the code to the position you want:
Click the Visual tab to see the result.
Save and Check the Result
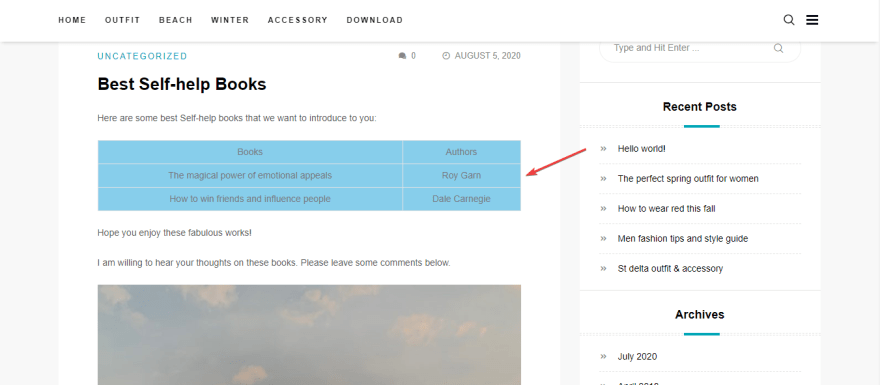
After finishing, remember to click Save or Update to save the content. Now the table is displayed as you want on the front end.
Use the HTML Editor in Widget
Widgets are the blocks of the content like media, text, links, lists, ... that can be added in the widget areas like sidebar, footer, slide-out menu, ... depending on your WordPress theme. You can add HTML into the widget in the Customizer or Admin Dashboard.
Use the HTML Editor in Customizer
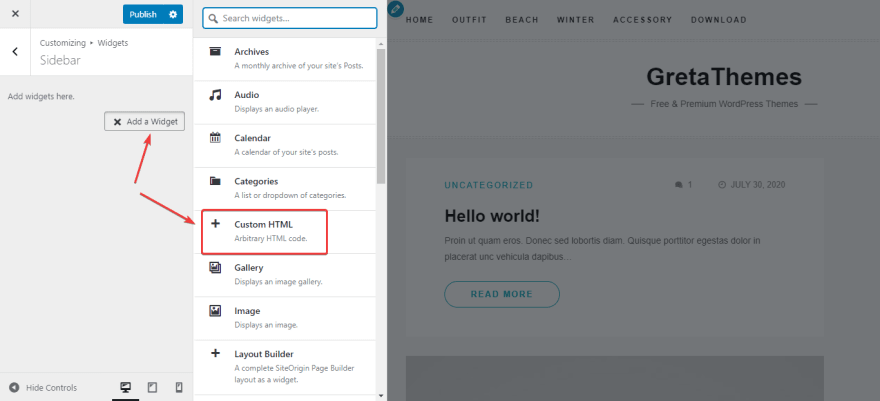
You need to add the Custom HTML widget to a widget area. It's basically similar to adding other widgets by Customizer. If you haven't known clearly how to use Customizer yet, let's check out our very detailed instructions here.
Go to Customize> Widget, select the widget area, and click Add New button.
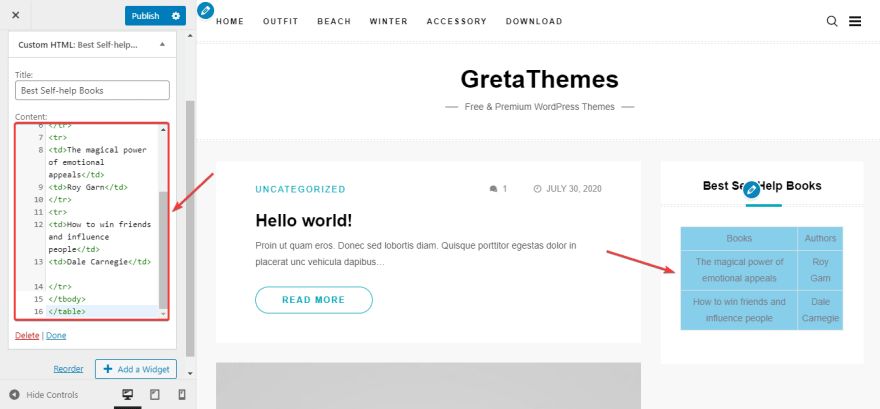
After you add the HTML code in the content box in Custom HTML widget, the table will be displayed in the sidebar as below. Don't forget to click Publish to save it. And that's it!
Using the HTML Editor in Admin Dashboard
In Admin Dashboard > Appearance > Widget, choose Custom HTML (1), select the location you want to display it (2), and click Add Widget (3). Then, add the code to the content box of Custom HTML widget (4) and press Save to finish.
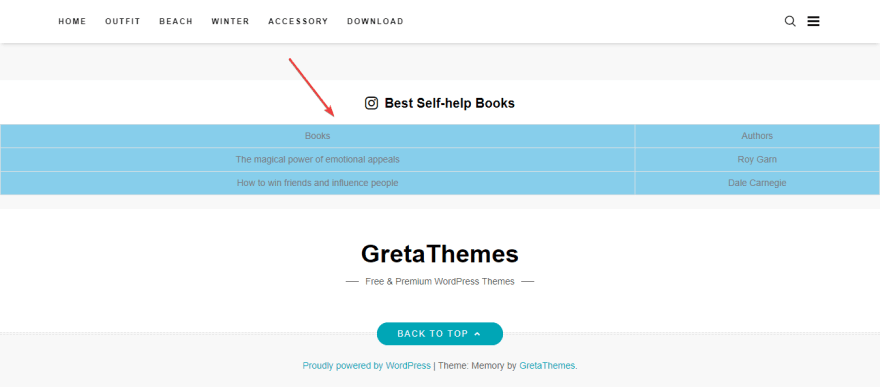
After that, go to the front end and check the results. The table is displayed in the footer.
As you can see, using the HTML editor in Dashboard is a little bit inconvenient because you cannot view the live preview on the front page, so I prefer the Customizer.
Last Words
Knowing how to use the HTML editor to add code to your website can help advance your website and improve the content and images significantly. Then, the rest of this work will depend on your coding skills to add and customize your content.
The publication at GretaThemes.






Top comments (0)