If you're diving into React, you might have come across some confusing concepts. Don't worry—I'm here to break it all down for you! With 8 years of experience under my belt, I’ll make sure you understand React in a clear, digestible way.
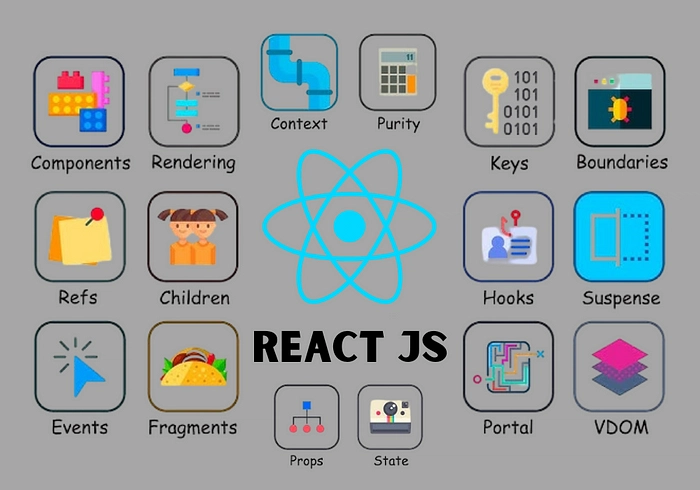
Let’s go over the essential React concepts one by one.
1️⃣ Components: The Building Blocks of React
In React, components are the heart and soul of your app. They're the modular units that represent parts of your UI, like buttons, inputs, or even entire pages.
- What are they? Components are JavaScript functions that return markup. Think of them as the "Lego blocks" of your app—you can reuse them as many times as you want. The more components you create, the more manageable your app becomes.
2️⃣ JSX: JavaScript with a Touch of HTML

React uses JSX, which is a special syntax that looks similar to HTML but has some unique properties. JSX allows you to write components with HTML-like syntax in your JavaScript code.
-
Why use it? While JSX is optional, it’s preferred because using plain
createElementcalls can get cumbersome. Plus, JSX enables you to combine HTML structure with JavaScript logic seamlessly. -
Important note: In JSX, you need to use camelCase for attributes, so
classbecomesclassName, andforbecomeshtmlFor.
3️⃣ Curly Braces: Making React Dynamic
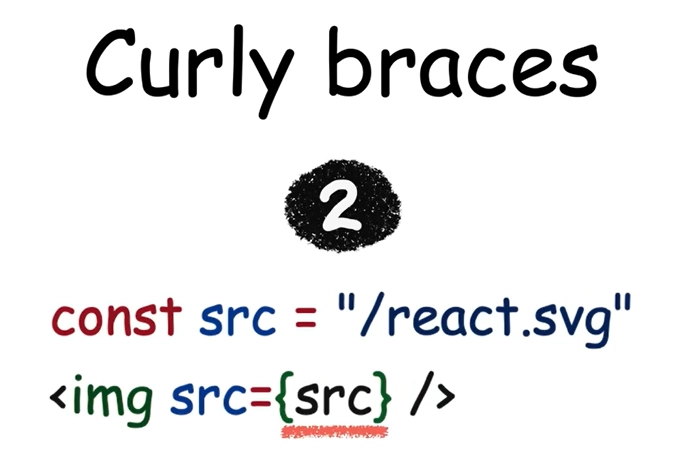
React allows you to use dynamic values in JSX through curly braces {}. This makes it easier to inject JavaScript variables and expressions into your markup.
- Example: If you have a variable holding a user’s name, you can display it in your JSX with curly braces:
<p>Hello, {userName}!</p>
You can also use curly braces to pass dynamic values to attributes and apply inline styles.
4️⃣ Fragments: Avoid Extra DOM Elements
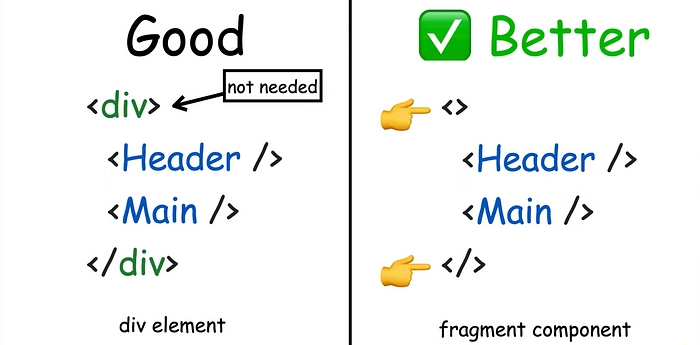
In React, every component must return a single parent element. This can be restrictive if you don’t want to add unnecessary wrapping elements like <div>.
-
Solution: Fragments let you return multiple elements without introducing extra nodes in the DOM. You can use
<React.Fragment>or the shorthand<> </>to wrap your elements.
Example:
<React.Fragment>
  <h1>Title</h1>
  <p>Some content here.</p>
</React.Fragment>
5️⃣ Props: Passing Data Between Components
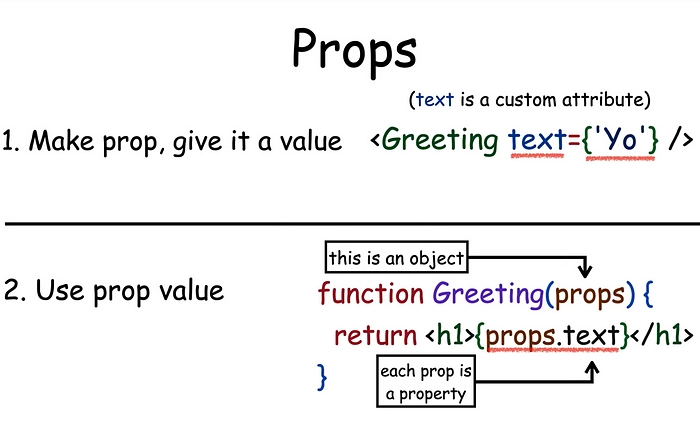
Props (short for "properties") allow you to pass data from a parent component to a child component. They’re immutable, meaning the child cannot modify them.
- How to use: Pass props like attributes when rendering components. In the child component, you access them as parameters.
  const WelcomeMessage = (props) => <h1>Hello, {props.name}!</h1>;

  <WelcomeMessage name="John" />
6️⃣ Children: Passing Components as Props
React allows you to pass components as props using the children prop. This is extremely useful for composing UI elements and creating flexible components.
- Example:
  const Card = ({ children }) => <div className="card">{children}</div>;

  <Card>
    <h2>Card Title</h2>
    <p>Card content goes here.</p>
  </Card>
7️⃣ Keys: Helping React Identify Elements
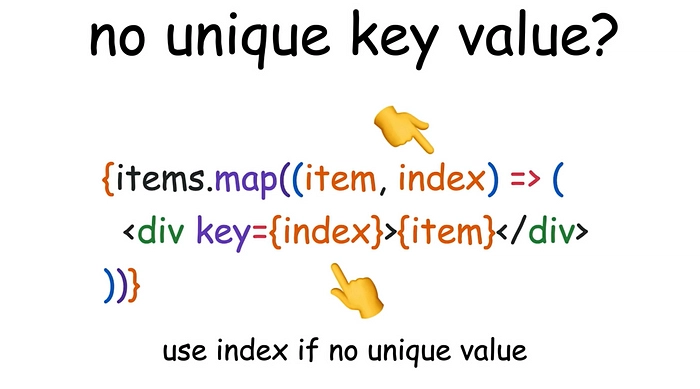
When you render a list of components, you need to assign a key prop to each one. This helps React identify which items have changed, are added, or are removed.
- Why is it important? It improves performance and ensures React can efficiently re-render the list.
  const items = ['Item 1', 'Item 2', 'Item 3'];
  const listItems = items.map((item, index) => <li key={index}>{item}</li>);
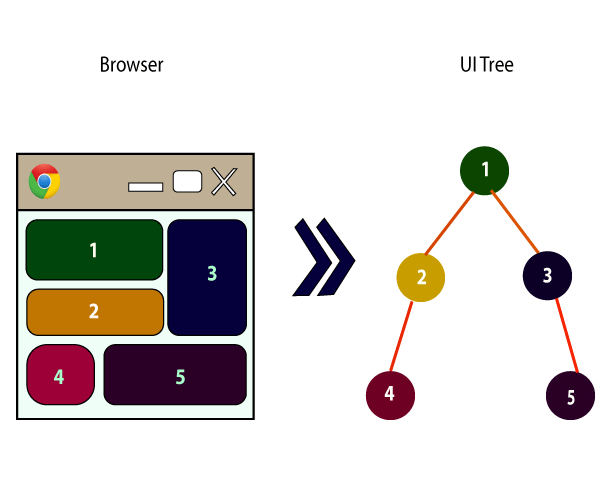
8️⃣ Rendering: How React Renders Components

Rendering is the process where React updates the user interface. React uses the Virtual DOM (VDOM) to perform efficient updates:
- React changes the virtual DOM when state or props change.
- It compares the new VDOM to the old one (called diffing).
- React updates only the parts of the actual DOM that have changed (this is called reconciliation).
9️⃣ Event Handling: Reacting to User Interactions
React provides event handling to detect and respond to user actions like clicks, key presses, and form submissions.
- Common events include
onClick,onChange, andonSubmit.
  const handleClick = () => alert('Button clicked!');
  <button onClick={handleClick}>Click Me</button>
🔟 State: Managing Data in Your App
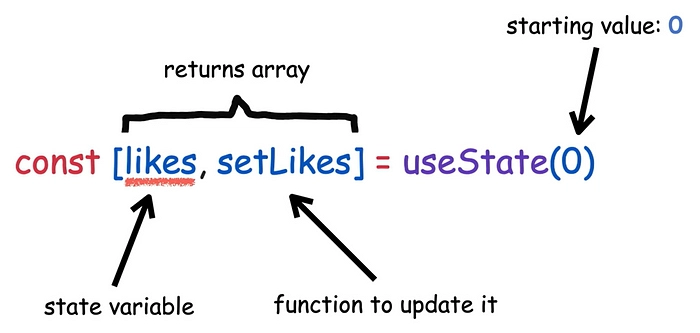
State represents the dynamic data of your application. When state changes, React re-renders the component that owns the state.
- useState is the hook you’ll use to manage state in function components:
const [likes, setLikes] = useState(0);
1️⃣1️⃣ Controlled Components: React-Driven Form Elements
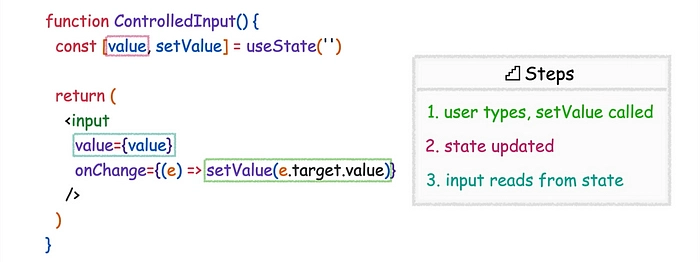
In a controlled component, React controls the input value, making it predictable and easier to manage. The component's state drives the input’s value.
- Example:
  const [value, setValue] = useState('');
  const handleChange = (e) => setValue(e.target.value);
  <input value={value} onChange={handleChange} />
1️⃣2️⃣ useState Hook: Managing State in Functional Components
useState is a hook in React that lets you add state to your functional components. It returns an array with the current state and a function to update it.
- Example:
  const [count, setCount] = useState(0);
  setCount(count + 1);
1️⃣3️⃣ Purity: Keeping Components Predictable

Purity refers to the idea that a React component should always return the same output for the same input, without changing any external variables.
- Pure component: Does not modify outside variables or states during rendering.
1️⃣4️⃣ Strict Mode: Identifying Potential Problems
React's Strict Mode helps you identify potential issues in your app by highlighting unsafe lifecycle methods and warnings.
- It’s a useful development tool but doesn’t affect production builds.
1️⃣5️⃣ Effects: Interacting with the Outside World
Effects allow you to interact with external systems like APIs or browser APIs. This is commonly done through the useEffect hook.
- Example:
  useEffect(() => {
    fetchData();
  }, []);  // Runs once after component mounts
1️⃣6️⃣ Refs: Accessing DOM Elements Directly
Refs provide a way to directly interact with DOM elements in React. You can create refs using the useRef hook and assign them to React elements.
- Example:
  const inputRef = useRef();
  <input ref={inputRef} />
1️⃣7️⃣ Context: Passing Data Through Components
React's Context API allows you to share data between components at different levels without explicitly passing props down manually at every level.
- Example:
  const UserContext = createContext();

  const UserProvider = ({ children }) => {
    const user = { name: "John Doe" };
    return <UserContext.Provider value={user}>{children}</UserContext.Provider>;
  };

  const UserProfile = () => {
    const user = useContext(UserContext);
    return <p>{user.name}</p>;
  };
1️⃣8️⃣ Portals: Moving Components Outside the DOM Hierarchy
Portals allow you to render React components outside their parent component's DOM hierarchy. This is useful for things like modals or tooltips.
- Example:
  const modalRoot = document.getElementById('modal-root');
  createPortal(<Modal />, modalRoot);
1️⃣9️⃣ Suspense: Handling Asynchronous Code
Suspense lets you manage loading states for components that need to fetch data or load asynchronously. It provides a fallback UI (like a spinner) until the component is ready.
- Example:
  <Suspense fallback={<Spinner />}>
    <LazyLoadedComponent />
  </Suspense>
2️⃣0️⃣ Error Boundaries: Catching JavaScript Errors
Error Boundaries are special components that catch errors during the rendering phase, preventing your app from crashing.
- Example:
  class ErrorBoundary extends React.Component {
    state = { hasError: false };

    static getDerivedStateFromError(error) {
      return { hasError: true };
    }

    componentDidCatch(error, info) {
      console.log(error, info);
    }

    render() {
      if (this.state.hasError) {
        return <h1>Something went wrong!</h1>;
      }
      return this.props.children;
    }
  }
I hope this article helps you grasp the core concepts of React in a simple and clear way. React can seem daunting at first, but with the right foundation, it gets easier to understand and build complex applications. See you in the next one!


Top comments (0)