In this blog let's checkout one of the commonly used K8s Objects, Deployment!
Deployment
K8s Deployment are used to define and manage the Pods, they work wrapping the replicaset mechanism underneath.
It allows users to declare the desired state in the manifest file, and the controller will ensure that the current state is same as the declared state once deployed.
So, let’s check out on how to create and use Kubernetes deployments, manage them, scale in-out, and roll back deployments here.
As usual, getting started with the Kubernetes configuration / manifest file.
deployment-demo.yaml
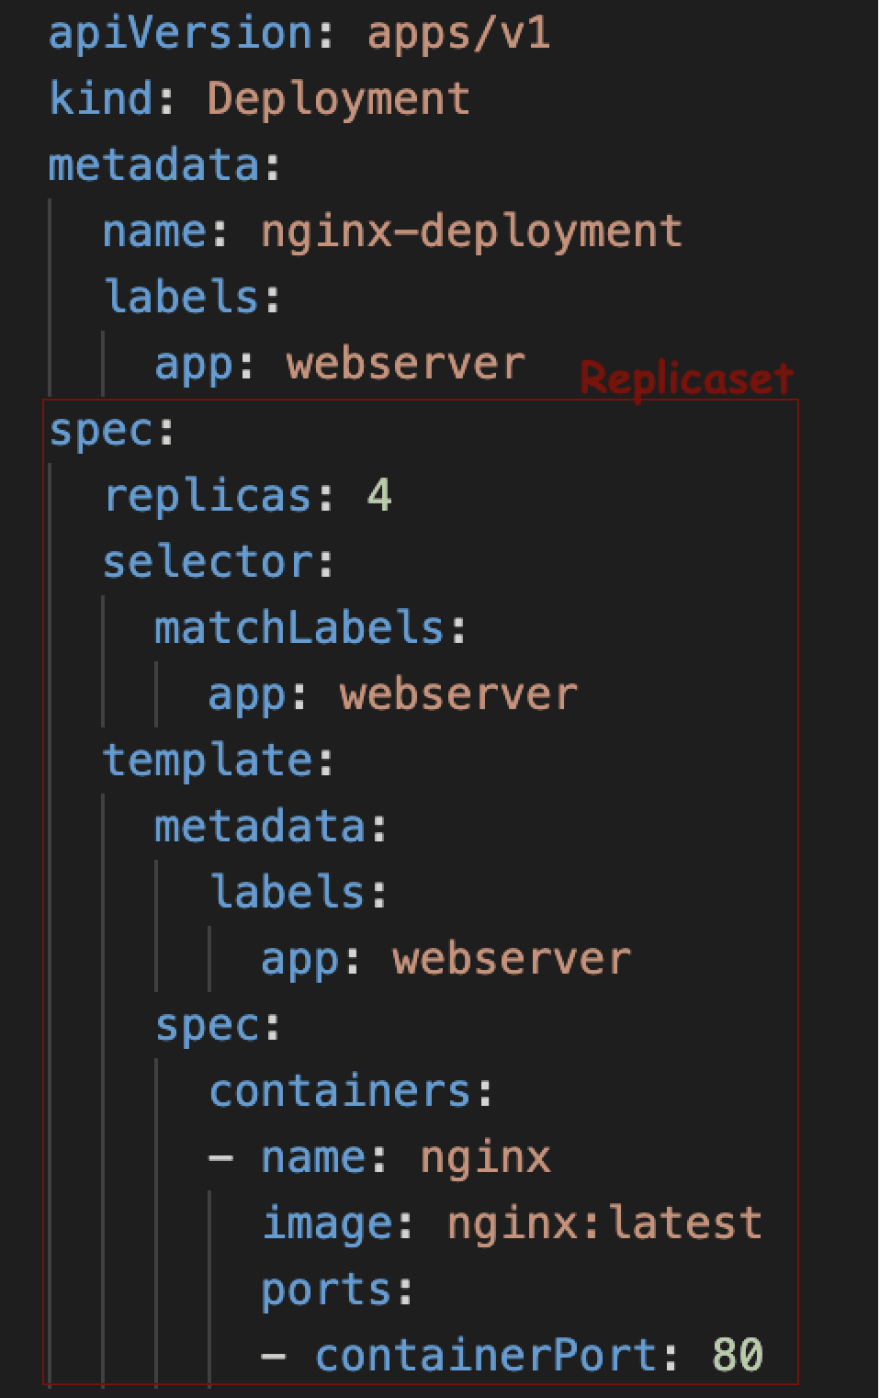
Let’s first create a simple nginx deployment with four replicas.
As mentioned, deployment uses replicaset underneath, the configuration file is very similar to the replicaset.
There is an additional label to match the replicaset selector label and have it as a deployment.
Let's create the deployment and verify the working as below,
By this configuration, we have created a replicaset of 4 Pods with Nginx containers exposed at port 80 - that is controlled as a deployment.
From creating desired number of replicas of provided Pod configuration to ensuring the number is managed... deployment seems to be same as Replicaset. In fact there is a replicaset created as well by creating this deployment.
But deployment is not just replicaset, it's more than that.
Now, let's taste the real essence of Deployment!
Power of Deployment
=> Modify your Pod configuration on the fly!
Unlike replicaset, Deployment powers you to update the pod configuration without causing any interruption to the underlying application.
Going by our example, say you need to change the image for some reason. In replicaset changing the version in the configuration file will have nil impact as replicaset just ensures the desired number of Pods are running. It doesn't worry on the configuration part. Whilst, this is handled carefully in Deployments... I repeat carefully!
There are two types of strategies used by K8s deployment for managing the Pod change rollout.
-> Recreate ::
- This will delete all the existing pods before creating the pods with new configuration.
- It will affect the availability of the application to some extend.
- If there is some problem with Pod creation (Say invalid image name), this would end up with zero running Pods - Taking down the application completely down until the problem is fixed and new deployment is applied.
-> RollingUpdate ::
- This will recreate the pods in a rolling update manner.
- It will delete and recreate pods gradually without interrupting the application availability.
- You have control over the percentage of Pods you want to be available at any given point of time during the time. This is achieved through properties called
maxUnavailableandmaxSurgemaxUnavailable - is the percentage indicating maximum number of pods that can be unavailable during the update process. maxSurge - is the percentage indicating maximum number of pods that can be created during the update process. - If there is some problem with Pod creation (Say invalid image name), maxUnavailable number of Pods only will be unavailable (Say maxUnavailable is 25%, then out of 4 Pods only 1 will go unavailable) until the problem is fixed.
You can define this strategy and its specifications in spec section of the configuration file. By default the RollingUpdate is provided with specifications as shown below
Let's check this out in action.
Change to configuration: Changing the nginx image version to 1.20. from 1:21 (latest when this blog was written)
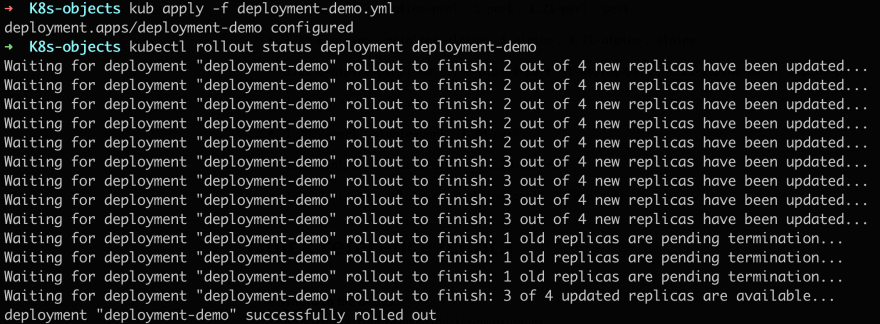
Let's apply the above configuration and check the ROLLOUT of this deployment
As you can see since the strategy type is RollingUpdate with default specifications, the rollout of the change (Image version) happens gradually one by one (maxSurge is 25%) and termination of old image follows the same number (maxUnavailable is 25%).
<-- TidBit -->
For every "new" update of the Deployment configuration, a new replicaset is created. For example, when you first have deployment file with nginx image 1:21 - a replicaset is created. Later when you updated the version to 1:20, another replicaset is created. But when you apply the older version of Deployment configuration, the replicaset is reused! (Yes, it's that intelligent 😛)
=> Pause / Resume
You can pause and resume deployment! This enables us to modify and try out any configs / fixes without creating a new ReplicaSet rollout.
You can pause the deployment by,
kubectl rollout pause deploy deployment-demo
After pausing, say we update the image version of the Pods.
As you can see, the rollout doesn’t start. It remains in the paused state.
In order to resume the rollout use,
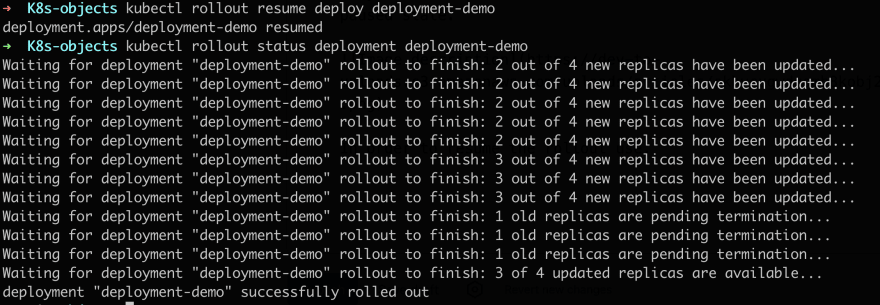
kubectl rollout resume deploy deployment-demo
Once resumed, by checking the rollout status we can understand that as soon as resume command is applied, the deployment process that was kept hold / paused resumes automatically.
=> Rollback the Deployment
You can also roll back deployments to the previous versions. This is a critical feature allowing us to undo changes in deployment!!
For example, Say there is a production bug deployed in the cluster, we can simply roll back the deployment to the previous version which is just a command away with no downtime until the bug is fixed!
-> Understanding the internals first!
To roll back to previous versions... Yes, there is someone helping us here!!
It's the Deployment controller’s history function.
Every deployment is tracked in the history.
We can check the history using the command
kubectl rollout history deployment deployment-demo
Let's check the history after creating the deployment for the first time.
You can see that there is an entry in the history table. But with no change cause.
In order to capture a change cause, you need to use --record flag. Let's try this!
the image version is changed using a command,
kubectl set image deployment deployment-demo deployment-demo-pod=nginx:1.18
This is stored as change cause in the history table as we are appending the --record in the command. This applies to all the commands.
<---Tidbit--->
Similar to replicaset, history is also maintained in a smart way. If you redeploy the same version which was previously deployed, then it is reused in the history table. In our example if we redeploy 1.18, then history table looks like this.
As you can see, fourth revision is created which is similar to the earlier second revision, and the second revision entry is removed as well.
Action time!
Now, let's rollback the deployment to revision 3 with just a command
In order to see details about a version use this command.
This gives information about revision 3.
kubectl rollout history deployment deployment-demo --revision=3
Now, let's deploy reversion 3 (Image version 1.20).
kubectl rollout undo deployment deployment-demo --to-revision=3
Checking the running Pods, we find the rollback came into effect!

The history table has now replaced revision 3 entry with revision 5, marking it the latest.

If you just want to undo the deployment or go to the previous version, skip the to-version part.
The previous revision 4 is now deployed. And the history table is updated to reflect it as the latest revision 6.
This brings us to the end of this blog. Hope you have a fair idea on K8s Deployment by now. See you in the next blog!
Happy leaning!


Top comments (0)