Welcome to part-4 of the series. This series have been inspired by this youtube tutorial from freecodecamp.
We will start from where we left. We will be first making an component to add books to our App, through the front-end.
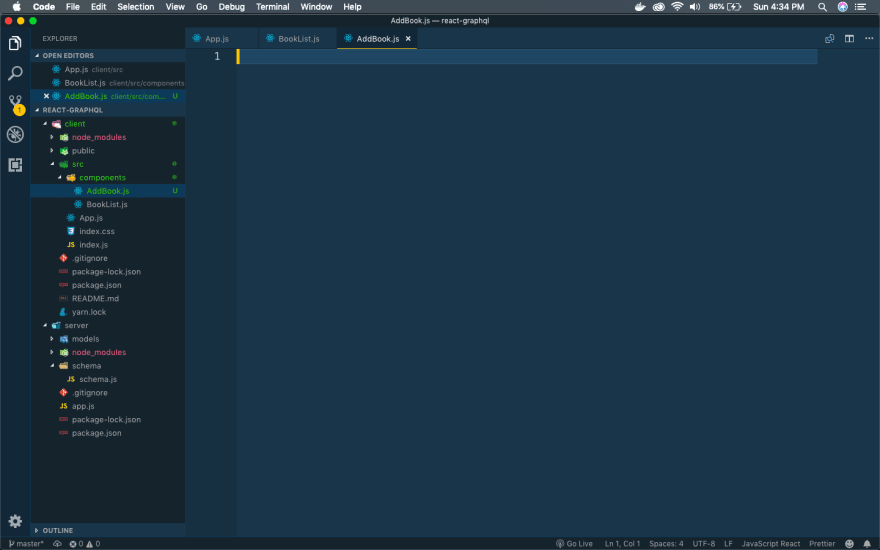
We will add a new file AddBook.js in components folder.
Now, we will add content to AddBook.js. You will notice that it is almost similar to BookList.js in previous tutorial. Only we are using a form to input the data and using GraphQL, to get the author list for the dropdown of author.
import React, { Component } from 'react';
import { gql } from 'apollo-boost';
import { graphql } from 'react-apollo';

const getAuthorsQuery = gql`
    {
        authors {
            name
            id
        }
    }
`;

class AddBook extends Component {
    displayAuthors(){
        var data = this.props.data;
        if(data.loading){
            return( <option disabled>Loading authors</option> );
        } else {
            return data.authors.map(author => {
                return( <option key={ author.id } value={author.id}>{ author.name }</option> );
            });
        }
    }
    render(){
        return(
            <form id="add-book">
                <div className="field">
                    <label>Book name:</label>
                    <input type="text" />
                </div>
                <div className="field">
                    <label>Genre:</label>
                    <input type="text" />
                </div>
                <div className="field">
                    <label>Author:</label>
                    <select>
                        <option>Select author</option>
                        { this.displayAuthors() }
                    </select>
                </div>
                <button>+</button>

            </form>
        );
    }
}

export default graphql(getAuthorsQuery)(AddBook);
We will also include this component in App.js. So, update it as below.
import React from 'react';
import BookList from './components/BookList';
import AddBook from './components/AddBook';
import ApolloClient from 'apollo-boost';
import { ApolloProvider } from 'react-apollo';

const client = new ApolloClient({
  uri: 'http://localhost:4000/graphql'
})

function App() {
  return (
    <ApolloProvider client={client}>
      <div className="main">
        <h1>Top books to Read</h1>
        <BookList />
        <AddBook />
      </div>
    </ApolloProvider>
  );
}

export default App;
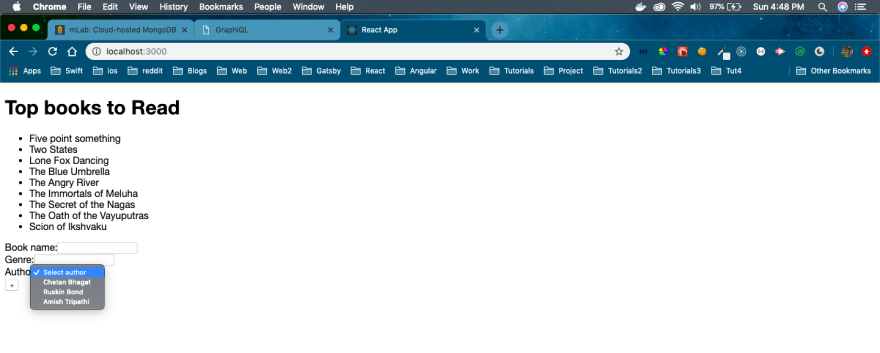
Now, our App looks like below, with a working Author dropdown.
Next, we will add some React state management to the file AddBooks.js, to store the value of the form. The changes have been marked in bold.
import React, { Component } from 'react';
import { gql } from 'apollo-boost';
import { graphql } from 'react-apollo';

const getAuthorsQuery = gql`
    {
        authors {
            name
            id
        }
    }
`;

class AddBook extends Component {
    constructor(props){
        super(props);
        this.state = {
            name: '',
            genre: '',
            authorId: ''
        };
    }

    displayAuthors(){
        var data = this.props.data;
        if(data.loading){
            return( <option disabled>Loading authors</option> );
        } else {
            return data.authors.map(author => {
                return( <option key={ author.id } value={author.id}>{ author.name }</option> );
            });
        }
    }

    submitForm(e){
        e.preventDefault()
        console.log(this.state);
    }

    render(){
        return(
            <form id="add-book" onSubmit={ this.submitForm.bind(this) }>
                <div className="field">
                    <label>Book name:</label>
                    <input type="text" onChange={ (e) => this.setState({ name: e.target.value }) } />
                </div>
                <div className="field">
                    <label>Genre:</label>
                    <input type="text" onChange={ (e) => this.setState({ genre: e.target.value }) } />
                </div>
                <div className="field">
                    <label>Author:</label>
                    <select onChange={ (e) => this.setState({ authorId: e.target.value }) }>
                        <option>Select author</option>
                        { this.displayAuthors() }
                    </select>
                </div>
                <button>+</button>

            </form>
        );
    }
}

export default graphql(getAuthorsQuery)(AddBook);
Next, it’s time to test the form by adding some data and clicking the “+” and checking the output on console.
Now, we will add the logic for mutation to add this data on GraphQL server. But since our AddBook.js will have more then one queries, we need to modify the logic a bit.
We will first move all the queries to a different file. Create a folder queries inside src and a file queries.js inside it.
Add the following content to queries.js
import { gql } from 'apollo-boost';

const getAuthorsQuery = gql`
    {
        authors {
            name
            id
        }
    }
`;

const getBooksQuery = gql`
    {
        books {
            name
            id
        }
    }
`;

const addBookMutation = gql`
    mutation AddBook($name: String!, $genre: String!, $authorId: ID!){
        addBook(name: $name, genre: $genre, authorId: $authorId){
            name
            id
        }
    }
`;

export { getAuthorsQuery, getBooksQuery, addBookMutation };
Now, we will use getBooksQuery and addBookMutation inside our AddBook.js
The changes are marked in bold. We had to use another function compose from react-apollo, to use two queries. The this.props also changed and will contain both getAuthorsQuery and addBookMutation.
import React, { Component } from 'react';
import { graphql, compose } from 'react-apollo';
import { getAuthorsQuery, addBookMutation } from '../queries/queries';

class AddBook extends Component {
    constructor(props){
        super(props);
        this.state = {
            name: '',
            genre: '',
            authorId: ''
        };
    }

    displayAuthors(){
        var data = this.props.getAuthorsQuery;
        if(data.loading){
            return( <option disabled>Loading authors</option> );
        } else {
            return data.authors.map(author => {
                return( <option key={ author.id } value={author.id}>{ author.name }</option> );
            });
        }
    }

    submitForm(e){
        e.preventDefault();
        this.props.addBookMutation({
            variables: {
                name: this.state.name,
                genre: this.state.genre,
                authorId: this.state.authorId
            }
        });
    }

...
...
...
}

export default compose(
    graphql(getAuthorsQuery, { name: "getAuthorsQuery" }),
    graphql(addBookMutation, { name: "addBookMutation" })
)(AddBook);
Let’s also make the change in BookList.js as we will use the query from queries.js
import React, { Component } from 'react';
import { graphql } from 'react-apollo';
import { getBooksQuery } from '../queries/queries';

class BookList extends Component {
    displayBooks() {
        var data = this.props.data;
        if (data.loading) {
            return (<div>Loading books...</div>);
        } else {
            return data.books.map(book => {
                return (
                    <li key={book.id}>{book.name}</li>
                );
            })
        }
    }

    render() {
        return (
            <div>
                <ul className="book-list">
                    {this.displayBooks()}
                </ul>
            </div>
        )
    }
}

export default graphql(getBooksQuery)(BookList);
Let’s go to the browser now and add a new book, by entering the fields and pressing “+”.
But we don’t see the new book reflected here as we don’t have logic for it yet. So, we can check it first at mongoDB.
Next, go to the browser and refresh it and you will see the book.
Now, to solve the refresh issue we need to run the query getBooksQuery as soon as the mutation query is ran.
We can do this simply by adding a refetchQueries after the mutation in AddBook.js file.
import React, { Component } from 'react';
import { graphql, compose } from 'react-apollo';
import { getAuthorsQuery, addBookMutation, getBooksQuery } from '../queries/queries';
…
…

    submitForm(e){
        e.preventDefault();
        this.props.addBookMutation({
            variables: {
                name: this.state.name,
                genre: this.state.genre,
                authorId: this.state.authorId
            },
            refetchQueries: [{ query: getBooksQuery }]
        });
    }
…
…
Now, add a book and click on “+” and you will get the book added to the page instantly.
Now, we are going to add the functionality to show details, when we click on a book. So, create a new file BookDetails.js inside components folder.
Let’s first add click functionality to each book from the BookList.js and get the book id. This we will pass to the BookDetails component.
import React, { Component } from 'react';
import { graphql } from 'react-apollo';
import { getBooksQuery } from '../queries/queries';
import BookDetails from './BookDetails';

class BookList extends Component {
    constructor(props){
        super(props);
        this.state = {
            selected: null
        }
    }
    displayBooks(){
        var data = this.props.data;
        if(data.loading){
            return( <div>Loading books...</div> );
        } else {
            return data.books.map(book => {
                return(
                    <li key={ book.id } onClick={ (e) => this.setState({ selected: book.id }) }>{ book.name }</li>
                );
            })
        }
    }
    render(){
        return(
            <div>
                <ul id="book-list">
                    { this.displayBooks() }
                </ul>
                <BookDetails bookId={ this.state.selected } />
            </div>
        );
    }
}

export default graphql(getBooksQuery)(BookList);
We will now add the query to get detail of a book in queries.js file. Here, we will not only get the id, name and genre of the book but also, the author’s id, name and age. We will also get the list of all other books by the author
…
…
const getBookQuery = gql`
    query GetBook($id: ID){
        book(id: $id) {
            id
            name
            genre
            author {
                id
                name
                age
                books {
                    name
                    id
                }
            }
        }
    }
`;

export { getAuthorsQuery, getBooksQuery, addBookMutation, getBookQuery };
Now, let’s add code to file BookDetails.js. Here, we are doing a graphql query(bold) from the props, which we have received from parent component ie BookList and then passing it to the query getBookQuery in queries.js.
On receiving the data back in this.props.data.book, we are displaying it.
import React, { Component } from 'react';
import { graphql } from 'react-apollo';
import { getBookQuery } from '../queries/queries';

class BookDetails extends Component {
    displayBookDetails(){
        const { book } = this.props.data;
        if(book){
            return(
                <div>
                    <h2>{ book.name }</h2>
                    <p>{ book.genre }</p>
                    <p>{ book.author.name }</p>
                    <p>All books by this author:</p>
                    <ul className="other-books">
                        { book.author.books.map(item => {
                            return <li key={item.id}>{ item.name }</li>
                        })}
                    </ul>
                </div>
            );
        } else {
            return( <div>No book selected...</div> );
        }
    }
    render(){
        return(
            <div id="book-details">
                { this.displayBookDetails() }
            </div>
        );
    }
}

export default graphql(getBookQuery, {
    options: (props) => {
        return {
            variables: {
                id: props.bookId
            }
        }
    }
})(BookDetails);
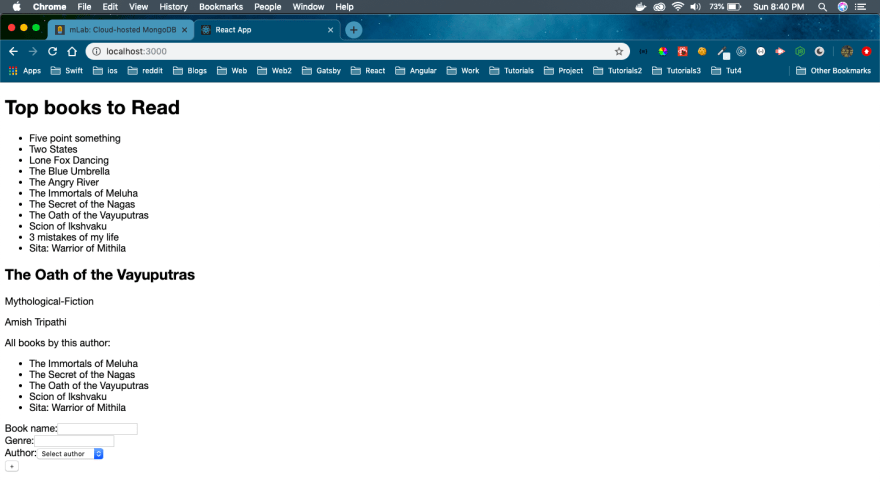
Now, when we go and click on any book, we will get it details.
Our App is complete, but it’s very ugly. So, we will go ahead and add the css to index.css file.
body {
  font-family: "Helvetica Neue", sans-serif;
}

.main h1{
  color: #444;
  text-align: center;
}

.main{
  padding: 0px;
  box-sizing: border-box;
  width: 60%;
  height: 100%;
}

#book-list{
  padding: 0;
}

#book-list li{
  display: inline-block;
  margin: 12px;
  padding: 10px;
  border-radius: 4px;
  border: 1px solid #880E4F;
  box-shadow: 1px 2px 3px rgba(0,0,0,0.3);
  cursor: pointer;
  color: #880E4F;
}

form{
  background: #fff;
  padding: 20px;
  position: fixed;
  left: 0;
  bottom: 0;
  width: 400px;
}

form .field{
  display: grid;
  grid-template-columns: 1fr 1fr;
  grid-gap: 10px;
}

form label{
  text-align: right;
  padding: 6px;
}

form input, form select{
  margin: 4px 0;
  padding: 6px;
  box-sizing: border-box;
}

form button{
  color: #fff;
  font-size: 2em;
  background: #AD1457;
  border: 0;
  padding: 0 10px;
  border-radius: 50%;
  cursor: pointer;
  position: absolute;
  bottom: 10px;
  left: 10px;
}

#book-details{
  position: fixed;
  top: 0;
  right: 0;
  width: 40%;
  height: 100%;
  background: #AD1457;
  padding: 30px;
  overflow: auto;
  box-shadow: -2px -3px 5px rgba(0,0,0,0.3);
  box-sizing: border-box;
  color: #fff;
}
It will show our final App.
This concludes our series. Hope you liked it. You can find code till here in the github link.


Top comments (6)
Hi Nabendu, thanks for the post, I've been following it for the past couple of days and I'm finding it very informative. There is one issue I ran into on part 4, which is
composeis no longer part ofreact-apollo- I found this GitHub issue which explains it: github.com/apollographql/react-apo... following this comment:Seemed to work for me.
Thanks for the help and fixing the bug. I originally did this series on medium, in May 19. GraphQl been the cutting edge technology, i changing a lot.
Nice post Nabendu!! I learned a lot of, i will try it!!
Can you make other part adding a real time comunication with database and graphql? I think it will be very usefull :)
Thanks for the suggestion Alfonso. Will try , once i get time. Right now in the middle of many other things.
Okey, waiting fow it thanks!! =)
Would be more helpful, if you use function hooks rather class components.
thanks