Custom UIView subclasses are huge productivity win. You can program them once and then use the result across your project or projects. However by default Xcode does not allow to also create .XIB file for designing using Storyboard editor like it does for custom UITableViewCell for example.
In this short post, I will show you how to design custom UIView with .XIB file.
Create Swift class
The first step is to create .swift file for you UIView. Something like this:
import UIKit

class CustomView: UIView {

}
Create .XIB file
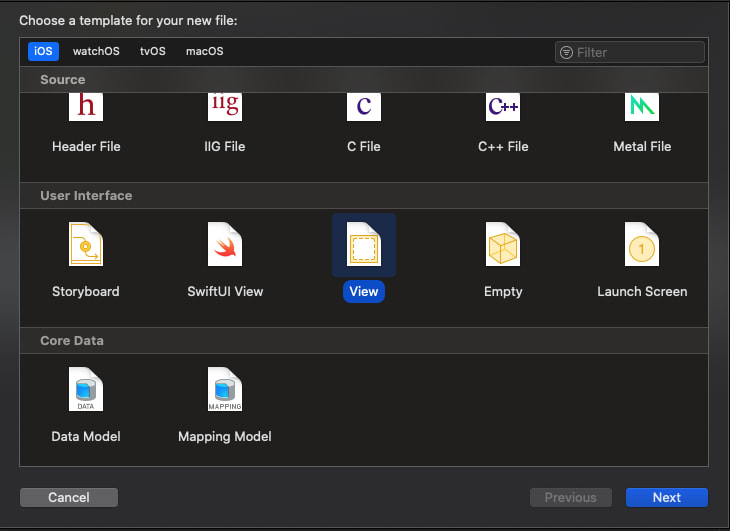
Then add new file to your project a under “User Interface” select the option "View":
Use the same name as for your subclass, in this case CustomView.
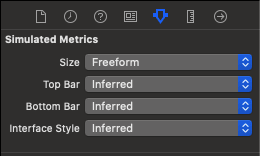
By default the preview is shown as entire device. But you can change this in the Size Inspector. Under "Simulated Metrics" choose the "Size" to be "Freeform" and also at the bottom select for example iPhone 8 to get rid of the safe areas of iPhones with a notch.
Now you can resize the view freely and approximate how it is going to look like in use.
To connect the CustomView.xib with our class, select the "View" in Document Outline, switch to Identity Inspector and as a "Class" enter the "CustomView".
That is all! You can now design your view and connect @IBOutlets to the class.
Using CustomView
To create instance of the CustomView using .xib file add this method:
class func instanceFromNib() -> CustomView {
        let view = UINib(nibName: "CustomView", bundle: nil).instantiate(withOwner: nil, options: nil)[0] as! CustomView
        return view
}
You need custom initialization code, you can create setupView method and call it before returning the view:
fileprivate func setupView() {
        // do your setup here
}

class func instanceFromNib() -> CustomView {
        let view = UINib(nibName: "CustomView", bundle: nil).instantiate(withOwner: nil, options: nil)[0] as! CustomView
        view.setupView()
        return view
 }
Thanks for reading!
Do you have your own ways of creating reusable views? Let me know 🙂
--
Need to focus on your iPhone? Get free WebBlock app for scheduled website blocking from the App Store!


Top comments (1)
Very clean and simple solution.