
Can a developer successfully work with an API without a standard API documentation? My answer is as good as yours. This means that API documentation is essential to all developers. A good API documentation is developer-friendly and concise.
According to the OpenAPI specification initiative, OpenAPI is the standard for defining your API. This means that you can migrate your API documentation from one platform to another with the help of this file. For example, you can migrate your API docs from Postman to ReadMe or Mintlify or vice versa.
This tutorial will walk you through integrating your OpenAPI spec file into your Mintlify project. By the end of this tutorial, you will have a fully functional API documentation, powered by an OpenAPI spec file.
Prerequisites
1.) Mintlify installed: You need Mintlify installed on your local computer, if you don't have one, we'll cover how to install it.
2.) Node.js installed: Install Node.js (version 19 or higher) before proceeding. You can download it here.
3.) Basic knowledge of OpenAPI
4.) You need to have some endpoints in your openAPI spec file in JSON or YAML format.
For this tutorial, I will use the Movie Database OpenAPI spec file. You can find the complete documentation here, and you can also clone the project from the GitHub repository if you want to work with it on your local computer.
Alright, let’s get started.
STEP 1: Set up your Mintlify Project
1.) Go to the website Mintlify website and sign up using Google
complete your profile by providing additional details, such as the name of your company (The name of your documentation).
Set up your first documentation deployment by following the instructions here
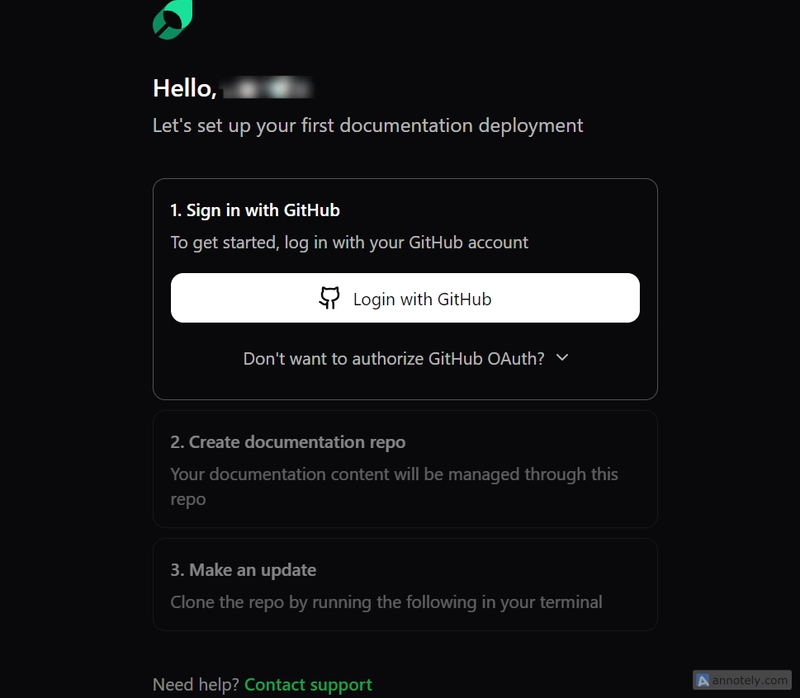
It will look like this when done

2.) Go to any Code Editor of your choice, navigate to the project directory, open the terminal, and run the following command:
npm i -g mintlify
You should use the command to install Mintlify CLI globally.
3.) After installing Mintlify globally, you enable local preview of your Mintlify documentation with the following command:
mintlify dev
STEP 2: Understanding the OpenAPI spec file format
The OpenAPI spec file, which is mostly edited in the Swagger Editor, is stored in JSON or YAML format. You can use any format of your choice, but it is advisable to use the YAML format because it is easier to read and maintain.

STEP 3: Integrate your OpenAPI spec file into Mintlify
When you are done documenting your endpoint in the OpenAPI spec file, ensure that you save and download it either as JSON or YAML format to your local device.
To integrate your OpenAPI spec file with your Mintlify project, follow these steps:
1.) Put your “openapi.yaml or openapi.json” file in the same directory as the "api-reference" folder in your Mintlify project.

2.) Go to your docs.json file and call your OpenAPI using the correct file path.
{
  "tab": "API Reference",
  "groups": [
    {
      "group": "Endpoints",
      "openapi": {
        "source": "/api-reference/openapi3.json",
        "directory": "api-reference"
      }
    }
  ]
}
The openapi contains two properties here, “source” and “directory”
“source”: “/api-reference/openapi3.json”: The source specifies the path to your OpenAPI spec file."directory": "api-reference": This specifies the directory where the OpenAPI spec file is located.
When you are done, it is important to validate your OpenAPI spec file before pushing it to your GitHub repository. Use the command “mintlify openapi-check <openapiFilenameOrUrl>” to check for errors and validate your work. If no errors, it gives the response: “✅ Your OpenAPI definition is valid”. If there is an error, it points to the specific endpoint where the error is and the reason for the error.
By doing this, all your documentation in the OpenAPI spec file will be appropriately displayed.

Additional Resouces
To deeply understand Mintlify, here are other great resources that you can use:
- Mintlify Documentation: A comprehensive guide for understanding MIntlify.
- OpenAPI Specification: Official OpenAPI documentation to understand the standard.
- Mintlify YouTube channel to watch tutorial videos.
- Swagger editor: Online tools used to write and test your OpenAPI spec file
- You can engage with other developers on Dev.to API discussions or explore the Mintlify GitHub repository.


Top comments (0)