Now that we're done with our supabase setup let's work on our frontend environment for our application.
Github Setup
Before we setup vercel, we're going to setup our code repository first, I'll be using github to upload the repository. Let's quickly make our repo, since we'll be working with Nextjs I'll be creating a Nextjs app using
npx create-next-app taskboard
If you like to work with typescript you can pass the ts flag in the command, your command should look like this
npx create-next-app --ts taskboard
NOTE: I'll be using javascript throughout the tutorial, this series will have add an extra part where I'll be porting the app to typescript.
Now let's make our github repository and push the code in our local machine to the repo.
I'll be creating different releases, so you can go through the different version and check what the code looked like in each of them.
You can find the link for my repo here.
Vercel Setup
For hosting our project on vercel we will need the code repository first.
This is how my project configuration looks like in vercel.

HIT DEPLOY!
you can find the link for the application here
Integrating Supabase
We've successfully created our Nextjs app and it is deployed, now vercel, the last step that is remaining is integrating our project with supabase.
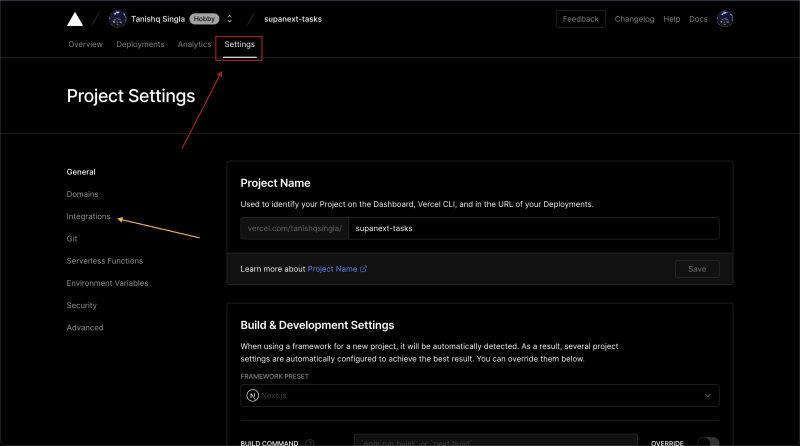
Click on setting tab of your project and then click integrations
You can refer this doc created by supabase or follow the steps below.
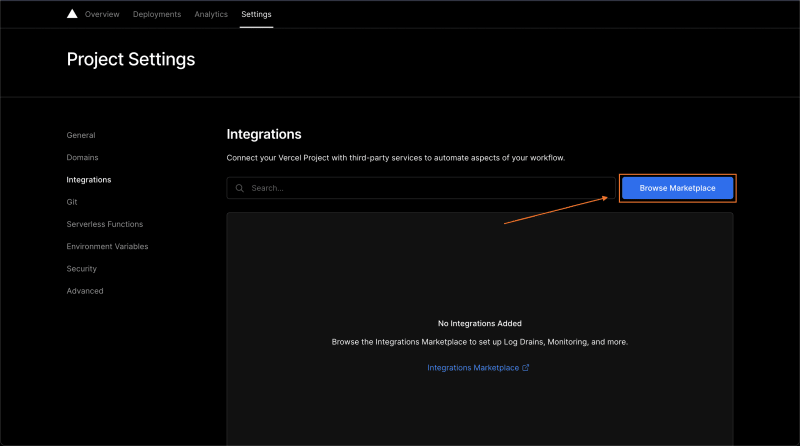
Now click on Browse Marketplace and search for supabase.
When you'll click add integration vercel will ask for the vercel account you want to add integration to, select your account and hit continue.
Hit continue and then add integration
Now when you'll click on your project setting and check environment variables section you'll see supabase environment variables already added


Top comments (1)
So.. it just add environment variables to my project? That's it?