 In this tutorial, we’ll continue the series of displaying images from cloneable fields using Meta Box and another page builder - Elementor. So here we go!
Here is my example:
Video Version
Before Getting Started
To get started, we need the Meta Box core plugin to have the framework for creating custom fields. It’s free, so you can download it directly from wordpress.org.
For the extensions, they’re in the Meta Box AIO. If you haven’t had it, you can download and install each extension individually. The list of extensions we need for this tutorial is as follows:
- Meta Box Settings Page: to create settings pages;
- Meta Box Builder: to have an intuitive UI to create custom fields in the backend;
- Meta Box Group: to organize custom fields into cloneable groups, where we input images;
- MB Elementor Integrator: to connect and display custom fields created by Meta Box plugin in the Elementor's dynamic tags.
Finally, make sure you have Elementor Pro which has integration with Meta Box.
Step 1: Create a Settings Page
Normally, we’ll use a custom post type to create multiple posts for brands. But today I will do it in a more convenient and simple way - creating a setting page. The information about all the brands will be inputted into that page. It means that all of them will be in one place only.
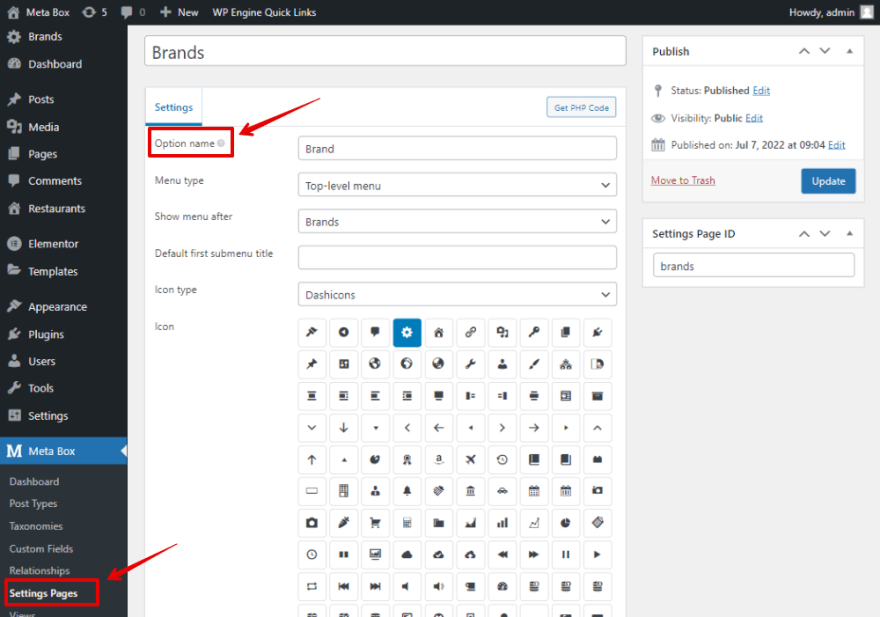
Go to Meta Box > Settings Page > Add New.
Since the settings page contains the image and name of each brand only, there’s no special setting for it. I just changed the option name.
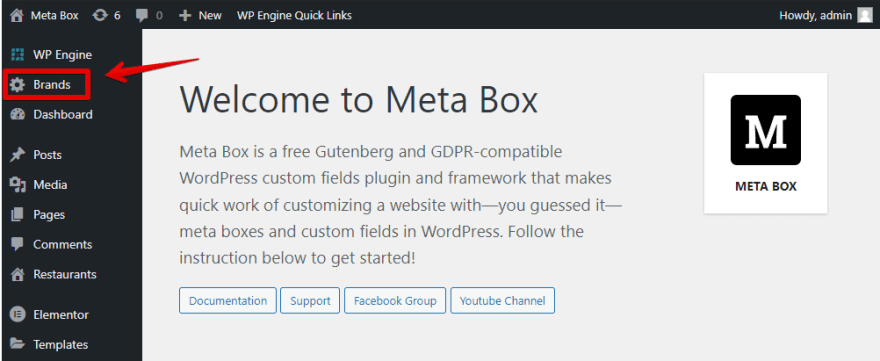
After publishing, you’ll see a new settings page named Brands appears as below:
Step 2: Create Custom Fields for the Settings Page
Now, let’s create custom fields. Go to Meta Box > Custom Fields > Add New. I’ll add fields with the following structure:
| Field | Types of Field | ID |
| Brand Group | Group | brand_group |
| Brand Logo Upload | Single Image | brand_logo_upload |
| Brand Name | Text | brand_name |
This is a group with 2 subfields inside. It is also set to be cloneable to have more spaces to add different brands' information.
In addition, I set this group as collapsible to collapse the information of the group field.
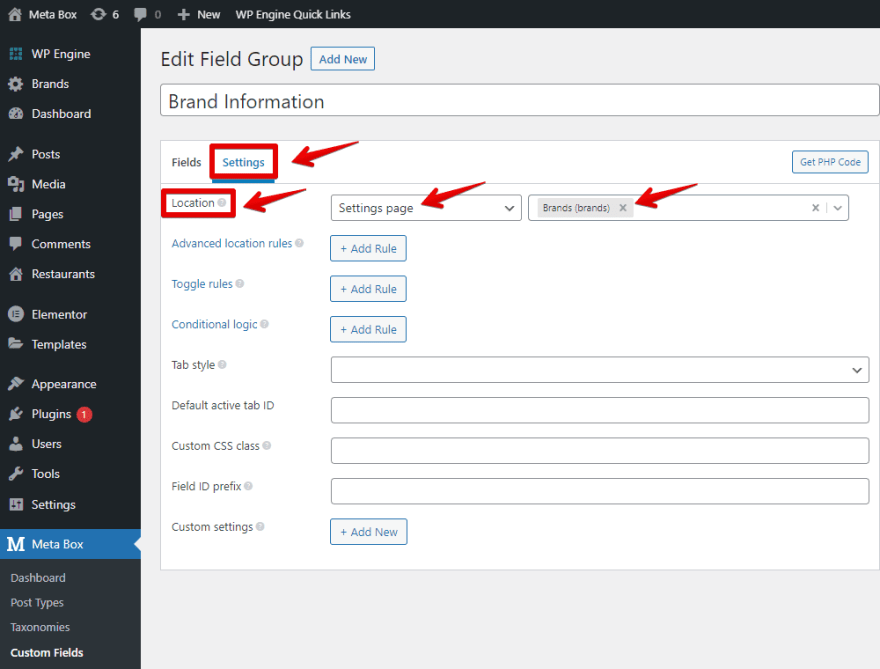
After that, open the Settings tab and choose the Location as the settings page that we’ve created to apply the custom fields to it.
Back to the settings page, you will see the created custom fields appear and the sub-fields are contained in the group field. Moreover, to add another brand’s information, press the Add more button.
Now, enter the brand’s information in the fields and go to the next step.
Step 3: Create a Skin
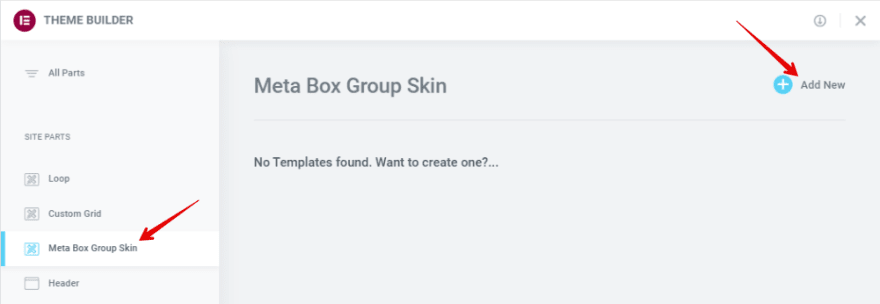
Go to Elementor Theme Builder > choose Meta Box Group Skin > Add new skin.
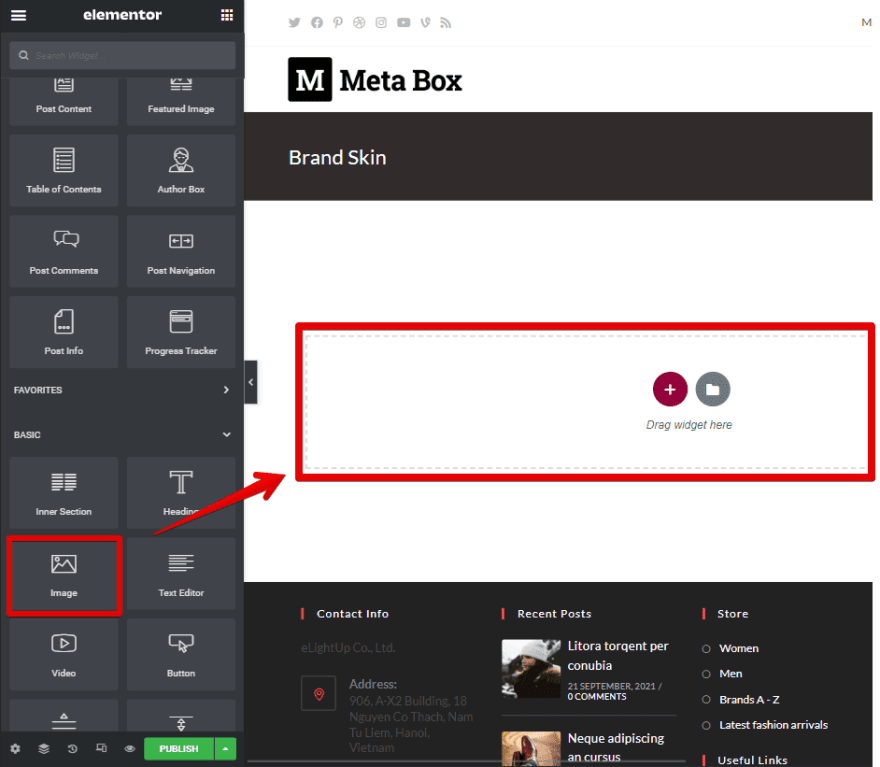
Set the settings for the skin as you want. Then, add the Image element to display the brand logo.
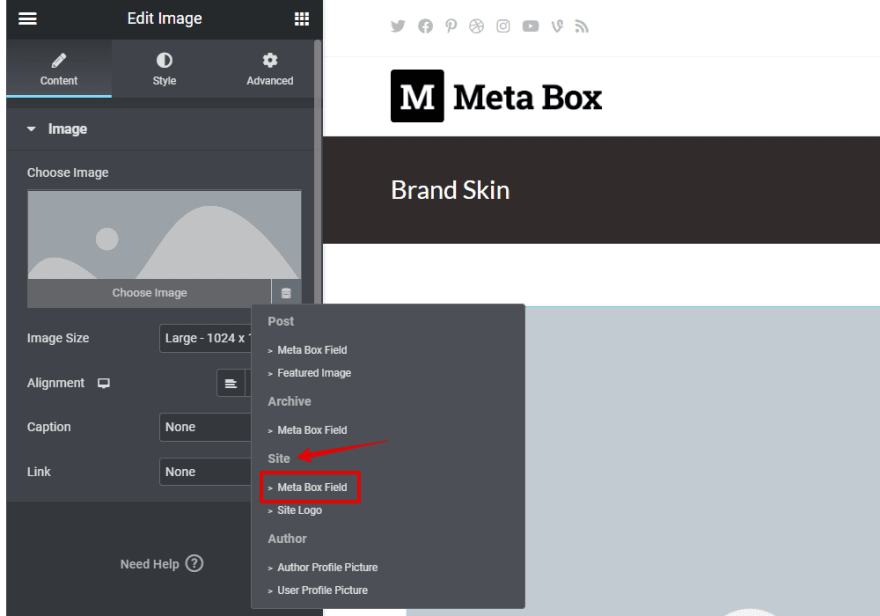
To get the image from custom fields created by Meta Box, go to the Dynamic Tags and find the Meta Box Field.
Since the custom field we created is on the settings page, we choose the Meta Box Field in the Site section.
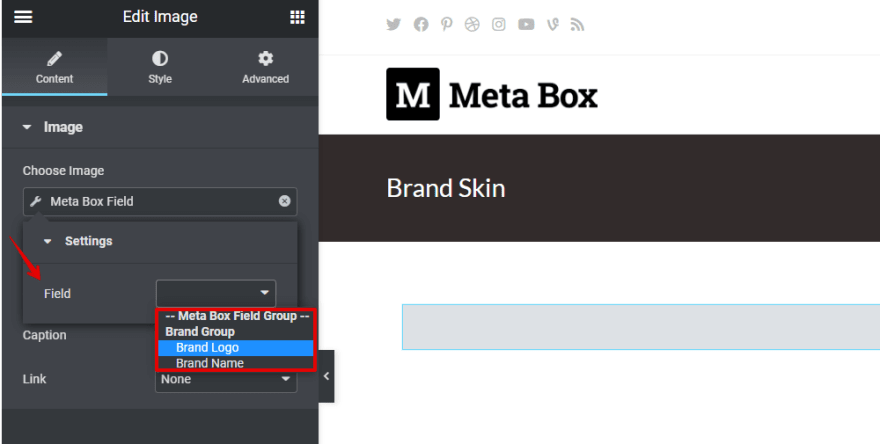
Then, choose the name of the field you want to get the image from.
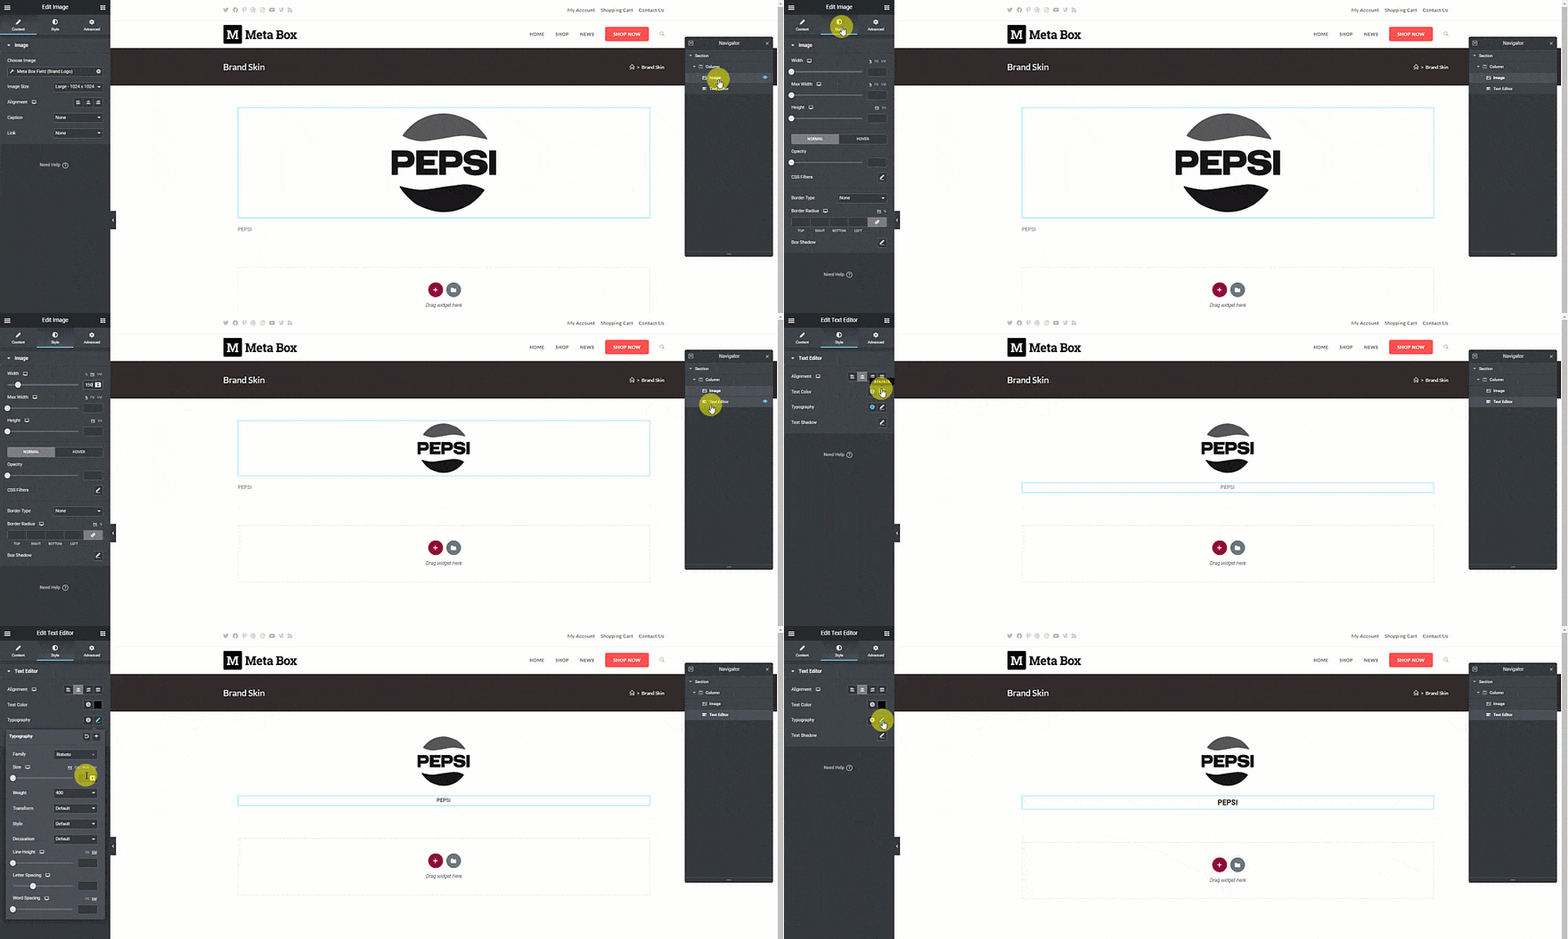
For the brand’s title, add a Text Editor element. Once again, go to the Dynamic Tags and find the Meta Box Field in the Site section and choose the Brand Name option.
After that, I’ll style both elements a little bit.
Step 4: Display the Logo Section on the Home Page
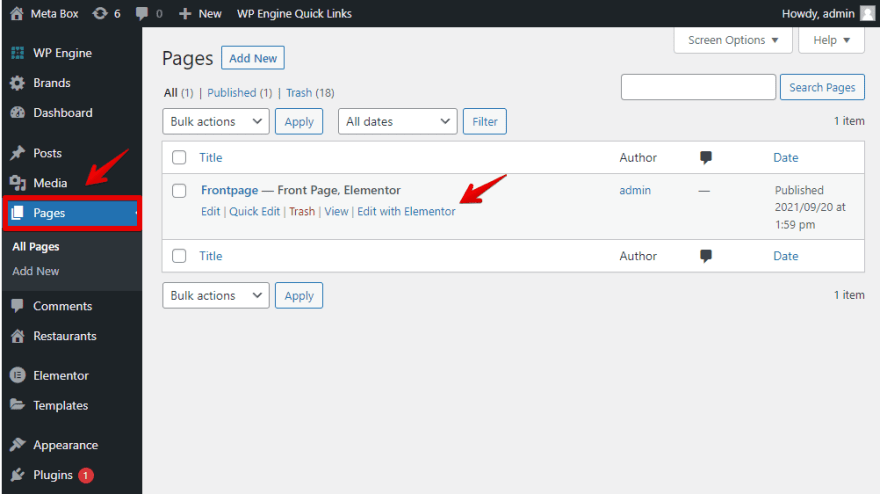
Let’s edit the homepage with Elementor.
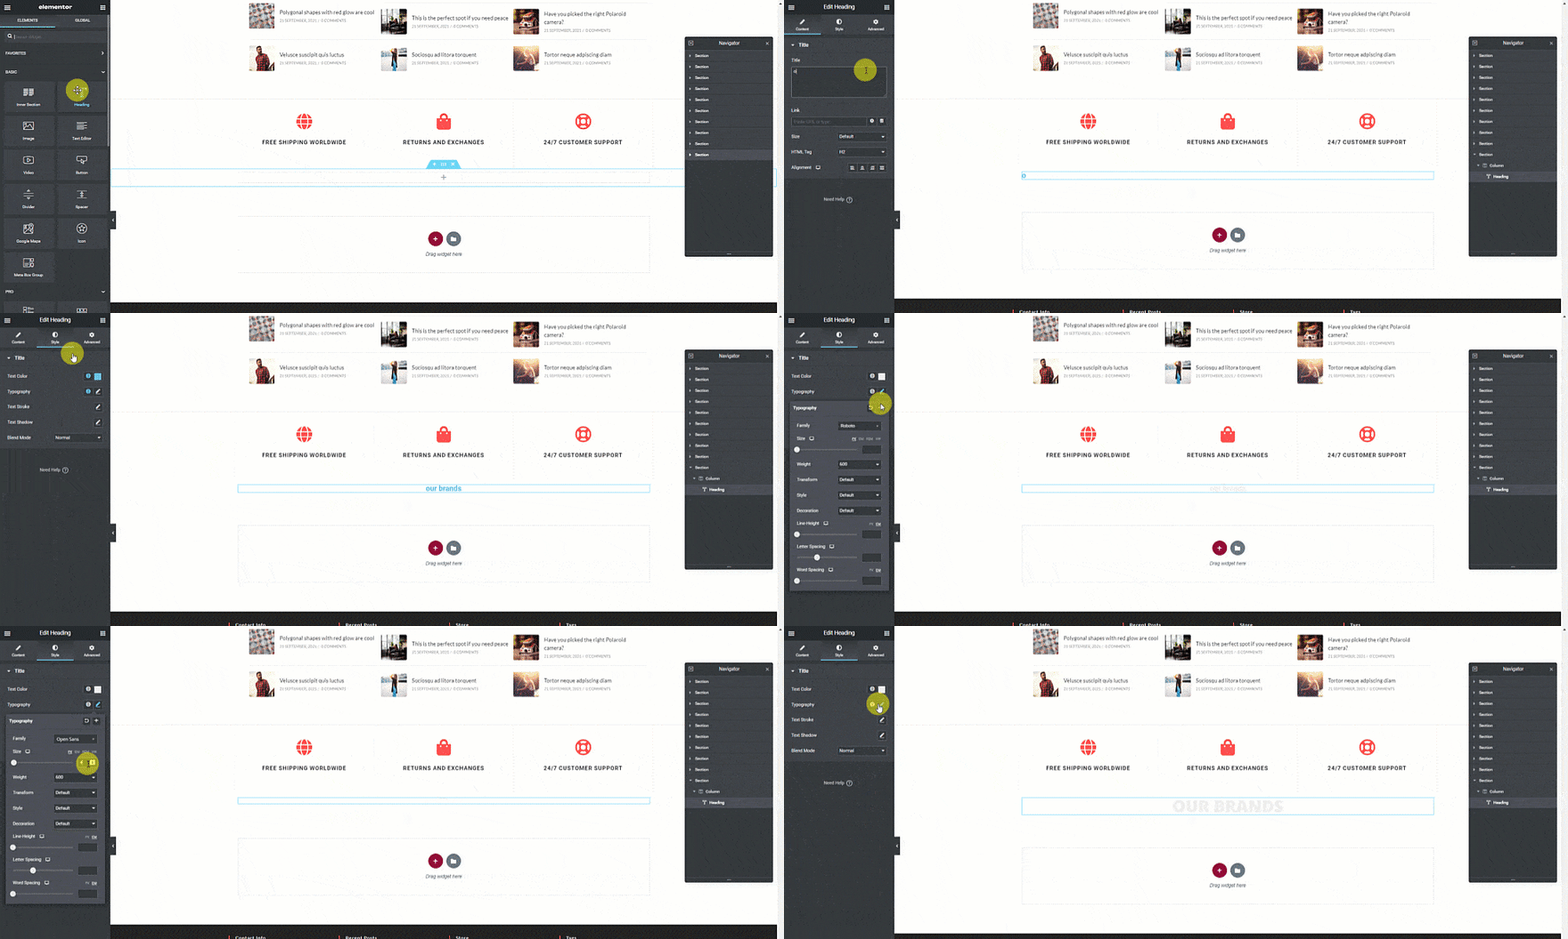
First, I add a widget to the homepage to create a section that contains brand information. Add a Heading for it and style it as you want.
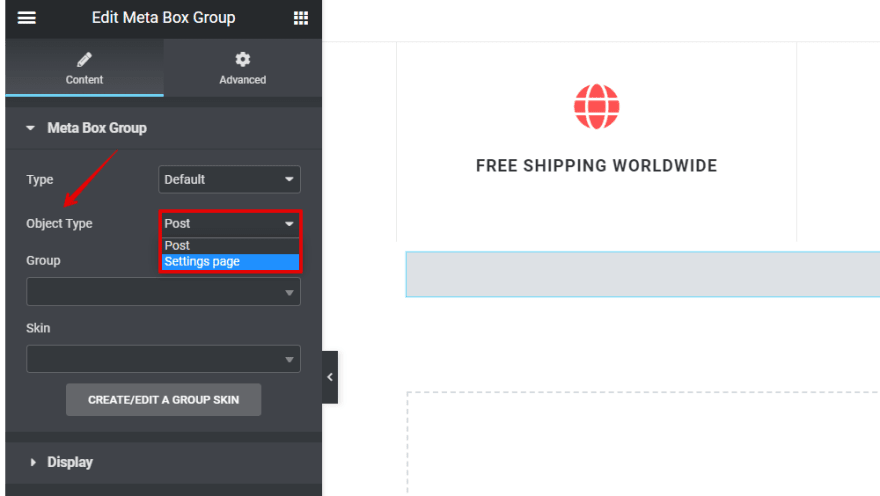
Next, to display the brands’ logos, add the Meta Box Group element.
Set Object Type as Settings page because we’ve just input the data into a settings page.
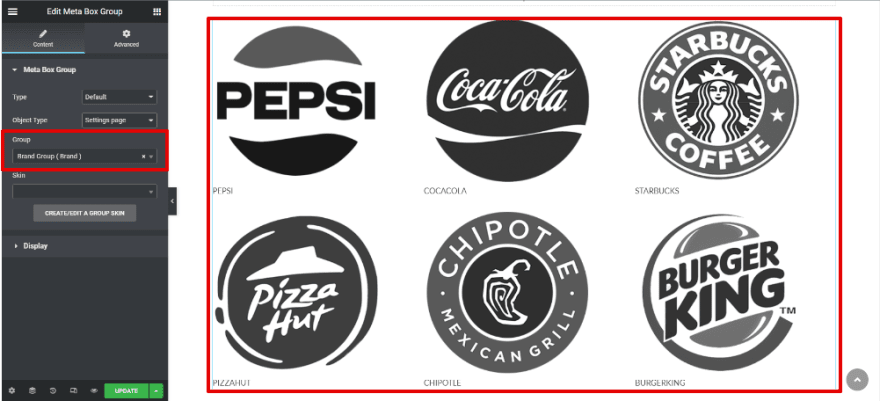
After that, it will set the created-latest group by default. Change it to the right one that you want.
All the data from the group will be displayed, but there is no styling.
For styling, choose the skin that you’ve created above. Then, it will turn to the new look with the style of the created skin.
Also, you can configure the display of the brand section, such as the number of columns and the spacing between them.
Next, drag and drop the section to your desired position on the homepage.
Here is the result we’ve got:
Last Words
As you can see, displaying the images from cloneable fields with Meta Box and Elementor is so simple and easy to do without coding. If you have any questions and ideas, leave comments below, and don’t forget to keep track of our channel for more helpful tutorials.










Top comments (0)