
Hello and Greetings Everyone 👋
I am hoping that you are having fun in our journey of creating the auto-tagging application for images like a pro using Amazon Rekognition, AWS Lambda and S3.
Recap
Let's do a quick recap of what we did in the last two parts.
1. Auto-Tag Images on AWS using Amazon Rekognition + Lambda + S3
- Created an S3 bucket to store uploaded images
- Created a Lambda function to handle image upload events
- Set up IAM roles and permissions for Rekognition and S3 access
- Used Amazon Rekognition to detect objects/scenes in images
- Logged detected labels to CloudWatch Logs
- Connected S3 and Lambda using event notifications
2. Level Up Your Auto-Tagging Pipeline on AWS
- Uploaded test images and successfully triggered Lambda
- Viewed detection results in CloudWatch logs
- Improved the Lambda logic to store Rekognition labels as .json files inside a tags/ folder in S3
- Validated that the full pipeline was working end-to-end
I guess that would have jogged your memory. In this article, we are going to discuss:
- Sending real-time email notifications using Amazon SNS
- Wrapping up the entire series with final thoughts and next steps
Let's Go 🚀
Send Real-Time notifications via Amazon SNS
As discussed, we already have created the pipeline for auto-tagging the image and saving the data in a JSON file. Now what can be cooler than getting an email whenever it happens? In this step, we will modify and enhance our pipeline by integrating Amazon SNS to send notifications everytime an image is tagged.
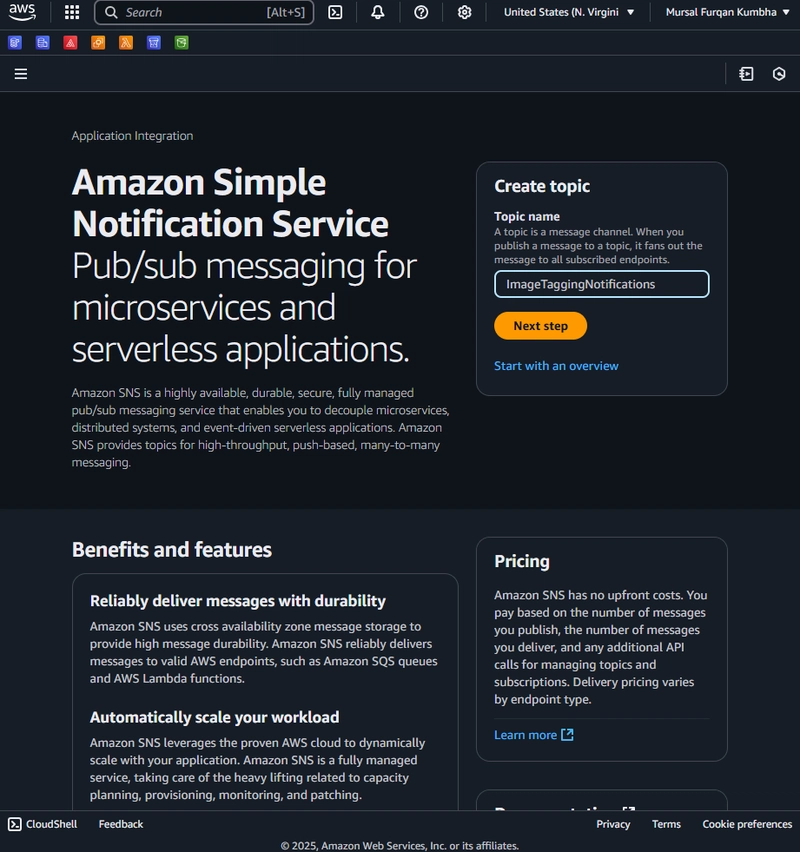
Create an SNS Topic
Like every other AWS Service, we need to first go to the AWS Console and find SNS (Simple Notification Service). On the SNS Homepage, write your topic's name, ImageTaggingNotifications, in the Create Topic textbox (As shown in the figure below). Once done, click on Next Step button. In the next screen, select Standard as the type and click Create Topic at the bottom of the screen leaving everything default.
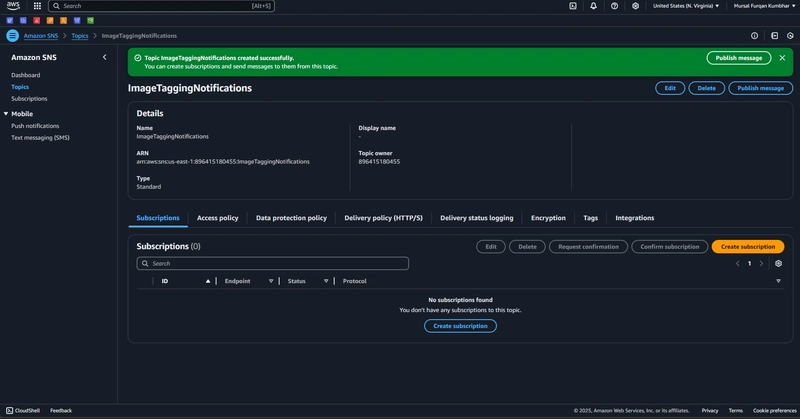
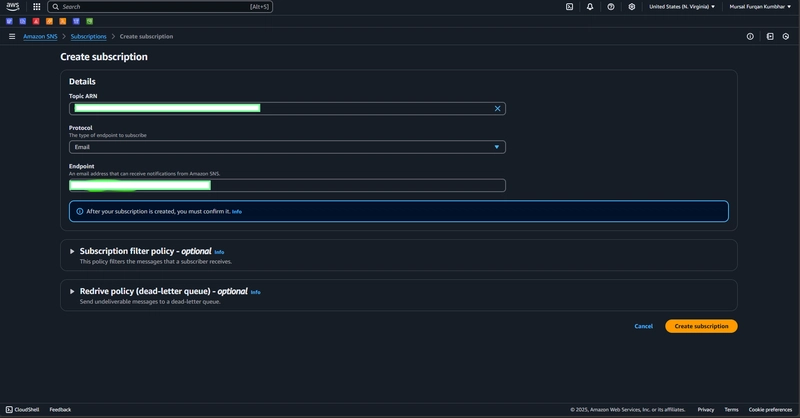
Seeing our friend, the green notification box would tell us that our topic is created. Once done, click on orange Create Substription button and fill in Email under Protocol and type in your email under Endpoint.
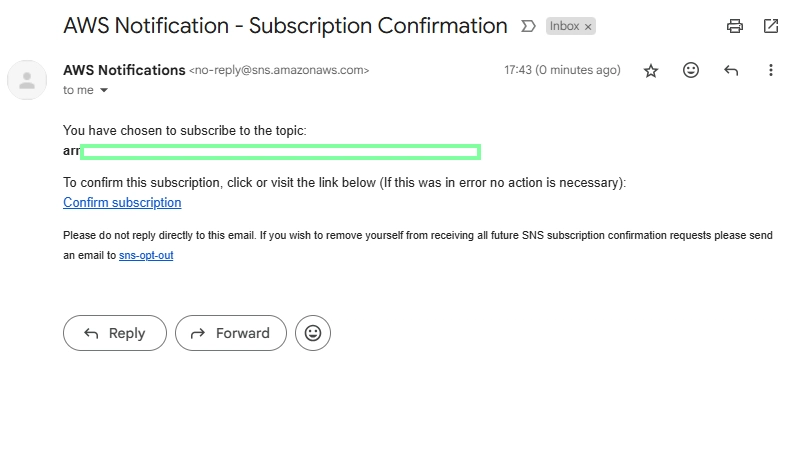
All done? Click on Create Subscription. As soon as subscription is created, check your email for the confirmation from AWS. Click on the link to confirm the subscription.
Remember: Don't skip/miss this step or you won't get any emails.
The email would look something like this:
Give Lambda Permission to Publish to SNS
After successfully creating the topic and subscribing to it with your email, we need to go to IAM > Roles > RekognitionLambdaRole > Add Permissions > Create Inline Policy.
In the next screen, click on JSON and copy paste the following code:
{
  "Version": "2012-10-17",
  "Statement": [
    {
      "Effect": "Allow",
      "Action": "sns:Publish",
      "Resource": "arn:aws:sns:your-region:your-account-id:ImageTaggingNotifications"
    }
  ]
}
Don't forget to replace
your-region(e.g. us-east-1) andyour-account-id(e.g. 123456789012) accordingly
Click next and Give it a good name such as AllowSnsPublishPolicy in the next screen. After doing so, click on Create Policy to finish the policy creation process.
Update the Lambda Code to Send Notifications
After creating the policy, we need to let the Lambda function know when and how to send the notification. To do so, we need to the below given code right after saving the .json file in S3:
import boto3

sns = boto3.client('sns')
TOPIC_ARN = 'arn:aws:sns:us-east-1:896415180455:ImageTaggingNotifications'  # Replace with your actual ARN

# Get top 3 labels
top_labels = label_data[:3]
labels_text = ', '.join([f"{l['Name']} ({l['Confidence']}%)" for l in top_labels])
message = f"Image '{key}' was tagged with:\n\n{labels_text}"

# Send SNS notification
sns.publish(
    TopicArn=TOPIC_ARN,
    Message=message,
    Subject='[Image Tagging Alert] New Image Tagged on S3'
)
Or if you didn't get it, replace the complete code for Lambda Function with:
import json
import boto3
import urllib.parse
import datetime

rekognition = boto3.client('rekognition')
s3 = boto3.client('s3')
sns = boto3.client('sns')

# Replace with your actual SNS topic ARN
TOPIC_ARN = '<TOPIC-ARN>'

def lambda_handler(event, context):
    print("Lambda Triggered at:", str(datetime.datetime.now()))
    print("Received event:", json.dumps(event, indent=2))

    bucket = event['Records'][0]['s3']['bucket']['name']
    key = urllib.parse.unquote_plus(event['Records'][0]['s3']['object']['key'])

    # ✅ Skip non-image files
    if not key.lower().endswith(('.jpg', '.jpeg', '.png')):
        print(f"Skipping file {key} — not a supported image format.")
        return {
            'statusCode': 200,
            'body': json.dumps('Skipped non-image file.')
        }

    try:
        # 🔍 Step 1: Detect labels using Rekognition
        response = rekognition.detect_labels(
            Image={
                'S3Object': {
                    'Bucket': bucket,
                    'Name': key
                }
            },
            MaxLabels=10,
            MinConfidence=80
        )

        # 📋 Step 2: Format label data
        label_data = []
        for label in response['Labels']:
            label_data.append({
                'Name': label['Name'],
                'Confidence': round(label['Confidence'], 2)
            })
            print(f" - {label['Name']} ({label['Confidence']:.2f}%)")

        # 💾 Step 3: Save labels as JSON to /tags/
        image_name = key.rsplit('/', 1)[-1].rsplit('.', 1)[0]
        tags_key = f"tags/{image_name}.json"

        s3.put_object(
            Bucket=bucket,
            Key=tags_key,
            Body=json.dumps(label_data, indent=2),
            ContentType='application/json'
        )

        print(f"Saved tags JSON to: {tags_key}")

        # 📬 Step 4: Send SNS notification with top labels
        top_labels = label_data[:3]
        labels_text = ', '.join([f"{l['Name']} ({l['Confidence']}%)" for l in top_labels])
        message = f"Image '{key}' was tagged with:\n\n{labels_text}"

        sns.publish(
            TopicArn=TOPIC_ARN,
            Message=message,
            Subject='[Image Tagging Alert] New Image Tagged on S3'
        )

        print("Notification sent via SNS!")

        return {
            'statusCode': 200,
            'body': json.dumps('Labels detected, saved to S3, and notification sent!')
        }

    except Exception as e:
        print(f"Error processing {key}: {str(e)}")
        raise e
Replace TOPIC_ARN with your actual SNS Topic ARN.
And it's done!
After this, our entire email notification pipeline is complete. Let's test this. To test, go to your AWS S3 bucket and upload the image like we did in the previous article. If the entire pipeline is working, you will immediately receive an email with the top 3 tags of the image in the email address you gave while creating the SNS Topic. The email would look something like this:
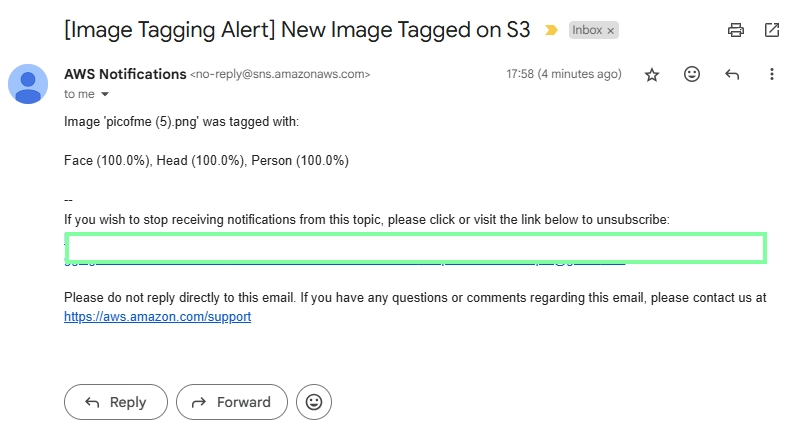
If you don't get the email, go through all the process and see what you missed. And in case you don't find what you did wrong, write me in the comments below.
🎉 Conclusion
And that’s a wrap, folks! 🎬
We’ve come a long way — from uploading images to S3 and detecting labels with Rekognition, to storing results, sending real-time notifications, and polishing our code like true builders 💪
This serverless, scalable, and smart image tagging workflow is just one example of how you can combine AWS Lambda, Amazon S3, Rekognition, and SNS to automate powerful tasks with ease.
Whether you’re building this for fun, a portfolio project, or the foundation of a real-world app — I hope this series inspired you to explore what’s possible on AWS.
Thanks for sticking around till the end — and as always, if you enjoyed this, drop a ❤️, share it, or leave a comment.
Until next time... Ciao! 👋


Top comments (0)