Welcome to part-9 of the series. We will continue building extensions, which show some type of image when we open a new tab.
The second tab extension will be called Developer Tab. So, go ahead and create a folder DeveloperTab and inside it another folder icons. Inside that folder place two icons. You can get them from the github link at the end of this post.
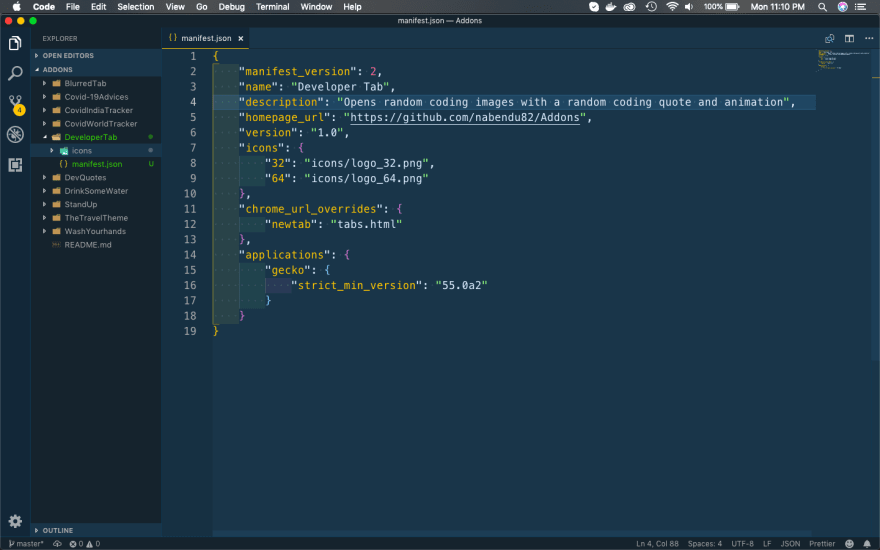
Now, create a file manifest.json inside the folder DeveloperTab and put the below content in it. It is quite similar to the file in previous extension and contains the parameter chrome_url_overides.
Now, this extension contains a cool trick with images. I had learned it from the awesome free course JavaScript 30 from Wes Bos. The link for the course is https://javascript30.com/ and i made it with, the marked tutorial.
So, not much explanation here. Please follow the above tutorial for the working. Go ahead and put the below in a file tabs.html in the same folder.
Here, we have three different set of texts, which we are going to choose randomly and display within images.
<!DOCTYPE html>
<html lang="en">
<head>
<meta charset="UTF-8">
<link rel="stylesheet" href="tabs.css"/>
<title>Developer Tab 💻</title>
<link href='[https://fonts.googleapis.com/css?family=Amatic+SC'](https://fonts.googleapis.com/css?family=Amatic+SC') rel='stylesheet' type='text/css'>
</head>
<body>
<div id="panels1" style="display:none;">
<div class="panel panel1">
<p>🍽</p>
<p>Eat</p>
<p>🍕</p>
</div>
<div class="panel panel2">
<p>💤</p>
<p>Sleep</p>
<p>🛌</p>
</div>
<div class="panel panel3">
<p>👨💻</p>
<p>Code</p>
<p>🖥</p>
</div>
<div class="panel panel4">
<p>🔁</p>
<p>Repeat</p>
<p>🔁</p>
</div>
</div>
<div id="panels2" style="display:none;">
<div class="panel panel1">
<p>💻</p>
<p>Code</p>
<p>👨💻</p>
</div>
<div class="panel panel2">
<p>🚀</p>
<p>Long</p>
<p>👨🚀</p>
</div>
<div class="panel panel3">
<p>🙋♀️</p>
<p>And</p>
<p>🌏</p>
</div>
<div class="panel panel4">
<p>🖖</p>
<p>Prosper</p>
<p>🖖</p>
</div>
</div>
<div id="panels3" style="display:none;">
<div class="panel panel1">
<p>🧘♂️</p>
<p>Keep</p>
<p>☯</p>
</div>
<div class="panel panel2">
<p>💆♂️</p>
<p>Calm</p>
<p>😌</p>
</div>
<div class="panel panel3">
<p>☕</p>
<p>And</p>
<p>🎧</p>
</div>
<div class="panel panel4">
<p>💻</p>
<p>Code</p>
<p>👨💻</p>
</div>
</div>
<script src="tabs.js"></script>
</body>
</html>
Next, let’s create the style file. Place a file tabs.css in the same folder and the below content in it.
We are taking four developer random images from unsplash.com, as background for panel1, panel2, panel3 and panel4.
    html {
        box-sizing: border-box;
        background:#ffc600;
        font-family:'helvetica neue';
        font-size: 20px;
        font-weight: 200;
    }
    body {
        margin: 0;
    }
      *, *:before, *:after {
        box-sizing: inherit;
    }
    .panel {
        background:#6B0F9C;
        box-shadow:inset 0 0 0 5px rgba(255,255,255,0.1);
        color:white;
        text-align: center;
        align-items:center;
        transition:
            font-size 0.7s cubic-bezier(0.61,-0.19, 0.7,-0.11),
            flex 0.7s cubic-bezier(0.61,-0.19, 0.7,-0.11),
            background 0.2s;
        font-size: 20px;
        background-size:cover;
        background-position:center;
        flex: 1;
        justify-content: center;
        display: flex;
        flex-direction: column;
    }

    .panel1 { background-image:url([https://source.unsplash.com/1500x1500/?javascript](https://source.unsplash.com/1500x1500/?javascript)); }
    .panel2 { background-image:url([https://source.unsplash.com/1500x1500/?developer](https://source.unsplash.com/1500x1500/?developer)); }
    .panel3 { background-image:url([https://source.unsplash.com/1500x1500/?coding](https://source.unsplash.com/1500x1500/?coding)); }
    .panel4 { background-image:url([https://source.unsplash.com/collection/991516/1500x1500](https://source.unsplash.com/collection/991516/1500x1500)); }

    /* Flex Items */
      .panel > * {
        margin:0;
        width: 100%;
        transition:transform 0.5s;
        flex: 1 0 auto;
        display:flex;
        justify-content: center;
        align-items: center;
    }

    .panel > *:first-child { transform: translateY(-100%); }
      .panel.open-active > *:first-child { transform: translateY(0); }
      .panel > *:last-child { transform: translateY(100%); }
      .panel.open-active > *:last-child { transform: translateY(0); }

    .panel p {
        text-transform: uppercase;
        font-family: 'Amatic SC', cursive;
        text-shadow:0 0 4px rgba(0, 0, 0, 0.72), 0 0 14px rgba(0, 0, 0, 0.45);
        font-size: 2em;
    }
    .panel p:nth-child(2) {
        font-size: 4em;
    }

    .panel.open {
        flex: 5;
        font-size:40px;
    }
Now, if we load the extension in firefox and then open a new tab, we can see a big blank page with yellow background. All the panels are display: none in html, so nothing is shown.
You can learn how to open an extension for testing in my previous post here.
Let’s add to logic to show the images and also the click animation. Create a new file tabs.js in the same directory.
Now, in this file the anonymous function runs on page load and the Math.random, chooses any one of the three panels. After that we show them by flex.
The below is what we get from the code.
Now, when we click on any of the tab, it calls the functions toggleOpen() and toggleActive(), which sets the properties in CSS and open the complete text.
We can click on all of the tabs and it will distribute the space between them.
So, it’s time to publish it in the mozilla addon store. I will follow the procedure from another of my blog in the series. The link is here.
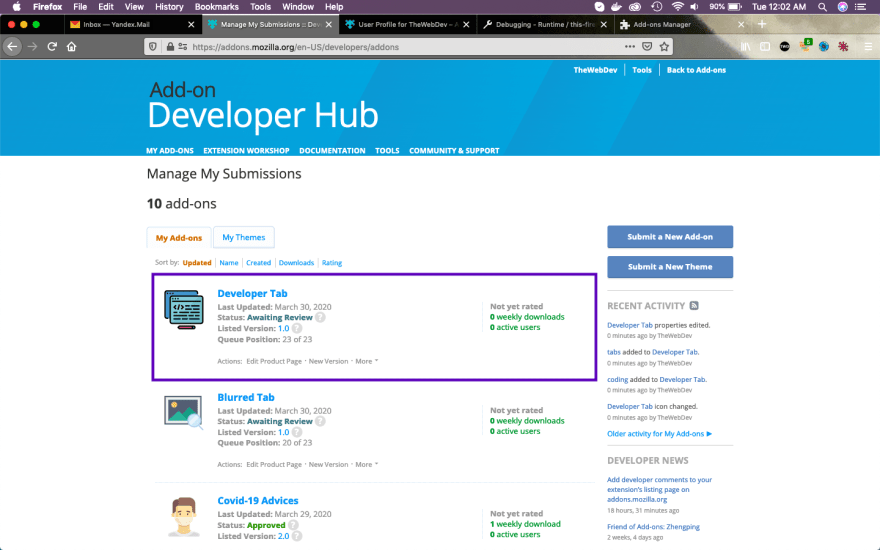
I had submitted the addon and it is Awaiting Review from mozilla reviewers.
This complete part-9 of the series.
You can find the code for the same in my github account here.


Top comments (2)
Woow!
Thanks